Sunday, September 29, 2013

Toned Cyanotype

I have been wanting to try this for a while and this weekend I finally had some time to read up and give it a go. I had bought some wine tannin a while back since tannin is the primary component in tea that is responsible for toning cyanotypes. With the powdered tannin I can skip the brewing step and be a little more quantitative/reproducible about the process. So what did I do?

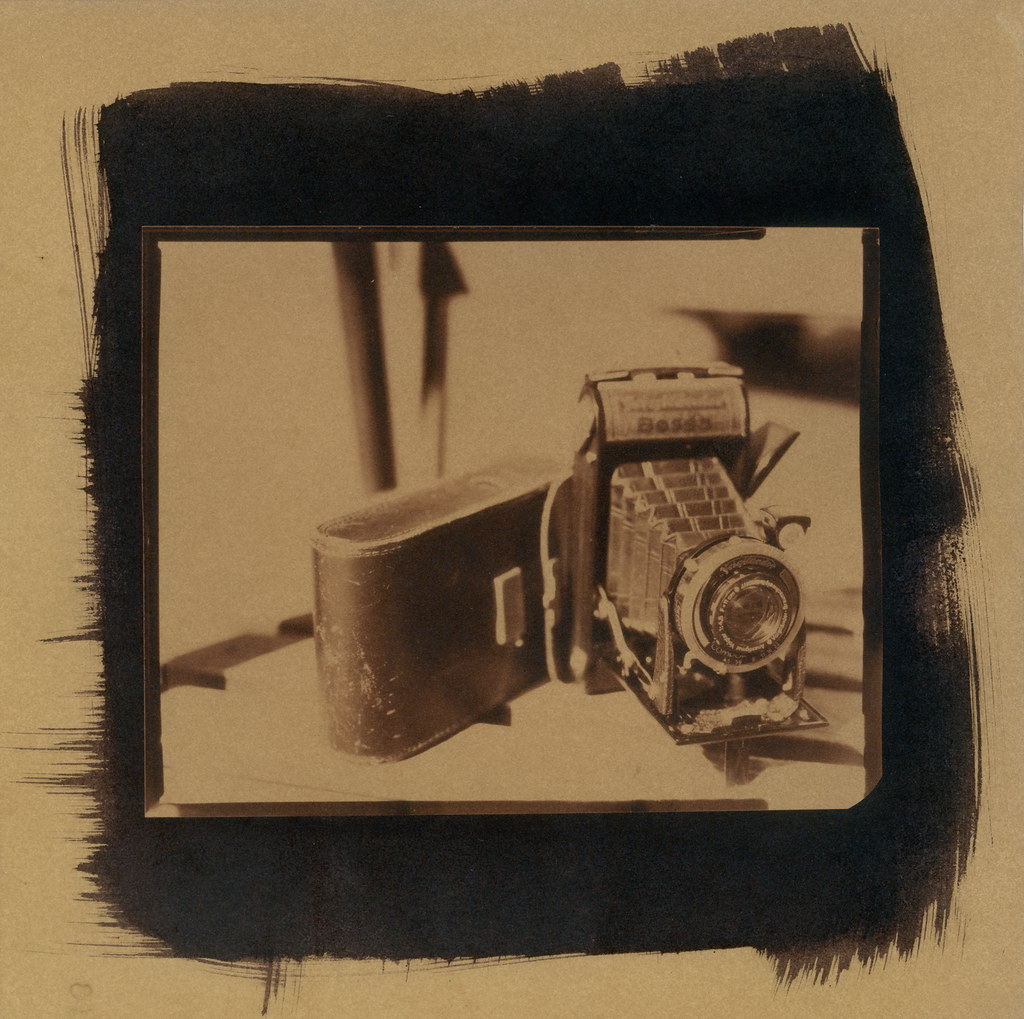
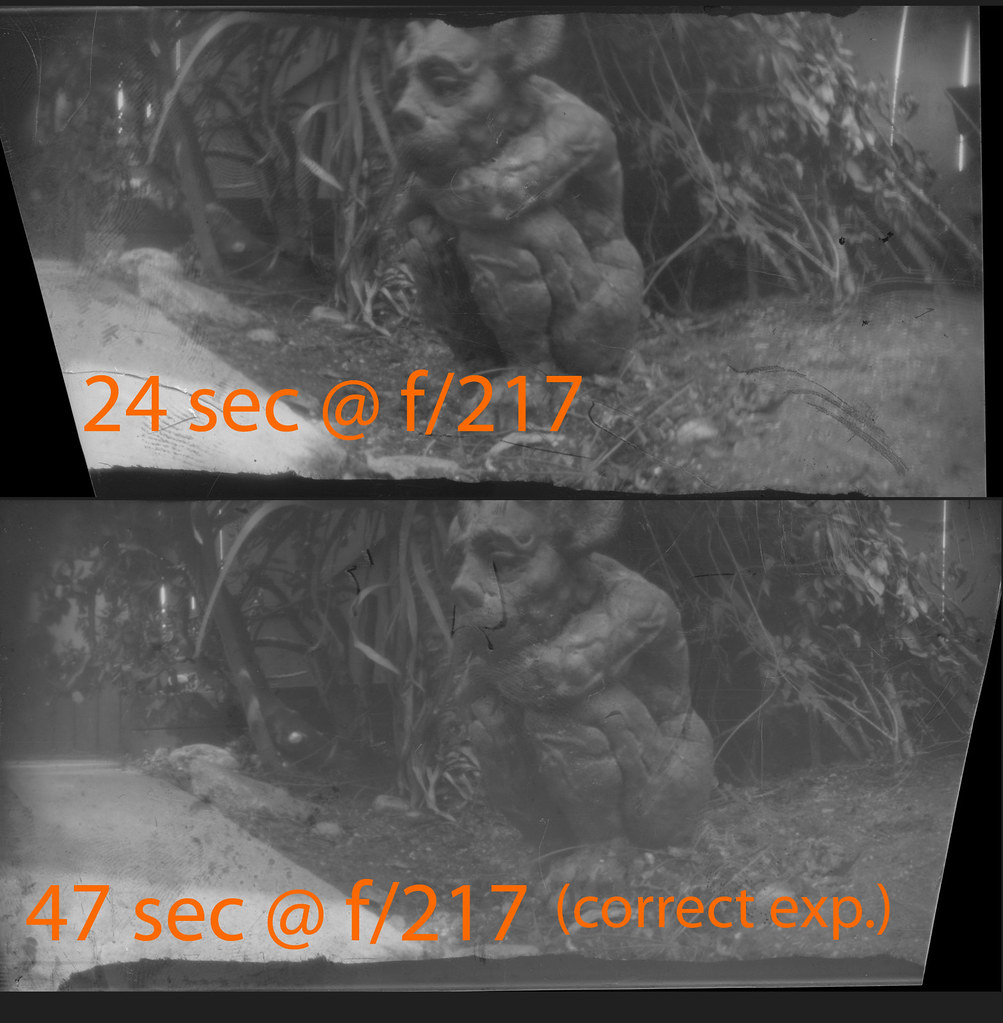
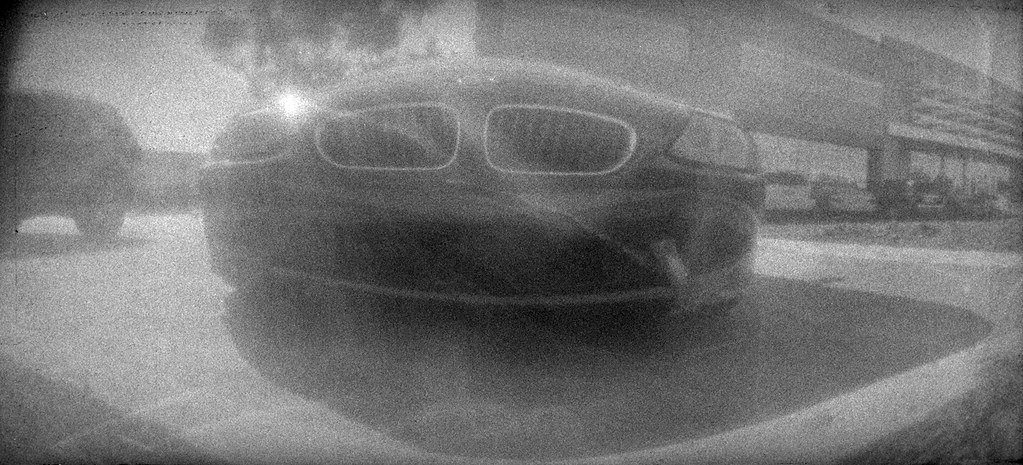
The image I used was from a while back. It is a 4x5 negative on x-ray film. For details of that image, look here. The cyanotype sensitizer I used was the traditional formula (not the Ware formula) and I have to admit it has been sitting in my photo box for probably a year or more. That is a testimony to the longevity of those solutions and the archival quality of the prints. The paper is Arches 90# hot press watercolor paper (love that stuff). The exposure was 6 minutes (probably should have done 8) in the waning autumnal sun (5:00pm in San Diego). The first bath was about 1:4 white vinegar:tap water. That was intended to extend the tonal range and I think it worked pretty well. Look at the bellows on the camera and you can see quite a few grays in there. Also, the blacks are 'just black' and not too blocky. This might be lost on the computer monitor, but the print is quite nice. The highlights are blown because I under-exposed the print, but that can be remedied next time. Then I washed in lots of plain water until the highlights cleared and were the same color as the borders of the paper. I then did another quick bath in dilute hydrogen peroxide to fully develop the iron. This can be done by drying the print and just waiting a few days, but I am impatient. Another plain water wash and it was time to tone.

I mixed ½ tsp washing soda in 500mL of distilled water.
I mixed 1 tsp wine tannin in 500mL of distilled water.

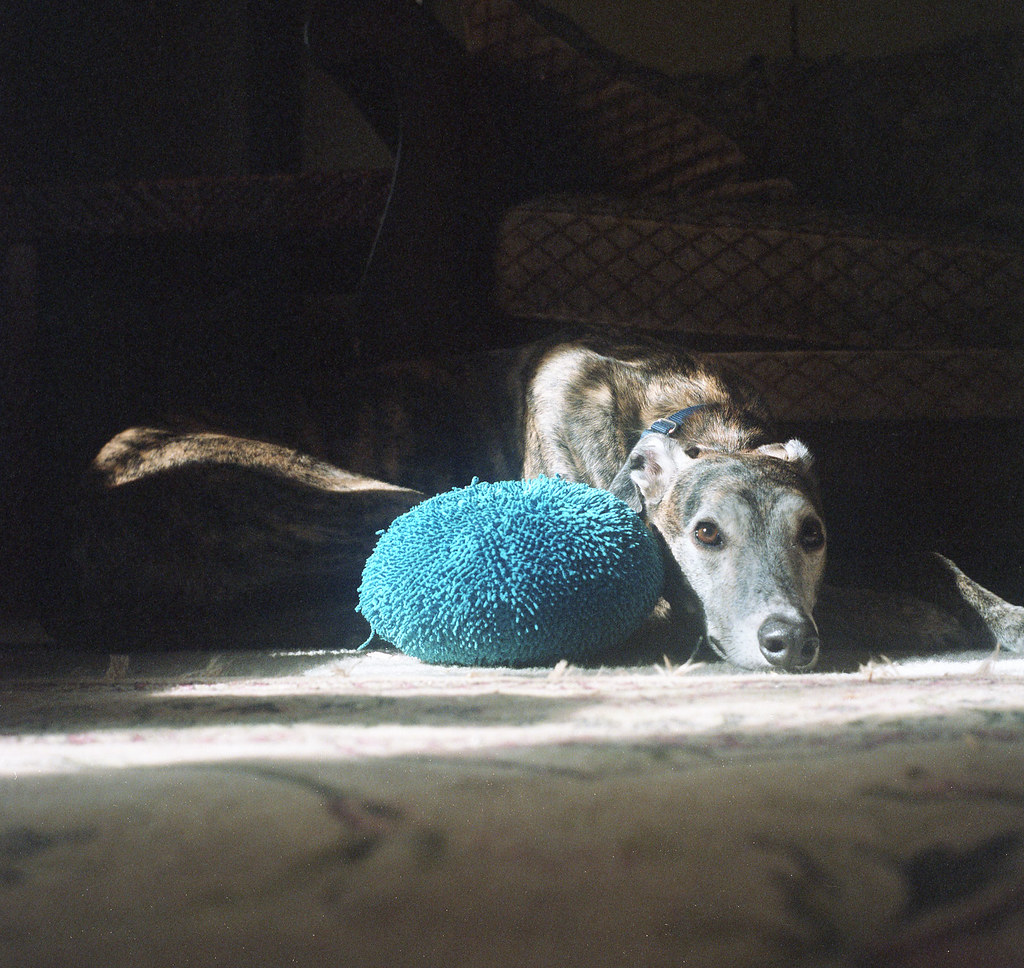
Starting with the soda bath, I alternated soda... water... tannin... water... for about 30 sec each until it started looking the way and the color I thought I wanted. Here is what I ended up with.

Voigtlander toned cyanotype

Saturday, September 28, 2013

Blurry Self Portrait

I recently saw a post over on FilmWasters.com where the author/artist posted a whole roll of photos where he admittedly
... made quite a few mistakes with focusing and exposure.
I thought this was quite bold to post publicly some shots that are not one's very best. It makes you artistically vulnerable. Now, granted the FilmWasters community is warm and welcoming and humble; very unlikely to tear apart a fellow 'filmy'. But even at that, I thought it was a really good post. They were putting themselves out there in hopes that they could educate or inform someone. Now here is the 'weird' thing. I actually liked the photos! They were blurry, but still picturesque. They were taken on expired color film, so the color and contrast were shifted slightly which lent more to the painterly qualities.

So I am taking heart from this person and have decided to post a photo of mine that did not turn out the way I expected (or wanted). I was going to just bin it, but after thinking about it for a few days, I am posting it here.

Not Looking

I took this self portrait with my Speed Graphic. Of course there is no 'auto focus' so I had the task of figuring out how to focus on myself. The short answer is that without some elaborate setup with mirrors and magnifiers and perhaps some technology on load from the NSA, I can't. The best I could do was to focus on the back of the chair I was going to sit in and then turn the focus knob back just a bit. Then I stopped the lens down to f/8. This gave me a 1/5 sec exposure which is about as long as I thought I could reliably hold still. Then I loaded the film, attached a long cable release, sat down and tried to visualize where the plane of focus was. "CLICK" Now to the darkroom to see my masterpiece! WHAT!!?? Out of focus!! Well, I'll toss it and try again later. But not this time. I am going out on an artistic branch and posting this photo on Flickr and here. Let's see what the fates bring to this mistake.

Friday, September 27, 2013

Pushing Through X

I found this photo on a roll that had been sitting in the refrigerator for a few weeks. I took it with my 1939 Voigtländer Bessa. I had the accessory mask inserted so instead of taking eight 6x9 photos, I got sixteen 6x4.5 photos. It is interesting to have these two options with this camera. Not only do you double the number of exposures on a 120 roll (at the expense of image size), but you get a different aspect ratio. The 6x9 aspect ratio is 2:3 and the 6x4.5 (commonly "645") ratio is 3:4. Of course the closer the ratio gets to 1, the more 'square-ish' the image. So something like 6x12 or 6x17 are really panoramic images while large format 4x5 (8x10) look quite square in comparison. Of course the standard 120 format is 6x6 which is a perfect square, but the 6x7 cameras are very popular too.
But I digress...
pushing through X
This plant isn't so much "Pushing Through" as much as "Taking Over". If you have ever tried to clear ivy, you will know that it can penetrate masonry and concrete easily with its little rootlets. This makes it quite invasive and difficult to control. One might even think of it as a pest, but not me. I find it beautiful in both appearance as well as principle. It does not 'care' what barriers man erects. Even the most permanent of monuments are merely a stairway to brighter sunlight for this survivor. Next time you walk by a building with ivy growing up the sides, stop and take a moment to appreciate the ingenuity of this plant which uses the barriers raised against it to mount up to the heavens and thrive all the more. I think there is a lesson in there for all of us.

Wednesday, September 25, 2013

Ornamental Shrubbery

Berries
I took this photo with my '51 Graflex Speed Graphic camera. I was walking around with it hand-held, which I don't do very much because it is heavy and my eyes aren't always good enough to use the range finder effectively. So usually, I tripod up and focus on the ground glass. This day though, was bright and the sun was just starting to get a little angular, so the shadows were good, but there was still enough light to see the overlapping images in the range finder. I shot this at f/8 x 1/200 sec on Kodak CSG x-ray film rated at iso 80. I developed the film in Adox Adonal (Rodinal) 1+100 for 4.5 min in a Patterson tank with a MOD 54 film holder. I scanned the negative at 2400 dpi with an Epson V600, taking two passes and stitching the two scans in Photoshop.

WHAT!!?? 2400 dpi?? Yes, I had the scanner set that way because I had been scanning some 6x6 photos from an engagement shoot I did earlier in the week. I didn't notice until I saw how long the first scan was taking and by then, I thought what the heck, just let it go at 2400. When you scan a 4x5 negative at 2400 dpi, you get about 115 megapixels. That is a huge image and really unnecessary unless you are doing billboard work. But I had it anyway and didn't feel like tossing it and re-scanning (note to self: next time toss it and re-scan it). The problem with such an enormous image comes when you go to load it up in Photoshop to do some dust spotting with the healing tool. At 2400 dpi every single microscopic spec of dust is visible (note my screen resolution is only 1366x768) and with a 15px brush, that takes a LOOOOOONG time to go over and click each speck and hair. Save yourself some trouble and scan at 800 or 1200 dpi for normal sized prints.

The very cool thing about these berries is that they are now just sort of yellowish green, but once "winter" comes to San Diego and things get really dry, they turn bright yellow and they pop open along the seams. Inside is sort of a shiny, creamy white with three bright red seeds inside. It is really beautiful. I will try to get some photos this year and post them here to follow this up.

Anyway, I hope you enjoy the photo. I think it came out well.

Monday, September 23, 2013

Pushing Through IX

This is a little bit of a departure from the theme of the first 8 in this series, but I think that it is well within the overall theme of plants defying man's attempts to control them. In this case, the landscapers have pruned back a branch on a tree. The tree's response? Re-grow that branch of course (sprouting from the lower left of the scar). After all it was there for a reason.
I took this photo with my '39 Voigtländer Bessa 6x9. I had it loaded with one of my favorite films, Fuji Neopan Acros 100. I also was holding a deep yellow filter in front of the lens (there is no way to mount a filter on the front of this lens). I think the filter helped with contrast and with distinguishing the sky and clouds in the background.
See the rest of this series HERE. Pushing Through IX

Monday, September 16, 2013

New 8x10 Pinhole

So I decided to make another pinhole camera. For this one I had contact printing in mind. That meant BIGGER NEGATIVES! So I have a box of 8x10 sheets of Kodak CSG x-ray film in the freezer that I have been cutting down to 4x5 for the Speed Graphic. Why not burn through some of that cheap stuff and have some fun along the way? I also happened to have some left over black foam core from my previous 6x12cm pinhole camera. So I went to the drawing board (literally) and sketched out some ideas. I like the curved film plane, but this time I thought I would keep a constant distance to the pinhole instead of the constant f-stop of the 6x12cm. I went and downloaded Pinhole Designer to do the calculations for me. That is a really great program and I highly recommend it to anyone interested in making a pinhole camera. I found the optimal pinhole size and it also gave me the right angle of view so that I could make the curved plane the right radius. I came up with a 115mm film distance with a 0.5mm pinhole. That makes an f/230 camera with a field of view around 109°. Here are some crappy phone digipics of the camera as it is today.
This is the back where the film sits. There are four stand-offs in the corners to make it curve upward on the ends. You can see too that I put some camera flocking material in the back since x-ray film doesn't have an anti-halation layer and the foam core is not perfectly flat black.

 photo CameraBack_zpsbe3552ed.jpg

Here is the same piece with a sheet of film in it.

 photo CameraBackwithFilm_zps400f7b43.jpg

Here is the front of the camera. There are two stand-offs that hold the center of the film's long edges down against the back of the camera, keeping the curve 'curvy'. The other pieces on the short ends are light traps that just slide down inside of the back. They also create friction that keeps the whole thing together without rubber bands.

 photo CameraFront_zpsccb2ed78.jpg

And here it is going together.

 photo CameraFittingTogether_zpsbf6c006b.jpg

Finally, I just used a 'drain plug' style of shutter. The exposures for this f/230 camera are long enough, especially with iso 80 x-ray film, that I don't need anything mechanical or spring loaded.

 photo CameraShutter_zps519c7e04.jpg

Here is my first 'successful' 8x10 image from this camera. Obviously, I need to put something in that will keep the film centered and I also have some light leaks to deal with. But for a first image from a basically cardboard camera, it's not too bad.

Three-Trees

Saturday, September 7, 2013

Unsafe Light

I had had a couple of failures using Kodak CSG x-ray film in my pinhole camera. They came out WAY over-exposed. One was this photo of Jim's Beemer. I had a nagging suspicion in my head that the problem was with my safelight. I used a 3-LED headlamp. It is pretty bright, but I usually point it at the ceiling and not directly at the film. However when I was developing these, I had shone the light right down into the developing tray. So I needed to do some experiments. What if I cut, loaded and developed in complete darkness? That would give me information about the safelight variable. I was also curious about whether the film had somehow changed or maybe the pinhole had been damaged and I was over-exposing in the camera. So I took the same photo twice; once at my 'normal' calculated exposure (47 sec in this case), using iso 80 for the CSG. Then I took another photo one stop down (24 sec). This would tell me something about the accuracy of my exposure table. So here are the results.
x-ray-compare
I developed these together in the same tray of 1+100 Adonal for 4 minutes in complete darkness. Don't mind the scratches. I wasn't being particularly careful with this film, I just wanted to get an idea of the exposures. You can see that both exposures are passable. The one stop 'push' came out with a bit more contrast as you would expect, but both negatives are of normal density.
So I think I narrowed the problem down to the safelight. The LEDs must just be too bright. It could also be a wavelength thing. I am not sure what the spectrum looks like for these led lights. They might have an overlap with the sensitivity of the x-ray film even though it is classified as 'orthochromatic'. Anyway, there you have it. X-ray film will be developed in the dark from now on and I will continue to use my same old pinhole exposure chart with this film rated at iso 80 or 100.

Boris

This is my dog, Boris.
Boris
He's a rescued greyhound who didn't win a single of his 4 races. In fact the best he ever did was 5th place. He was definitely not going to have a long life. But when he was 2½ a rescue organization scooped him up with some other greyhounds and brought him to San Diego. A few months later, he was placed with us and that is the beginning of the story of Boris' life with us. There is more of the story on his Facebook blog Life With Boris.
The photo I want to talk about though is this one.

I loaded this photo of Boris in December of last year and it got a few views initially, but then at the end of August, it suddenly started getting hits every day. Now I realize that 20 views per day is not a lot in the grand scheme, but for my photos, it is unusual. So what happened? I looked to see if it had been put in the "Explored" view, but no. I hadn't changed anything or added it to any additional groups. I did a Google image search to see if it had been used by someone else on a more popular site, but no. So what triggered this unusual increase in views? I guess it will be a mystery. I am just glad that people are enjoying Boris' sweet face as much as I do.
Portra Boris

Friday, September 6, 2013

The destruction of Jim's Beemer

Ok, the BMW wasn't destroyed, but the image nearly was. i was cutting down some 8x10 sheets of Kodak CSG x-ray film for the Speed Graphic and I noticed that I had some sort of oddly sized pieces of film in the bag with the 8x10's. So I decided to go grab my homemade pinhole camera and cut one of these down to fit in it. It only takes one 'sheet' at a time, so I don't load it very often, but this was just sort of asking to happen. So I load it up and set it in my 'take to work' pile with my sunglasses and keys.

About mid-day the following day, I was looking out my window and discovered that Jim's beemer was in the parking lot, which was unusual since he normally works in a different building. It was parked in front of a sort of dirt embankment that I decided would provide an adequate place to set the camera since the exposures are generally too long to hand-hold. I went out and made a little shelf in the dirt upon which to set the camera. Then I took an f/16 meter reading with my Sekonic L-508 at iso 80 and consulted my exposure table to find the f/217 exposure time. Three seconds! That sounds long, but my shutter is a piece of gaffer's tape stuck over the pinhole (did I mention this camera was homemade?) and I wasn't sure I could take it off and put it back on in 3 sec without shaking the camera a lot and making a blurry pic. So I took another reading holding the light meter vertically and sort of in the shade of the car. Another consult of the exposure table and I got 12sec! Perfect! That is enough time so that the jiggling of the camera won't cause significant blur.

I went home that evening and decided to do the development in Adox Adonal at a dilution of 1+100. I mixed the chemicals and got everything together in the bathroom. I had read that you can monitor development of this film under a safe light and since I wasn't exactly sure of the development time, I decided to keep my red LED headlight turned on. That was the first bad decision. I turned out the room lights and took the film out of the camera. Placing it in the chemicals, I started the timer. I had set my 'safe light' up on a shelf pointed toward the ceiling so as not to risk fogging the film. But then for some reason I started to worry because I could not see an image appearing. I took the light down and shone it right down into the tray where the film was. There was a bit of an image starting to emerge, so I put the light back, but the damage was done. About 20sec later the film was almost completely black. I took it out of the developer and after a quick rinse under the tap, I put it into the fixer. Six minutes in the rapid fix and I figured it was done, but it was still just black. I turned on the lights and started the final wash with little or no hope of getting anything out of my labors. I held it up to the light and could see the faint but distinctive BMW grill. It was really dark, but my scanner is pretty good at pulling out contrast where there seems to be none.

So here it is. Low contrast, extreme grain, but not completely offensive or even unartistic. I think the combination of the grain and the distortion of the curved-plane pinhole image makes a sort of interesting image. The really fun thing about this camera is that I don't really have any idea at all what kind of image is going to come out of it. That may drive the 'control your process' photographers crazy, but I like to have fun with it.

Jims Beemer