Tuesday, April 8, 2014

Isolette III Overhaul part 1

I have never done my own CLA (Clean, Lube and Adjust) on a camera before, but I just recently got a wonderful Agfa Isolette III that has some problems. The Isolette III is a medium format folding camera with an uncoupled range finder. That means that when you look through it, you look through a range finder (not through the lens) that gives you a distance to your subject. You then transfer that distance reading to the focusing ring of the lens. A coupled range finder would have gears and levers that would move the focus mechanism on the lens for you when you adjusted the range finder. I like old mechanical, "figure it out yourself" kinds of cameras, so this one is perfect. It has good glass (an Apotar which is a good Cooke triplet) and the build quality is what you would expect from a mid-century German made camera (excellent). Now I mentioned that there are problems, and there are.
  • There is a light leak in the bellows, so the bellows will need to be replaced.
  • The wheel that turns to adjust the range finder is very stiff, probably from coagulated grease.
  • The focusing ring is completely frozen, probably from the same grease.
  • The shutter works, but the blades move very slowly.
This may seem a bit daunting at first, but there were so many of these cameras made and made well, that they are still around today in very good numbers. The problems I listed above are pretty common too, so there is a good amount of documentation on how to go about fixing these and bringing them back to their former glory, or maybe even making them better!

Instead of jumping right into the lens/shutter assembly, I thought I would start with the "easy" part of getting the top cover off and seeing if I couldn't get the range finder wheel to move a little more smoothly. Unfortunately, I couldn't find any documentation about removing the top cover on this model. But how hard could it be? There are a few screws. Take those out and the cover should lift right off, right??? Well, sort of. The two tiny screws that hold the distance/aperture reference ring on the left side are pretty straight forward and there is a larger screw under that. There is a tiny screw on the right end that has to come out as well. Then there is the film winding knob. There is a large screw in the middle of that. The slot in it is super thin and I didn't have a screwdriver with a narrow enough blade to unscrew it. I have some small screwdrivers, but they didn't provide enough leverage to loosen it. This thing was TIGHT! I went to the hardware store hoping to find something narrow and wide that would provide the leverage to get this thing out. No luck. So I tried the dull edge of a razor blade held in a pair of needle nose pliers. This fit the slot just fine, but after breaking every one, that screw had still not budged. So I thought I would use my rotary tool with a cut-off wheel to widen the slot on the screw just enough to get a regular screw driver in there and really apply some torque. So that's what I did. It didn't take much and I was able to get a regular screwdriver blade in there and really put some muscle to it. Still it wouldn't turn, not even a millimeter! I sat back and started contemplating how I was going to have to drill out the screw and find a replacement. I stared at that takeup spool knob with its little counter-clockwise arrow mocking me. Wait... the arrow... You turn the knob counter-clockwise to wind on the film. I wondered if maybe the screw turned the other way in order to keep it tight over time. Well anything was worth a try at this point. So I slotted the screwdriver blade and made a clockwise turn. BAM!!! It turned!!! Unbelievable. I had to give a little growl of protest to the ingenuity of the German engineer who came up with this brilliant idea that keeps the winding knob from getting loose. Klaus, wherever you are... Thank you, and I hate you.

So now the top was off. There is usually another internal cover over the optics of most range finder cameras. It helps to keep the dust out. This was no different. There were four screws visible and I started taking them out, not paying any attention to the piece of old cello tape that fell off of one of them. But when I got to that one, I noticed that it felt different. It wasn't coming out. I turned it back the same number of turns I had turned it out. It was not holding the cover on. It was an adjustment screw. It is in the center of the cover at the edge toward the back of the camera. The rest of the screws came out fine and the cover came off revealing the simple optics that make up the rangefinder. The glass needs some gentle cleaning, but I will be careful not to touch the half-mirror. It is coated and if you remove any of the coating, you will ruin the whole thing. I still need to get the thumb wheel off, clean off the grease and add a tiny bit of lithium grease, but that should be pretty straightforward. The only hitch will be getting the wheel off. It has a pin-screw head. That means instead of slots, it has tiny holes that require a special tool to loosen. Mine is on the way, so I should be getting that going very soon. Here is a photo of the camera with the top cover and the internal dust cover removed.

Stay tuned for more Isolette fun!

Saturday, March 29, 2014

Bromide Streaks

"Bromide streaks?"
"Why yes... yes it does."
""They should arrest it for public indecency!!"

Okay, that's a terrible joke. The truth is that if you aren't careful with your development, you could get some ghastly, ghostly streaks on your negatives. Bromide streaks, also known as bromide drag is described best by some unknown source I found on the "internet".

The developer near the heavily exposed areas of the film becomes exhausted in the process of reducing silver salts to silver. Bromide ions are also produced in this process, and being heavier than the developer, they drag downward across the surface of the film, inhibiting development in those areas and leaving streaks of uneven development, called "bromide drag" aka bromide streaking. Agitation during development brings fresh developer to all areas of the film and flushes away the bromide by turbulence within the developer."

This tends to show up for me especially on 35mm film that is developed using "stand development" (long development in dilute developers with very little agitation). It seems that the borders where the sprocket holes are provide the perfect conditions for bromide streaks. Combine that with a low contrast area of the image and you will notice the streaks of over/under development. These two photos I took at my local filling station show bromides streaks at the tops.


The solution to this problem is to choose a development method with more agitation, or use a tank that you can flip over and set down every few minutes or so. That would prevent the bromide from "sinking". So don't let bromide be a drag. Keep experimenting and you'll figure out a solution. If you have experience with this, please share it down in the comments.

Friday, March 28, 2014

Transitioning Off Of Flickr

Looking back, I can see that it was inevitable. Flickr started making massive and dramatic changes to their site maybe around a year ago. At first they called it a 'Beta' and you could opt in or out. There was a seemingly huge backlash and people were writing scathing reviews on the photo forums and in the Flickr groups. Many people left at that point and found alternate places to host their photos. I tried to work with the Beta for a while, but eventually got fed up and tired of being frustrated, so I switched back to the older version of the user interface. I figured that Flickr would hear the outcry and modify their plans to change things so drastically. It was sort of 'out of sight, out of mind' for a few months, but early this week, they switched everyone over to the 'new' interface. No warning, no choice, and it was just as bad as I remembered. Additionally, my account is experiencing a bug so that I can only embed the original size photo here in my blog or on the forums where I like to share. Well, that is the proverbial straw that has broken the camel's back. I will not be loading photos on to Flickr and I have cancelled my 'Pro' account. I am going to give iPernity a try and see how things work over there. I did encounter one serious limitation initially, but have subsequently figured out a work around for it.

The problem was that I didn't want to jump into a paid 'Club' account right away. That meant that I did not have the functionality to get the embed code in html or bbcode so that I could share photos on my blog or the forums. I couldn't even get the url of a photo by the usual right-click -> Copy image url. It was completely blocked (as it is for all of their 'free account' users)! Now that seems a little dirty to me. The whole reason for using an image hosting site is to share your photos elsewhere. At least that is my primary use case. So what to do? Try another host like pBase or Photobucket? I didn't really feel like trolling around looking for the one image host that 'has it all', and I knew that many of my contacts from Flickr had moved to iPernity. As with many things in life Google has the solution! I generally use Chrome to browse the interwebz. I also have the benefit of being a bit of a computer nerd and have done some web development. So I thought I would just give the old CSS inspector a look to see if there was anything helpful there. Right click on the image and select "Inspect Element". Make sure that the "Elements" tab is selected at the top of the window that pops up at the bottom of your browser. There you will see a bunch of code. This is the cascading style sheet that controls what everything on a web page looks like (colors, fonts, layout, etc.). Right there on the highlighted line is the url (web address) for the image! BAM! Just what I was looking for! Now I can use that url to link directly to my photo. For the blog, I use html tags like this:
<img>http://u1.ipernity.com/41/63/61/31446361.32e384e1.640.jpg?r1</img>

For online forums, I use bbcode like this:
[img]http://u1.ipernity.com/41/63/61/31446361.32e384e1.640.jpg?r1[/img]

If I want a different size, I just select that size on iPernity so that I am viewing it and repeat the right click inspect element step. Then I have the url for that size image. Easy Peasy!!

I hope you find this helpful especially if you are migrating away from Flickr like I am and want to try iPernity for free for a while. Here is a photo from the first roll out of my 'new' Yashica Electro 35 GSN. This is a rangefinder camera from the mid-70's that was mass produced. They are super easy to get in good-ish condition. They do have some inherent issues, but if you aren't afraid to get your hands a little dirty, and open up a camera you probably paid less than $30US for, then it is a no-brainer. Just go get one. They come with a pretty darn good lens, the 45mm Yashinon 1:1.7. That's right, a nice sharp, clear, contrasty f/1.7 on a cheap camera. I shot this photo on some old Ilford FP4 that had expired back in 1981, so it is a little grainy, but over all I like the look.

Tuesday, March 25, 2014

Pushing Through XII

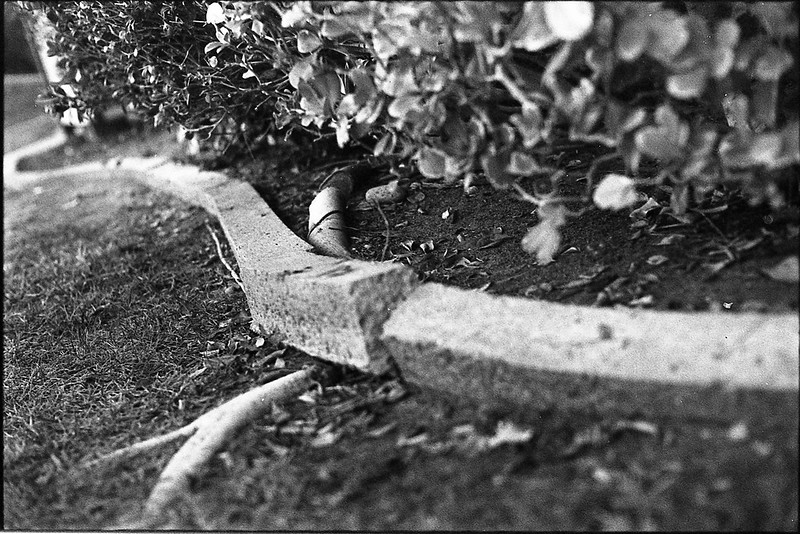
Wow, it's been a while since I've done one of these. This one is a root of a Ficus benjamina tree. If you live somewhere that these trees grow then you know what the roots do. They creep along the ground just under the surface and then they start to grow so that they break the surface and anything that has been built on it. That means that concrete sidewalks, barriers, foundations, etc. are all going to break. These are the trees that are going to be the rock smashers that level the cities after humanity has extinguished itself. For now though, they are an inconvenient beauty that decorates our landscape.

Pushing Through XII

Monday, March 24, 2014

Normal Lens Macro

I may have posted something about this in the past, but I'm too lazy to find out, so forgive me if I am being redundant.

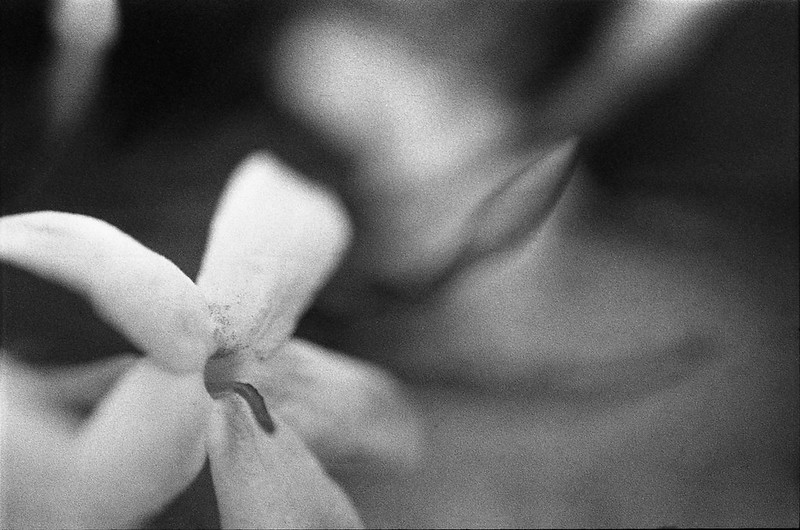
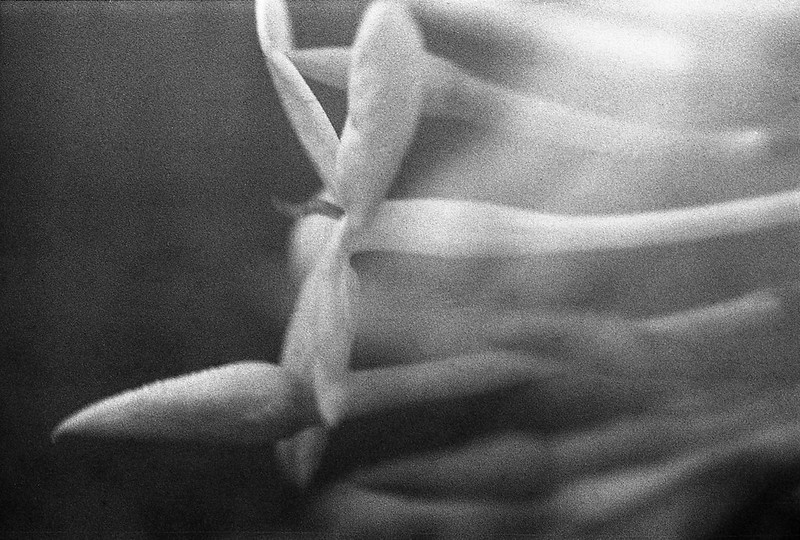
Lots of people take macro photos these days. Hop on over to photo.net and you'll see what I'm talking about. Most of the examples on that site are amazingly sharp and bright and colorful. That is because they are taken with digital SLRs equipped with a 'macro' lens of some sort and then the photo is cropped down even closer. This can be done because of the high pixel count of the newest sensors as well as the sharpening algorithms used by modern editing software. Now I don't have a macro lens, so I have to make due if I want to get close. Most of my lenses have a minimum focusing distance of about 2ft, so I have to do something different to get up close to my subject. This is a technique that I learned a long time ago, so it must have been out of Popular Photography or Photographic magazine. Yes, I was taking photos well before the advent of the world wide web. What I do is to take my normal prime lens off of my SLR. In this case it is a Nikkor 50mm 1:1.4 lens on my Nikkormat FTn. Then I flip the lens around so that the mount is facing outward and I hold the outer part up to the camera, pressed against the front. Got it? I'm just holding the lens backward against the front of the camera. There are 'adapters' that will convert your lens mount to a male screw mount so that you can use the filter threads to actually hold the lens in place, but I have never really found I need something so elaborate. Make sure the lens is stopped down a bit and focused at the minimum distance. Then you are going to have to move closer and farther from the subject until the focus is just right. The more you stop down, the more will be in focus (normal depth of field principles apply), but things are going to get really really dim in the finder window, so f/8 is probably about as small as you want to get with the aperture. I think I was more like f/2 for these photos. That makes for some shallow DOF, but I like the effect.

The film was some Ilford FP4 that had been rebranded as generic "Professional Film". It had expired back in 1981, so I shot it at iso 25. Development was in my old stand-by Adonal (Rodinal) diluted 1:100, developed for 70min with 10sec agitation initially and at 35min. What you see is pretty much how it came out of the Epson V600 scanner. I did a little dusting in PhotoShop. So what are you waiting for? Get that normal lens off of your SLR and take some great macro shots of your own! Jasmine I

Jasmine II

Thursday, February 27, 2014

Hiatus

First of all I would like to thank my readership and hope that you are both doing well. :)

I have not posted anything in a while because the concrete slab upon which my house was built developed a large crack (actually a network of cracks). Subsequently, there was removal of flooring and jack-hammering and grinding which caused everything to become covered with a rather thick layer of grit and fine dust. Obviously, I put all photo-taking and developing equipment into sealed containers to protect them. I have been shooting a little, but development will have to wait until I can get things set up again. Until then, please take a look down the page on the right at the other blogs I find interesting. In particular, I liked this post from the friendly and helpful Filmosaur.

I hope to have some photos to share soon. Until then, keep shooting!

Thursday, January 16, 2014

Process or Providence

I was asked recently what I look for when I take photos. I thought that was a good question as I have thought a lot about 'what' to photograph and 'how' to photograph, but I haven't really verbalized a process. I suppose many photographers are 'inspired' and just snap the shutter and get wonderful art. They have 'an eye' for composition that allows them to take photos instinctively. I don't have that. I struggle to 'see' the beauty around me and photograph it in a way that conveys my vision. So when my friend asked this question I went to work to put down something about my process and when I was done, I thought "That sounds like it might be a good blog post that someone out in the void we call the blogosphere might like to read. So here it is.

Sometimes I go out with a subject in mind (I want to shoot something specific like a building or a puddle or a person). Sometimes I go out with a photograph in mind (I want to shoot something like Porch Shadows by Strand). Ansel Adams always visualized the print he was going to make when he took his camera somewhere. I don't really print, so I usually have a more general idea of what I want to shoot. Not that scanning is so different than printing, but I don't have my end product in mind the way I think AA did. I have gotten into the habit of taking a camera with me almost everywhere. I have decided that it is better to have it and not need it than to need it and not have it. This after many, many times saying to myself "That would make an interesting or beautiful photo... if only I had a camera." I don't count the thing in my phone as a camera, though when I would rather kill myself than miss the shot, I will use it. I have acquired a Yashica Electro 35 GSN that is small and light enough to not be a bother to carry everywhere, but I will still carry a medium format folder or even a TLR if I want to shoot those formats. If I am just carrying a camera around, I will be aware of the film (b/w, color, contrast properties, etc.) and usually pre-set the shutter speed and aperture to something reasonable for the brightest thing I might shoot (Sunny 16 is surprisingly accurate). Then I just wait and see if the light casts an interesting shadow or if there is some odd reflection in a window or even if a building I have passed a thousand times is actually interesting in some way or at some angle. I find myself kneeling, squatting, sitting, laying a lot and the low angle works for my aesthetic sensibility.

Looks like an orangeThis was taken outside the Target store in my neighborhood. I drive/walk past these concrete spheres all the time, but this day for whatever reason, I thought I would take a photo of one of them. Looking at the scene, there was nothing special, but once I sat down, got the viewfinder up to my eye and started composing I was able to see the shot. I took one frame and moved on. I got a few odd looks, but I am pretty impervious at this point. When I am framing/composing, I look for (obviously) my subject. If I am shooting a rectangular format like 35mm, I almost always use the Rule of Thirds to position the subject. Square formats will tolerate centered subjects better.

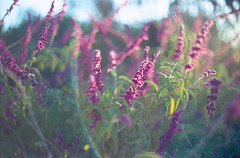
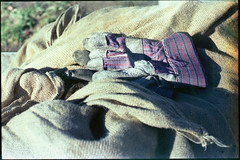
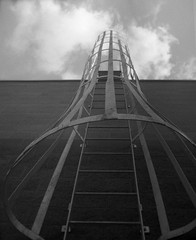
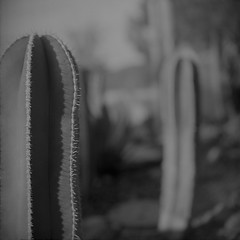
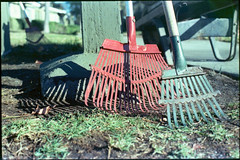
Purple MagicI like blurry backgrounds, so I open the aperture as much as the lighting conditions will allow. I try to find a contrasty angle so if the sun is out I put it to my right or left.Gloves I look for lines converging or intersecting To the Mothership and consider how that will direct or distract the viewer. Repetition is a great compositional tool that I like to use. Winter Greenery It reinforces the subject (look in the background) Rakes. I have to say, that I am of a different mind-set now than when I was shooting digital. As often as not, I look, compose and walk away. I don't feel obligated to actuate the shutter just because I took the time to point my camera at something. Rolls of film sit in my cameras for sometimes weeks. That is why I try to also carry a little Moleskine and jot down notes about the photos I take (date, subject, camera, film, exposure if I know it). That way I can add some data to the photos I share online. My best advice is to start looking at your everyday surroundings through your camera. Get close, get far, get low, get high, turn off the lights and let some faint or diffuse window light fall on things. Don't be afraid to hand hold on long exposures. Blur isn't the end of the world. Just ask Heinrich Kuehn. :)

Well, I hope there was something of value in there somewhere. I think I have 'developed' an intuition for what I think will look good, but it didn't/doesn't just come naturally. I can definitely tell when I am rushing and when I am thinking. I don't 'feel' the photo as much as I have a process that works when I apply it. I think that is how a lot of artists work. I am still refining the process and trying to slow down and think more frequently and my percentages of 'good' photos is creeping up slowly. If you are one of the lucky few who has 'an eye', then good for you. If not, you might want to start thinking about the 'process of seeing'. Dorothea Lange said, "The camera is an instrument that teaches people how to see without a camera."