Saturday, December 28, 2013

Sprockets!

This post will have nothing to do with Mike Meyers, other than to show the youngsters what enters my mind when I hear the word "Sprockets!"


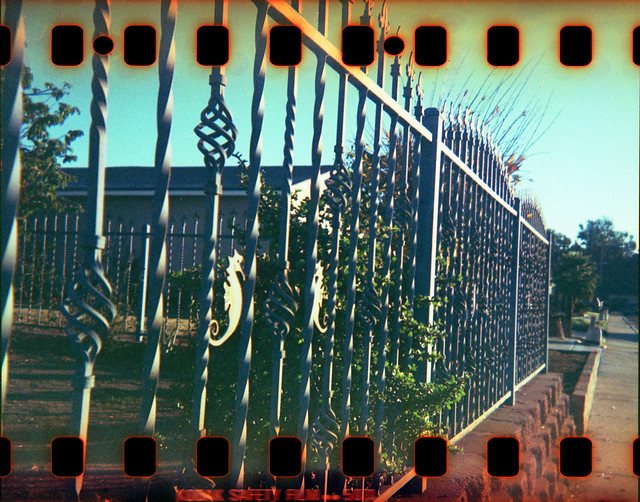
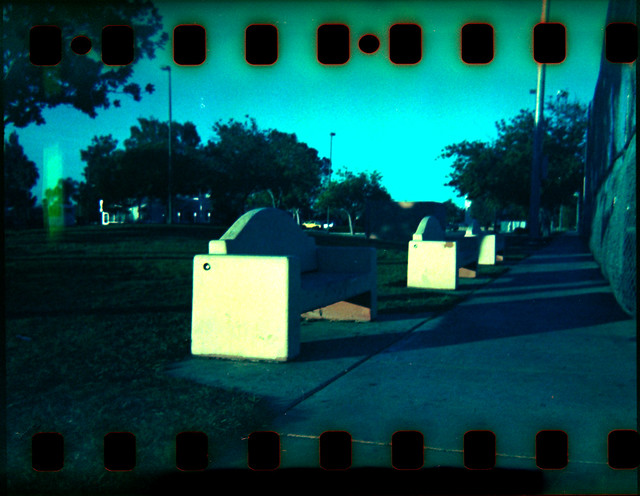
What I really want to talk about is the practice of putting 35mm film into a camera of a larger format so that the film is exposed from edge to edge, and then scanning or printing that film from edge to edge so as to show the sprocket holes perforating the image.
Seahorses


Almost every camera has a 'mask'. This is a square or rectangular frame that sits in front of the film and blocks light from reaching some parts. In a standard 35mm camera, the mask is 36mm wide by 24mm high. That is what gives you that nice 2:3 aspect ratio. So when you take 35mm film and put it in a camera that has a larger mask, the top and bottom parts of the film are not blocked and so the image extends out to the edges.


In my case, I used a Kodak Brownie Fiesta camera. This was designed in the 50's to use 127 roll film and its mask is about 4x4cm square. That is more than enough to expose the entire 35mm height of 35mm film. The final image will then be 35mm high and 40mm wide, almost square. So I measured the length of a standard 127 roll of film and cut a piece of string that long. Then I taped it down to the counter in my darkroom (bathroom). Boom, boom, out go the lights and out comes my 100ft roll of Kodak Ektachrome Slide Duplicating Film. I roll out a piece the right length, measuring it against the string on the counter which I can feel in the dark. Now is the tricky part. I have to tape the film to the middle of the backing paper and I have to do it so that the edges of the film are parallel to the edges of the backing paper... in the dark. It took a few tries, but eventually, it 'felt' like I had it all pretty close. There were creases in the backing paper where the film started, so I was able to get it easily to the right place longitudinally. So I roll up the paper and film on a 127 spool and emerge into the light and load it into the camera.

Now the Brownie line of cameras are very simple. They have fixed focus plastic meniscus lenses, a single shutter speed and usually just one or two apertures to choose from. I think they were made with 50 - 100 speed film in mind. So even though this film is probably closer to iso 25, I figured the latitude of the C-41 process would compensate and I would get images, even if the quality was sub-optimal. It's all about experimentation, right? Nobody makes anything awesome by doing what everyone else does. Ok, that's not exactly true, but it sounded sort of inspirational in my head. Anyway, here are a couple more "Sprockets!" images from my Brownie. Enjoy.
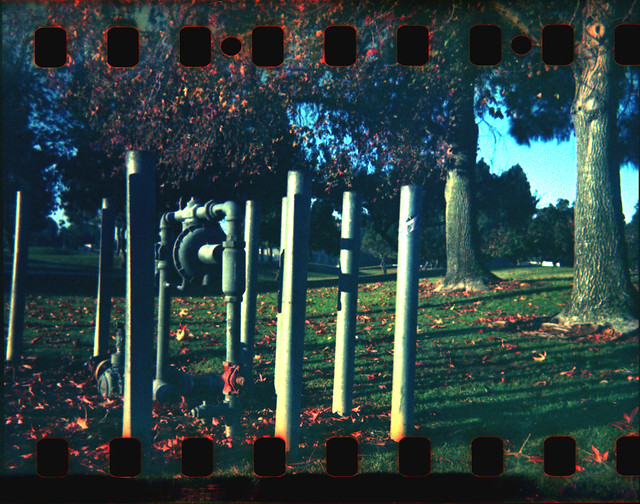
Gasworks

Park Bench

Friday, December 27, 2013

Summer in December

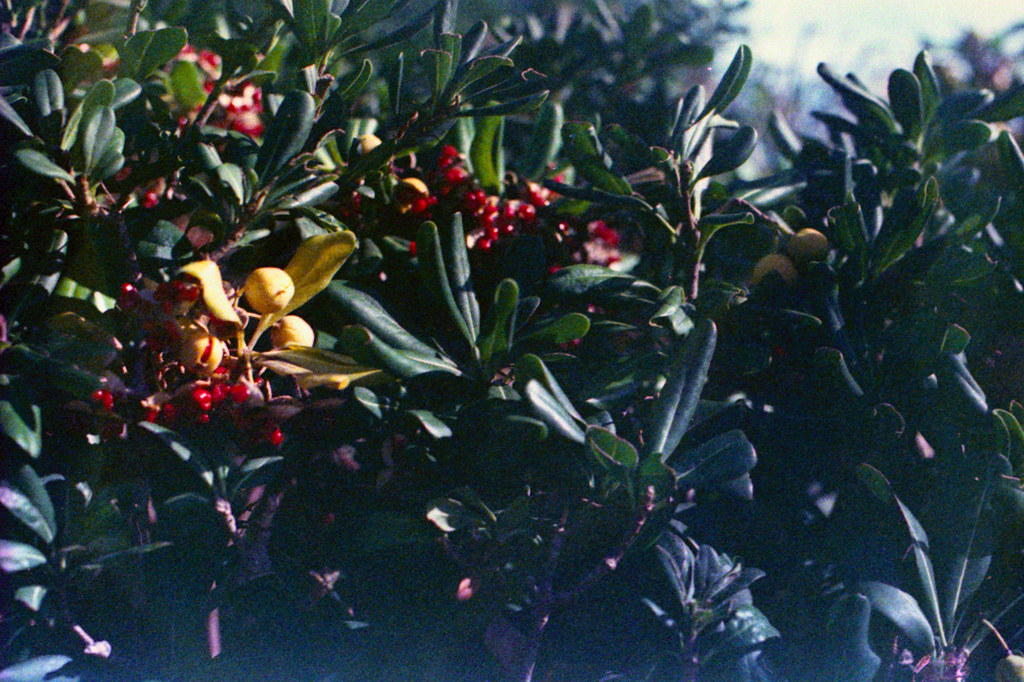
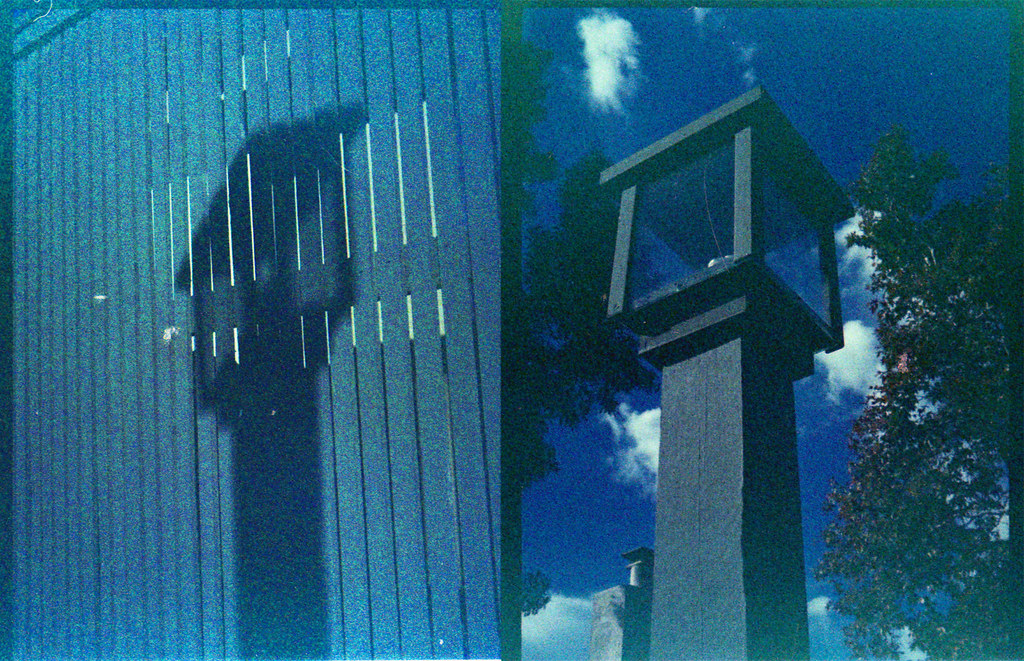
Here in San Diego, we don't get a lot of variety in the weather department. Some people say we have "perfect" weather, but I would beg to differ. I grew up in E. Washington where we had four very distinct seasons. Even within a season, the weather would vary and you could have warm winter days or cool, rainy summer days. I have heard it said that San Diego has two seasons... warm Summer and hot Summer. We are now in the midst of warm Summer where the daytime temps are in the 70's and the sun is shining. I took the week off of work for Christmas and so I have had time during the day to go out and walk around the neighborhood, seeing things that normally happen when I am at work. One of these things is that the landscapers are hard at work keeping things tidy and growing. I took these two photos near where one guy was working. He probably thought I was crazy, taking photos of such mundane things. Why would anyone want a picture of this stuff? I guess that is where 'taste' comes in. I like photos of the ordinary, every day stuff that surrounds us. Also, having an idea of what the final image will look like helps. I knew that the film I had loaded in my 1967 Nikkormat FTn was expired 30 years ago, so there would be grain. I also knew that I was going to cross-process the film so there would be color and contrast shifts. I also knew that the film was tungsten balanced, so shooting in daylight would throw the color balance toward the 'cool' spectrum. All of these things were in mind when I composed these shots. So I had a feeling that this 'mundane' subject would be helped out by all of the stuff going on with the film itself. I could have also done other things in PhotoShop after scanning the negatives, but I chose not to do that. These are pretty much straight off the scanner with a little dust spotting. I think they are interesting, especially the shot of the rakes. Let me know what you think.


Tuesday, December 24, 2013

2 Cameras, 2 Films, 1 Subject

I didn't really take these two photos with a blog post in mind, but I ended up scanning the films together and so the comparison was inevitable.

The first was taken with a c. 1939 Agfa PD16 Clipper. I wrote about this camera recently, so click the link to find out more about it. The film is expired (1981) Tri-X, so I expected some grain. I took the photo indoors near a bright-ish window, but still it was under-exposed for sure (probably f/5.6 at about 1/40th). The processing was done in Adonal diluted 1+100 with semi stand agitation (10 sec init and 10sec at 35min) for 70 minutes. That should have brought the grain under control a little, but I think the other factors were overpowering. The grain is "pronounced" to say the least. The contrast is low, the DOF is not bad, but I am a little too close to the subject, so it is soft. These work to emphasize the grain. So what I ended up with was a photo that looks very old indeed. I think the treatment actually works with this subject, so I am happy to share it.

The next one was taken with my trusty old (c. 1967) Nikkormat FTn with the awesome Nikkor 50mm f/1.4 lens. This lens has great clarity and contrast and takes pretty sharp photos if I do my part and hit the focus correctly. Development was identical to the image above, but the film was slower. Initially it was some generic "Professional Film" rated at asa (iso) 125. Being that it expired in 1981, I rated it at iso 50 and hoped for the best. I will definitely be posting some more photos from this film since I have 100 ft of it. It turned out quite nice, I think. Everything I would expect from this camera/lens and good film. There may be a bit more grain than it would have had 30 years ago, but it is nowhere near as pronounced as with the Tri-X above that expired in the same year.
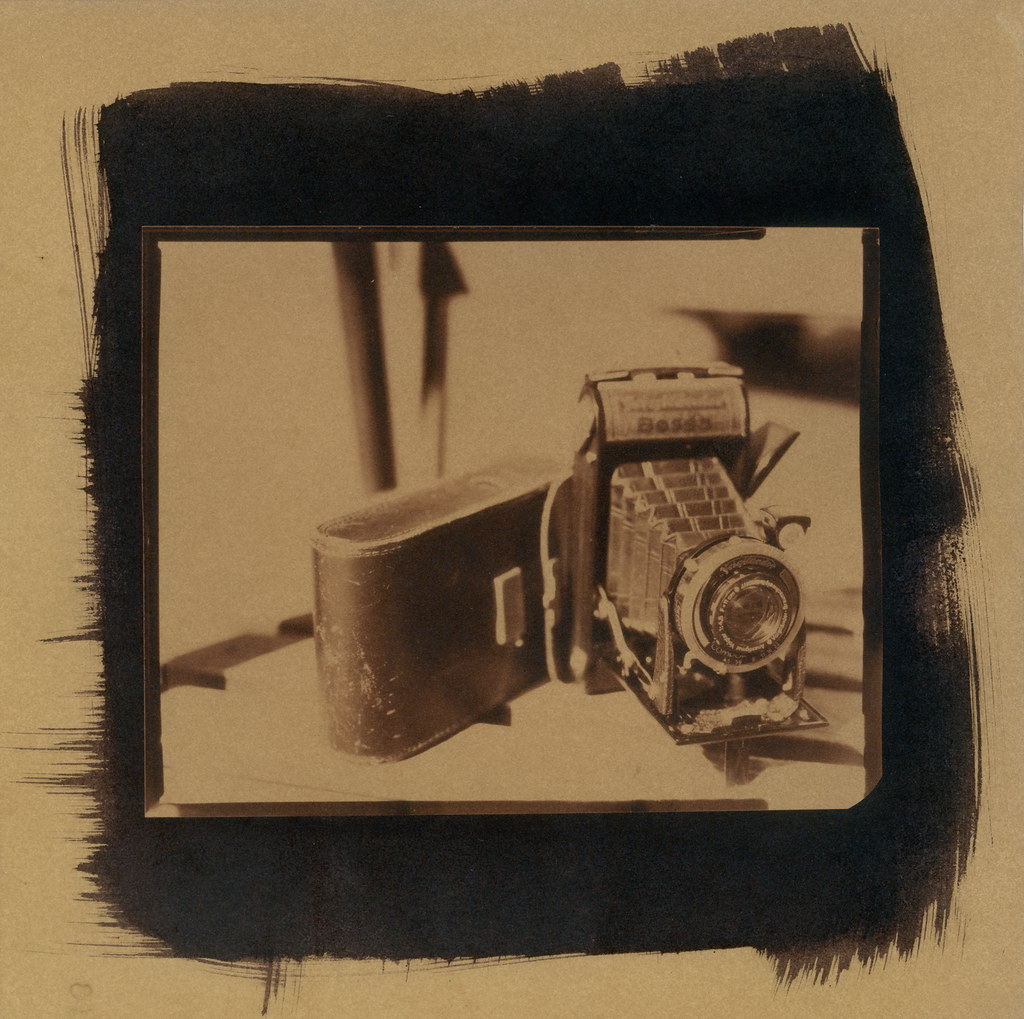
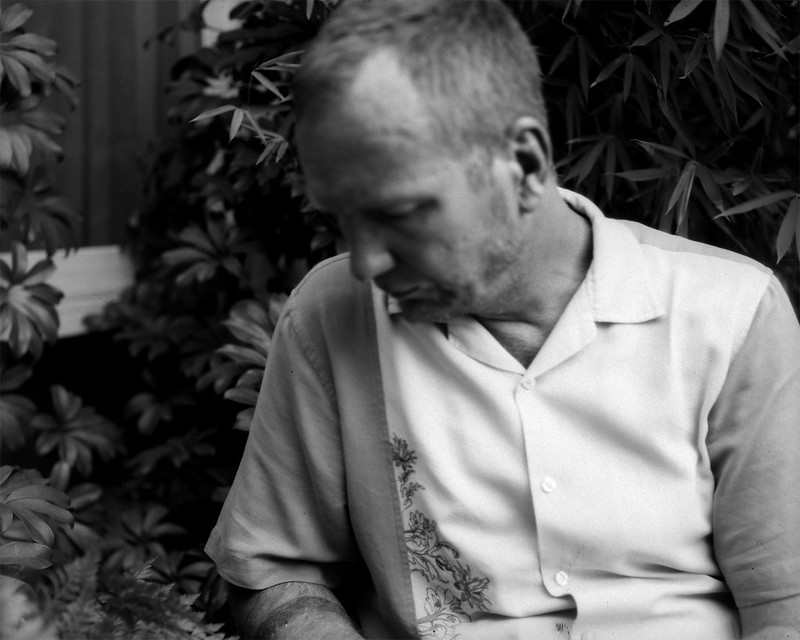
I hope you have a wonderful Christmas. If you were nice, maybe Santa will put some expired film in your stocking!

Tuesday, December 17, 2013

Clipper

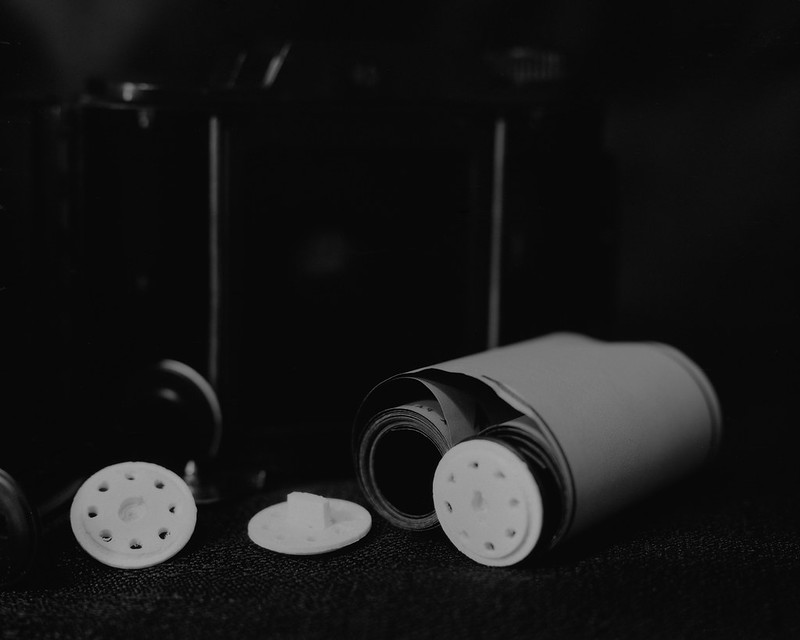
I had a few cameras given to me recently. One of them was a 1939 Agfa PD16 Clipper. This was made after Agfa (Germany) and Ansco (U.S.A.) merged and this was the first camera design produced by the new company Agfa - Ansco. You can find identical Clippers with both Agfa and Ansco badges on them. It has a simple Cooke Triplet lens, so the images are nice, but a bit soft. It is fixed focus from ~5 - 12ft. It has an aperture of around f/6.5 and a shutter speed of about 1/30th - 1/40th sec. So with modern films (especially b/w) with good exposure latitude, you can shoot anything from iso 50 in bright daylight to iso 400 (box speed) or greater indoors or in dim light. The camera has a little tab that pulls out to allow "bulb" exposures so that the shutter stays open as long as you hold down the shutter release button. There is no tripod socket, so it's probably best to find a sturdy surface on which to set the camera. The front 'standard' has a little foot to keep it level. This camera was designed for the 616 rollfilm format. This film was 70mm wide compared to 60mm of the 'modern' 120 format. So with a little fanangling, you can use 120 film. By 'fanangling' I mean 'get something to extend the 120 spools enough to fit the camera and turn with the film advance knob'. I have an associate with a 3-D printer, so he did me a favor and printed up a set of spool extenders that are designed for just this purpose. You will get images from edge to edge on the 120 film and the film may not be perfectly flat in the camera, so you might want to engineer a new 6x6 mask if these imperfections bug you. I'm fine with what I get, so no need for further 'improvements'. The images are about 5x6cm, which is a 'near square' format, but not as near as 6x7, so it makes it interesting.

Here is a poor photo of the spool extenders.

Clipper-Roll-Extenders

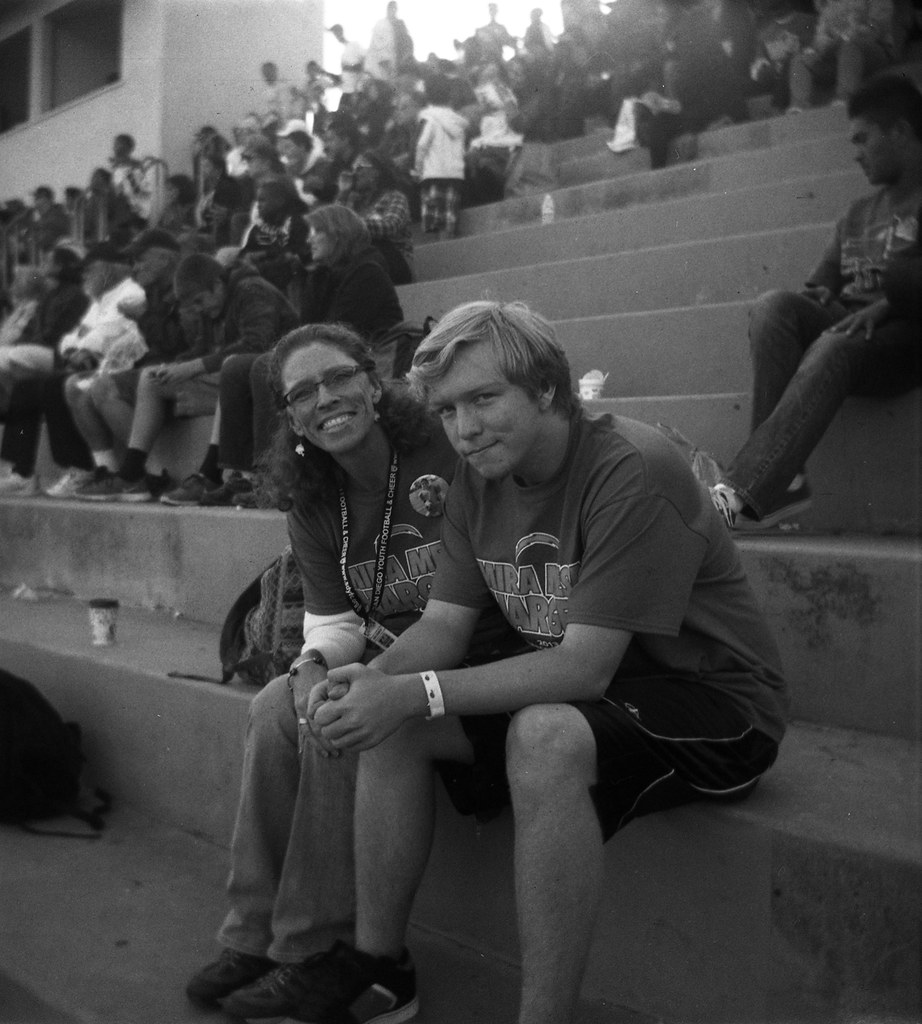
Here is an example of a photo I took with my Clipper. I used Kodak Tri-X expired in 1981 and stand developed in Caffenol-C-L.

At the Q-Bowl

I love using these old point & shoot cameras. It is super low-tech, so there's not a lot to think about aside from composition.

Monday, December 9, 2013

Slide Duplicating Film

"KODAK PROFESSIONAL EKTACHROME Duplicating Film EDUPE is a low-contrast color reversal duplicating film designed for making high-quality duplicates from originals on KODAK EKTACHROME or KODACHROME Films. It features excellent color reproduction, extremely fine grain, and very high sharpness."

Or... you can do what I did and buy 100' of the stuff that expired in Feb. of 1981 and load it up on some 35mm spools and throw it in a camera. Then, since you are in the mood to break the rules anyway, process it in your kitchen in C-41 chemistry instead of the 'required' E6 transparency chemistry (cross-process). Go ahead. Don't be afraid. You have a hundred freakin' feet of this stuff! ok, you don't have to do all of that rebellious stuff, but I did. Unfortunately, I didn't quite get the exposures right. I shot the film at iso 50. Everything was quite over exposed in the Nikkormat FTn and because of a malfunctioning aperture, everything was under exposed in the Olympus Pen EES-2. So next time I will shoot it at iso 100 and see what happens. But I still got a few frames that were salvagable. The film base is a deep orange, so mucho color correction had to be done. In the end, I ended up with contrasty, saturated photos, pretty much what you expect when toying with x-pro. You can see the pronounced grain which I think is because of the age of the film even though the person I bought it from said it had always been in cold storage. But let's face it, 32 years is pretty old when you are a roll of film.

Here is the shot from the Nikkormat FTn. I have a Nikkor 50mm 1:1.4 lens that has good contrast to begin with, so with the 'push' and the x-pro, contrast is, well, high.

Open Seed Pods

I made a diptych with a couple of the half frames from the Pen. These images show even more grain and I think some additional noise from the scanner.Lamp Dyptich

Still, for all of the strikes these images had against them to begin with (expired, wrong equipment, wrong chemistry), I think they are not horrible. I think I will roll up some more and keep on going with it.

Friday, December 6, 2013

New Life for a Polaroid Land

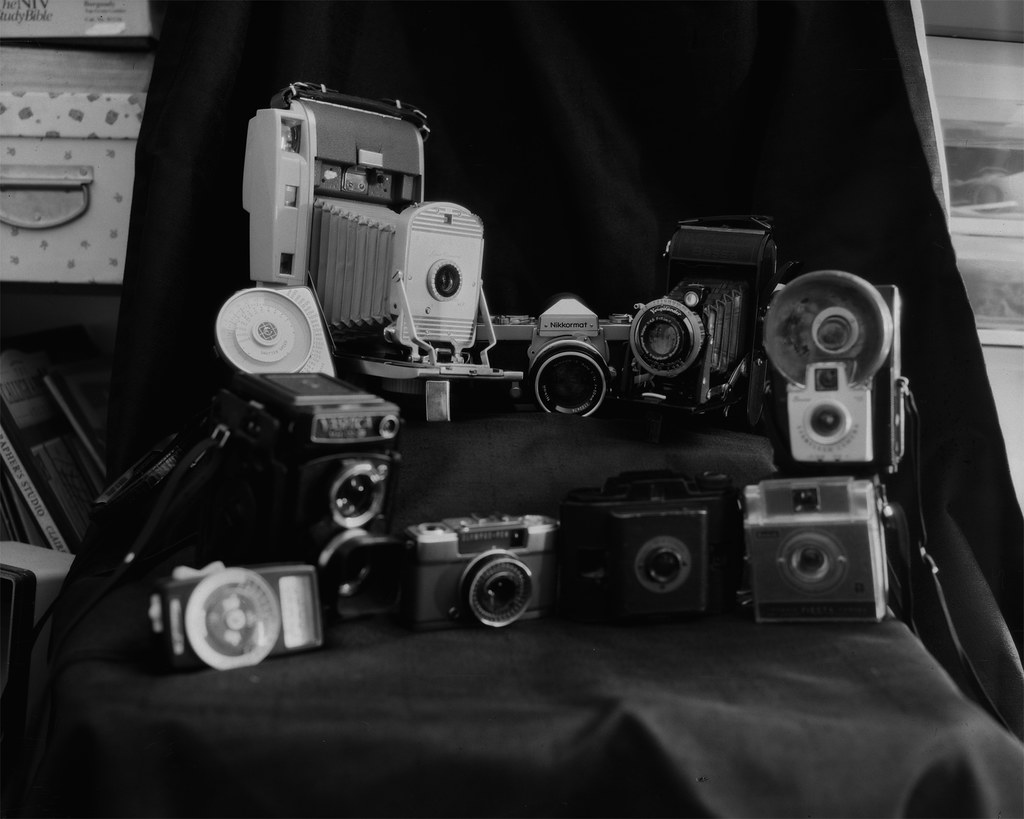
CamerasI was given a Polaroid Model 800 Land Camera recently (upper left). It is in very good shape for a camera that was manufactured c. 1957-62. The lens is clean and clear, the bellows are intact and all of the dials and buttons work just like they did 40+ years ago. The only thing that becomes an obstacle to using this camera is that the film is no longer manufactured for it. This particular camera used Polaroid Roll Film which consisted of a 'positive' roll and a 'negative' roll. The camera exposed the negative and then the positive was sandwiched to it and the developer was rolled out between them as they were pulled out of the camera. A minute later you could peel them apart and lacquer your print. Simple, right? Well, even if it was simple, it wasn't profitable for very long. Additionally, if you could find some of this film on say, an auction site, the developer would have long since dried out, rendering it useless for all but a dreary reminder of a wondrous time in photographic history when it only took a minute to get a print.

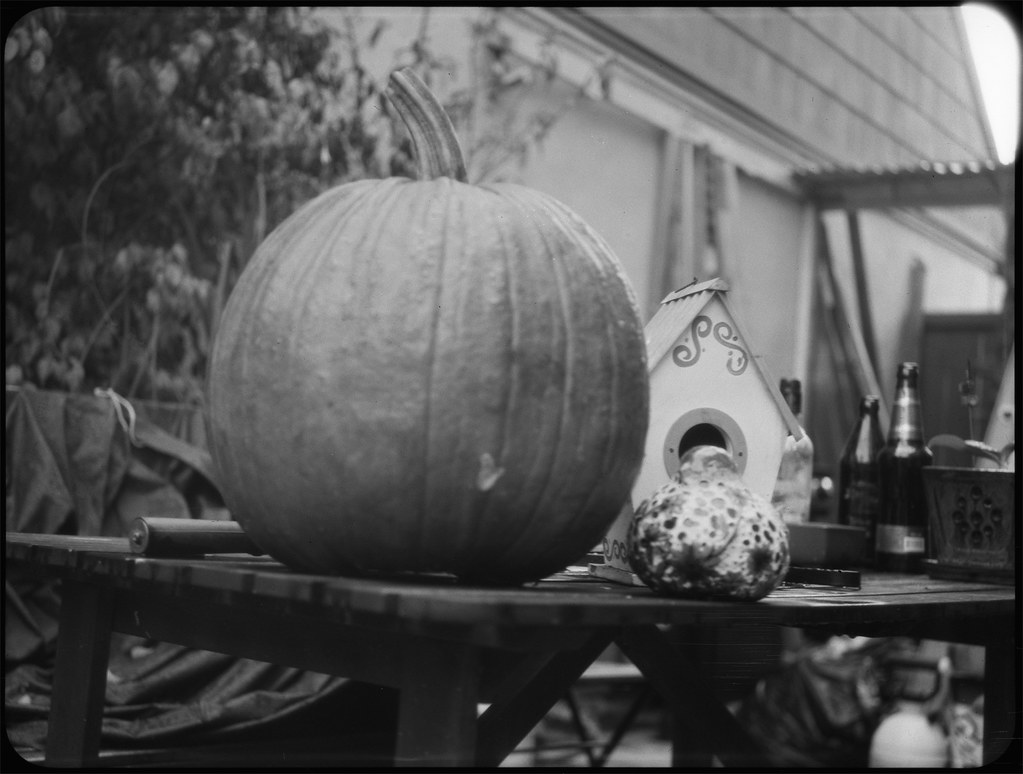
So what to do with this old beauty? I don't own any shelf queens. All of my cameras are functional and are used. This one should be no exception. I was fiddling around with it, looking at the rollers and how the whole system worked together. It originally made a 3x4 inch image and so that is the size of the mask the the pressure plate sits against. However, there is a larger detent around the mask that just happens to be very close to 4x5 inches! I quickly grabbed a spare sheet of 4x5 film and set it in the back of the camera. A nearly perfect fit!! This could become a nice single shot large format camera. It is smaller than the Speed Graphic (though still plenty big), but a single shot isn't really worth lugging it around town. It could be a nice portrait or still life camera. But first, I should give it a quick test just to see if the focus and shutter are even in the ballpark. I loaded up a sheet of 4x5 Kodak CSG x-ray film in the dark, closed up the back and hoped that the film wouldn't shift. The pressure plate seems a little weak, but it's hard to say what is happening inside once the back is closed. I took it out to the patio where there was a pumpkin sitting on the table with some other sundries. The camera shutter/aperture are linked. You set a dial to the correct EV and the exposure is taken care of by the camera. You don't get any real control over DOF. Focus is with a coupled range finder. Instead of 'snap' or 'click', the shutter goes 'poinnngggg', like you just over-wound your grandfather clock. I took the film out and put it into a 4x5 holder since I don't have any bags that I trust to be light tight, and stored it in the fridge until I had 5 more shots to use with my MOD54 developing rig. A couple of weeks later, I am ready and with fingers crossed, I develop per my usual process with this film:
Here is the final product. Not an exciting photo, but a successful test of the camera. I am excited to try this out in some different lighting situations. The 3x4 format is pleasing to my eye, so I will probably use it more than I think. I am trying to devise a way to get a few shots loaded with layers of film and opaque paper since there are essentially two compartments inside the camera. More on that later.PolaPumpkin

Friday, November 29, 2013

New Found Respect

I photographed a wedding recently. I was torn over which camera(s) to bring with me. Of course the Nikon D7000 with a variety of lenses and flash were the base that most of the photos would be taken with. It is just foolish to not bring digital to a wedding these days. I will tell you though that the inevitable happened and I only kept about 30% of the images I took. It is the digital demon that causes people to just snap away without enough thought that inhabited me. I am not ashamed because I ended up with a few hundred shots that I am proud to give the happy couple whereas if I had been shooting only film, they would have had a fraction of that. I took two film cameras to the wedding. First was my '39 Voigtländer Bessa 6x9. The other was my Graflex Speed Graphic with the Graflex Optar 135mm f/4,7 lens and six sheets each of Portra 400 and Kodak CSG x-ray film. This is commonly called a "press camera" because back in the day, it was a camera used by many newspaper photographers. These guys would carry these cameras around with the flash unit attached and pockets full of film holders and flashbulbs. The flashbulbs are somewhat prone to igniting from a little static discharge, so caution must be taken when carrying them in the pocket of wool pants, especially in the winter. Many photographers suffered burns on their thighs from accidental ignitions. I didn't put any bulbs in my pockets, but I did attach the flash unit and brought along some clear GE #5 and blue #5B flashbulbs. The camera weighs in at about 6.6lb with the flash adding another 2.4lb. Add a film holder and you are getting close to 10 pounds. That is not bad to lift up and take one or two shots, but those old timers lugged that rig around for hours maybe, depending on the event they were covering. So respect to those guys who were beat reporters in the 30's, 40's and 50's. It may not have been high art, but it was hard work and low pay.

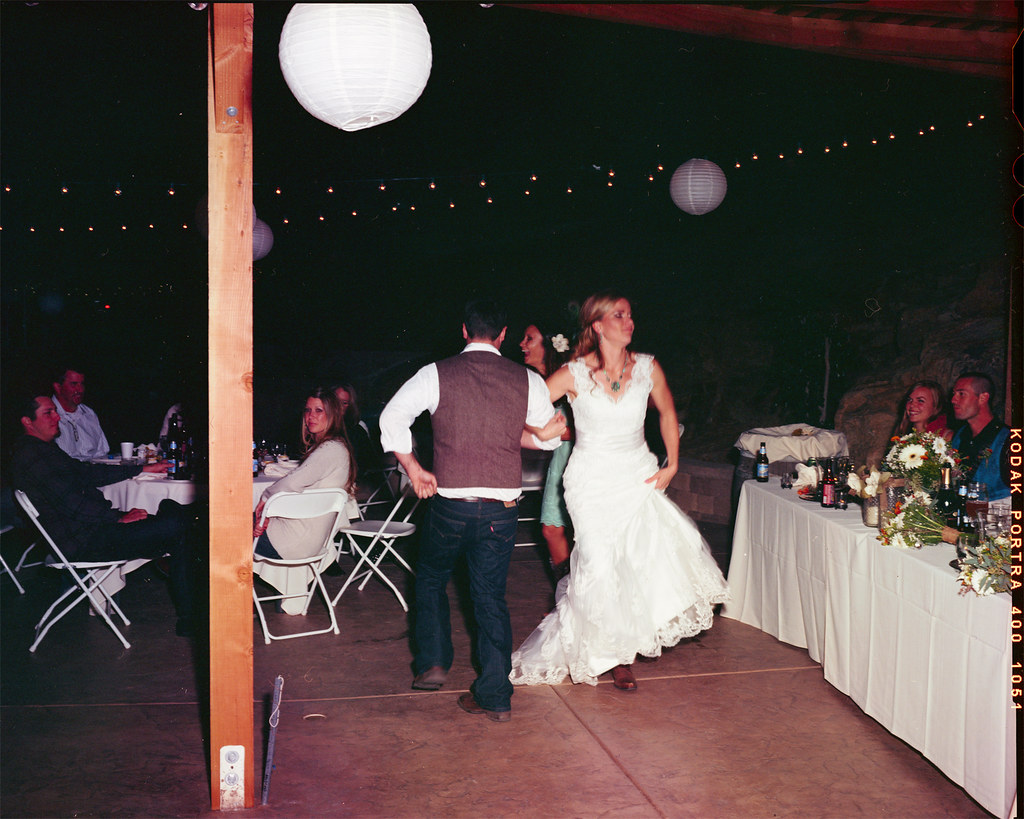
Here is one of the shots I took with the Speed Graphic using Portra 400 and a #5B blue flashbulb. The color balance came out perfect, which I didn't really expect. The scanner may have contributed, but it looks just like Portra should look. I might have missed the focus just a little, but since they are dancing, a little blur is non-fatal to the photo. I like the way the flashbulb and accompanying 7-inch reflector light the scene. It is definitely 'hotter' in the center and less so at the edges, causing a sort of natural vignetting.

I am happy that I could bring the old technology into service again. I am also happy that Kodak and others are still making film with the newest emulsions (yes, I miss some of the old ones). The photos we are able to create with this pairing are 'classic' in their own rights and have a look to them that is unmistakably film. Drop me some feedback if you like shooting film in old cameras.Wedding Dancing

Thursday, November 21, 2013

Pushing Through XI

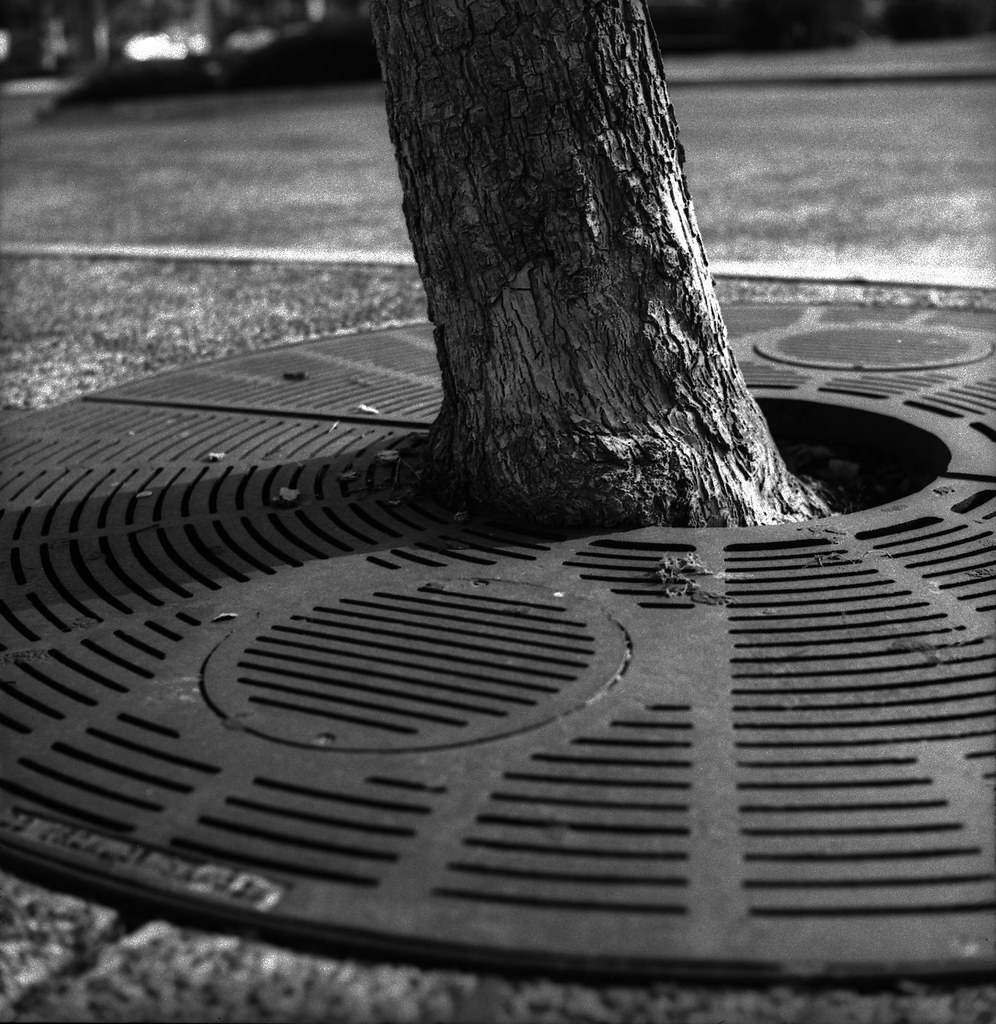
When this tree was planted, they installed a steel grating around it. The idea being that the steel, being stronger than wood, would contain the tree within its provided circle. The tree didn't get the memo and had different ideas for its future. It has grown up and over the steel grate and will continue this growth until it consumes the steel. I'm sure that at some point the city workers will come along and cut down this tree and replace it with one they hope will be better behaved.

Pushing Through XI

Monday, November 18, 2013

Orange and Blue

Orange and Blue 1

Orange and Blue 2

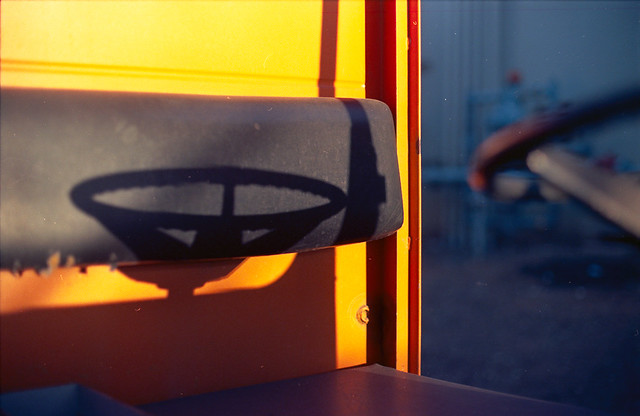
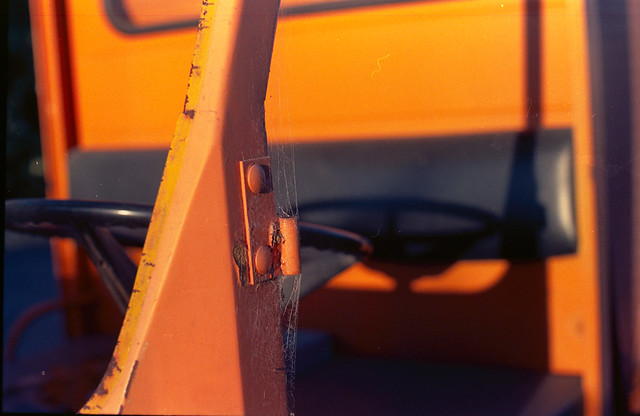
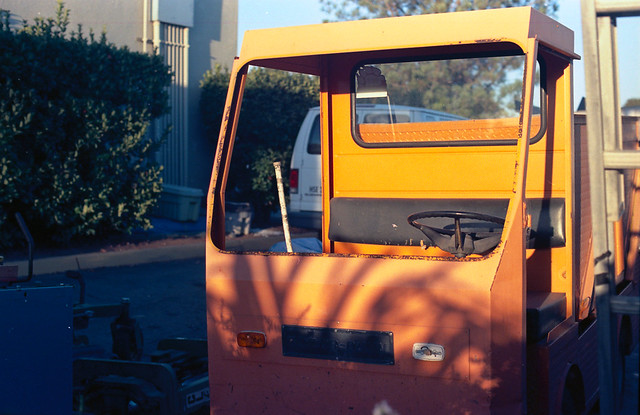
Orange and Blue 3The first thing I ever learned about color theory was that orange and blue are "complimentary" colors. That is if you make a circle with a rainbow going around it, orange and blue will be opposite each other. That is an extreme oversimplification, because it matters what color space or color model you are using. In this case, it is standard RGB. For a long time, I thought that meant that the colors 'clashed' and should not be used together in any pleasing artistic composition. This is obviously a foolishly amature conclusion to anyone who has ever enjoyed a sunset. The truth is that orange and blue create great contrast and can really enhance your subject's visibility and thereby improve your composition. Here are a few photos I took recently with my '67 Nikkormat FTn on a roll of Kodak Ektar 100. I love this camera. It is the camera I learned on 30 years ago and I still learn from it even to this day.

The subject is an old beat up maintenance vehicle I came across at my son's school. The sun was setting just right so that the orange vehicle was lit up but the background was in shadow, making it look blue on film. I think these came out kind of nice, especially when viewed together as a triptych.

Saturday, November 16, 2013

Long Live Film

100 Strangers 2&3/100

A couple of weekends ago I was at the big weekly swap meet, what my UK counterparts might call a 'car boot sale'. I took my Graflex Speed Graphic just in case there was something to photograph while there. I figured with that many bargain hunters walking around, there would be some good opportunities for my 100 Strangers Project. Most of my time was spent looking for bargain basement prices on cameras in good condition. Well, I didn't really find any of those, but carrying around a Speed Graphic did make for some easy introductions to strangers.

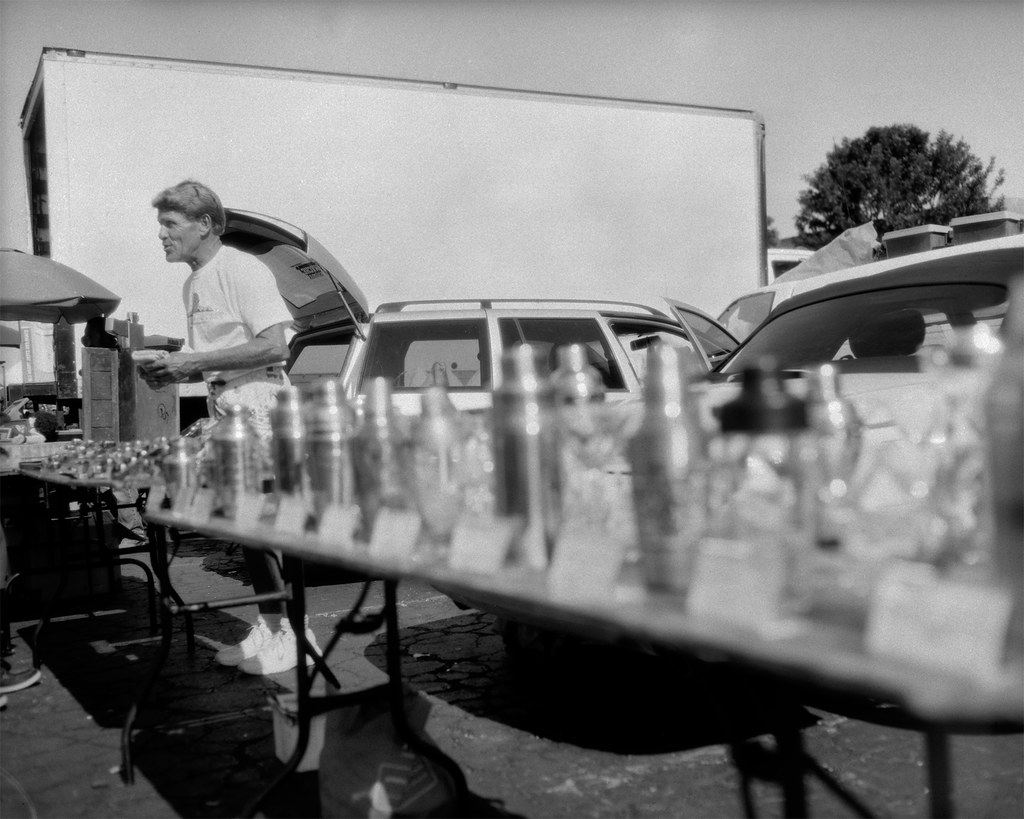
This is Denny. He was selling some very cool barware. Mostly he had martini shaker/glass sets that were printed with various themes. I don't like martinis, so I didn't pay much attention to his wares, but from watching him work you would have thought he was selling used cars. I mean this guy could talk you out of your shirt and sell it right back to you. So when I walked by, he immediately commented on the camera. He wanted to know all about it and I was happy to talk with him. At the end of the conversation, I asked if I could take his photo. He agreed, but while I was metering and focusing, another mark entered his line of sight and he was off to close another sale.

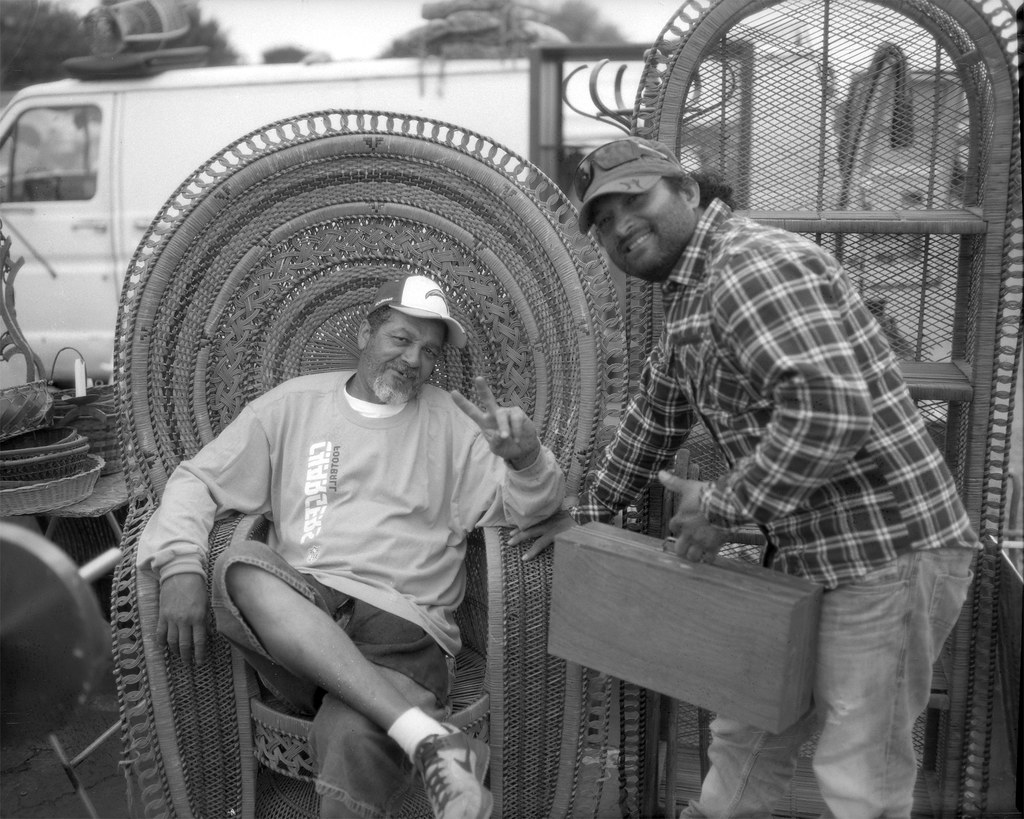
Denny This guy also asked about my camera, but was really just interested in what I paid for it. I got a few questions like that from various people. I assume that this was a piece of information they wanted to tuck away in case they ever came across one to buy or sell. Anyway, this guy was sitting in this big old wicker chair talking about the good ol' days in the clubs when you would sit in a chair like this and have the ladies come sit on your lap. The funny part came when he would try to convince some young (or not so young) lady to come sit on his lap. The looks they gave him were priceless. And I think he was truly surprised and disappointed that they would not come and sit with him. I had to get a photo of this guy. The other guy was I think just a passer-by who wanted in the photo.

King-of-Kobeys

Wednesday, November 13, 2013

Dia de los Muertos

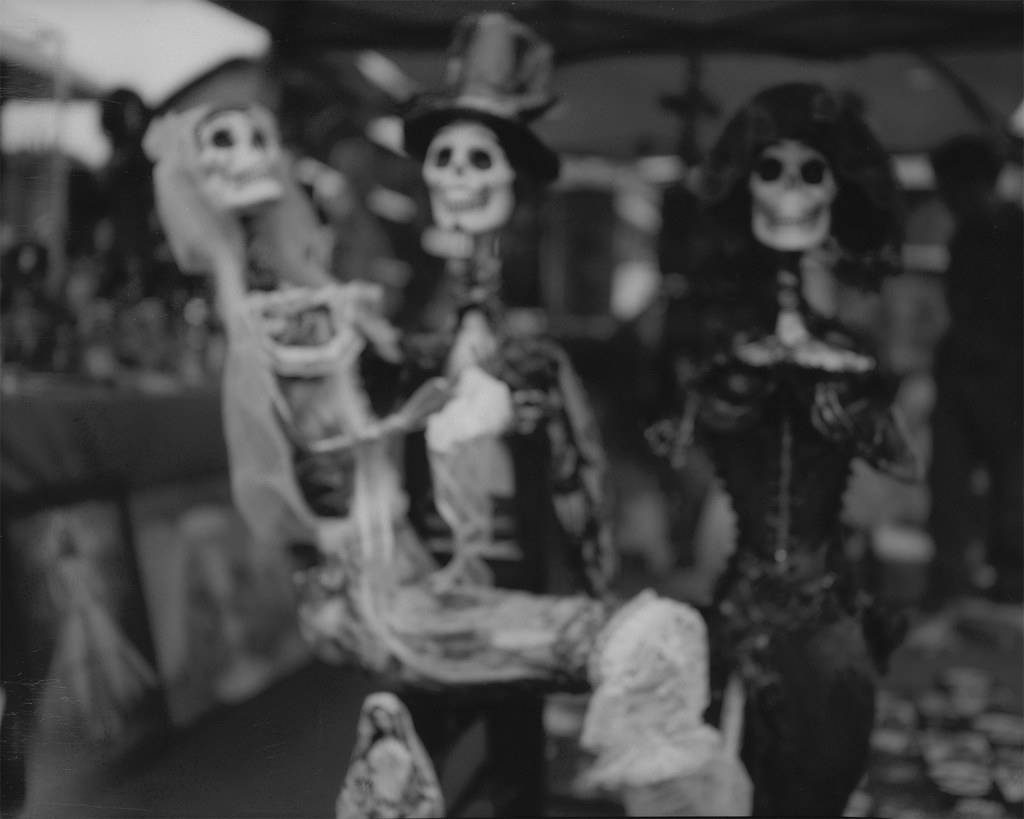
I was carrying my speed graphic around the BIG swap meet here in San Diego, looking for interesting things and people. I came across this boot selling decor for Dia de los Muertos. I snapped a shot on the Kodak x-ray film I had loaded, but I forgot to focus. I think it turns this photo from and interesting image of some small statuary into something a little creepier.

de-los-muertos

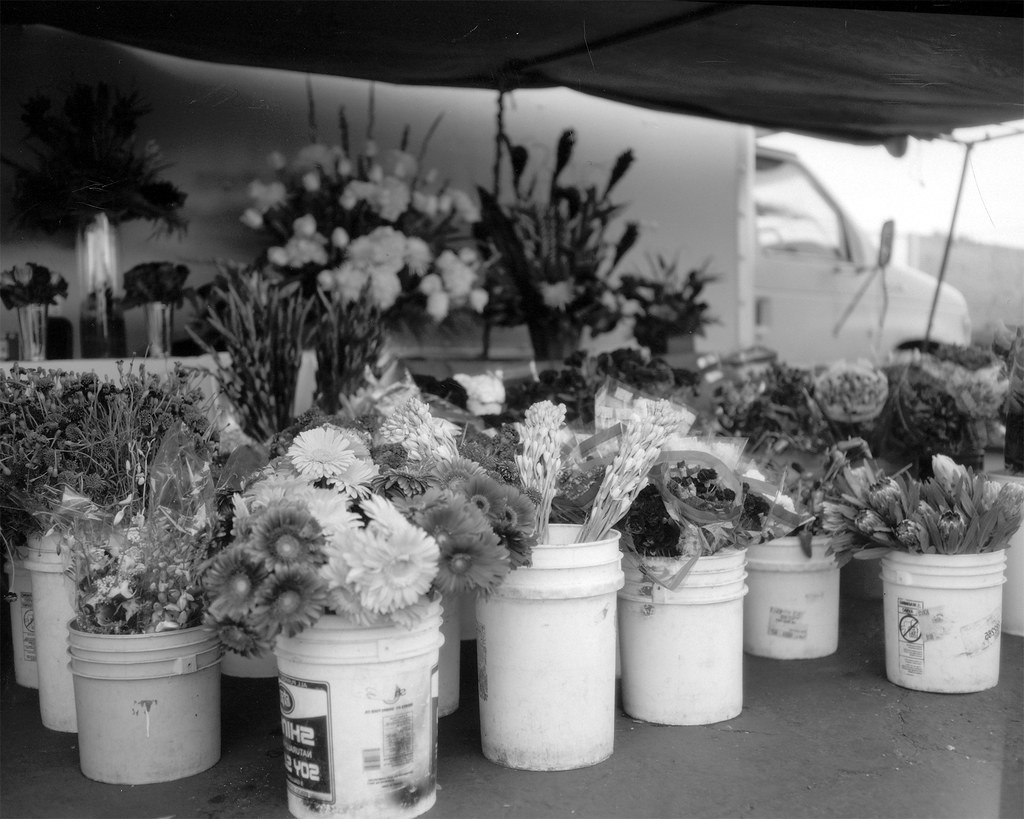
Here is another pic I took a little farther along at a flower vendor. The guy selling the flowers came out of his booth at me and said, "Five dollars a picture!" I laughed and walked away. The people selling at this swap meet are ferocious hagglers and want to gouge every last cent out of you. I thought I would find some nice little film cameras for good prices, but pretty much everything was double its market value. I don't like bickering over money, so I took a pass on buying anything there, but it was fun to walk around and take some "free" photos. I got a couple more for my 100 strangers project which I will post soon.

Flowers

Monday, November 11, 2013

JamesWatson

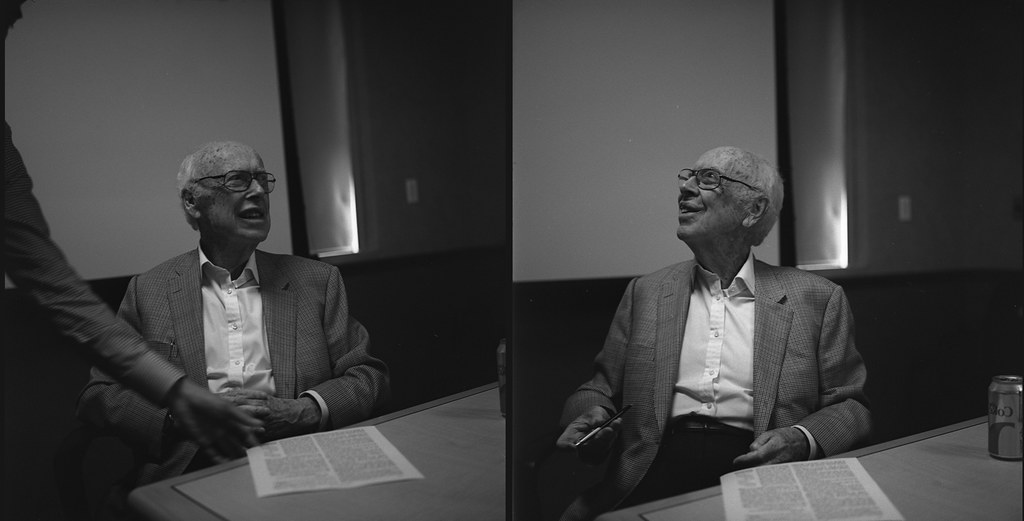
James Waston (co-discoverer of the double helix structure of DNA) came to the company where I work to give a talk about this great scientific discovery. I never read The Double Helix, nor did I really know much about the discovery aside from the names Watson and Crick. He talked for a while about the science and the personalities involved, which was kind of interesting. Then he started sprinkling in personal remarks about some of the other scientists. Not nice or complimentary things, but derogatory things, insulting things, downright mean things. In fact the only scientist he didn't have some disdain for was himself, to whom he directed many very complimentary remarks. At one point or another, he must have insulted everyone in the room of about 150 people. Now I am enough of a realist to know that not everyone is 'personable', especially among the smart sectors of humanity, and he was mostly insulting dead people. But here is when things turned the corner for me. He just finished an attack directed against Republicans and finished by saying rhetorically , "Why should you bother with such hateful people?" Okay, fine. He doesn't like hateful people and is making a wild generalization about Republicans. Whatever. But then in the next 10 minutes he went on to name two or three groups of people he "hates". Yes, he used that word, "hate". So opinions about women, conservatives, vegans, biologists and 'dumb' people aside, he is just logically inconsistent. According to him, we should pay no attention to him because he is a hateful person. I expected more from James Watson.

After the partly shocking, partly disappointing talk he gave, people were lined up out the door and down the hallway to have him sign a book or a paper and get a picture with this bigoted elder statesman. Needless to say, I passed on the signature and the photo-op. I did snap a couple of photos of him just with this blog entry in mind.

I am sorry for James Watson. He obviously has (or had) a brilliant scientific mind. It is sad that it was not coupled with a more kind, compassionate and forgiving spirit.

James Watson

Thursday, November 7, 2013

My Dad's Stuff

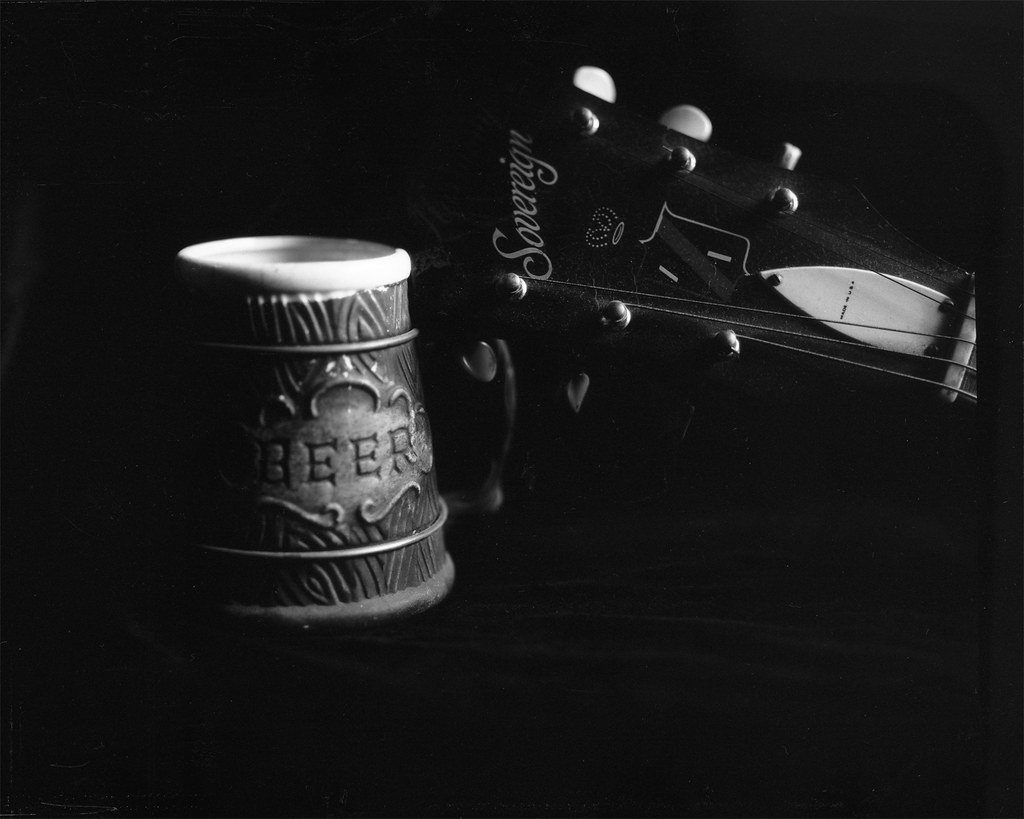
I was looking around the house for things to photograph. I had my still life platform all set, now I just needed something 'still' to put on it. I saw my dad's old Sovereign Harmony sitting in the corner, but that's too big. So I walked around a while and noticed his old "Beer" cup. That would do. But it was lonely just sitting there by itself, so I grabbed the guitar and leaned it up against the stage so at least the head could get in on the act. My dad told me once that he used to actually drink out of that cup until he figured out that it was painted with lead paint. Then he stopped and it became a pencil holder in the kitchen for as long as I can remember. The guitar was also a fixture and I can still hear him singing sad songs and strumming away. Dad's been gone almost 11 years now, so memories will have to do.

"Hear that lonesome whippoorwill,
He sounds too blue to fly.
The midnight train is whining low.
I'm so lonesome I could cry."


Dads stuff

Thursday, October 24, 2013

A Cyanotype Miracle

I believe that miracles really happen. In spite of the title, this is not one of them, but the word is apt in a figurative sense to describe the improbability of what happened with these two prints. Allow me to start at the beginning.

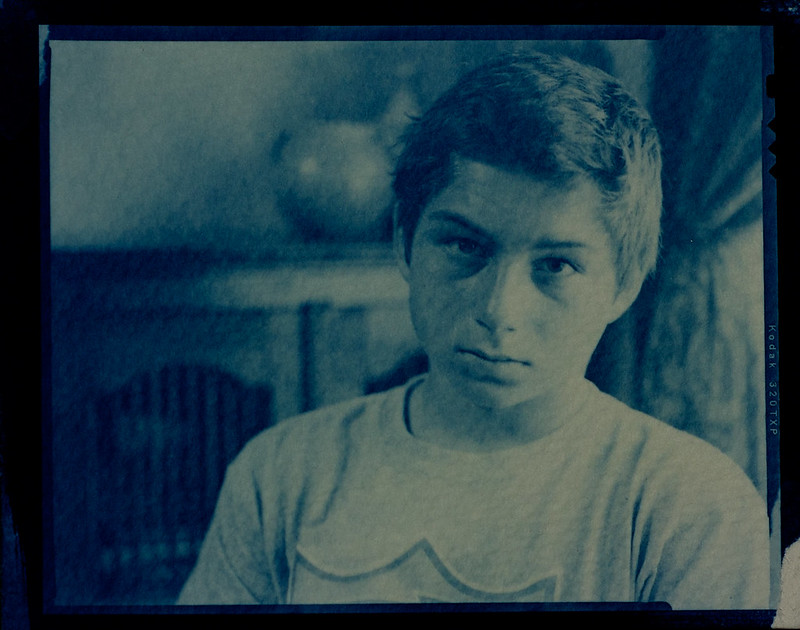
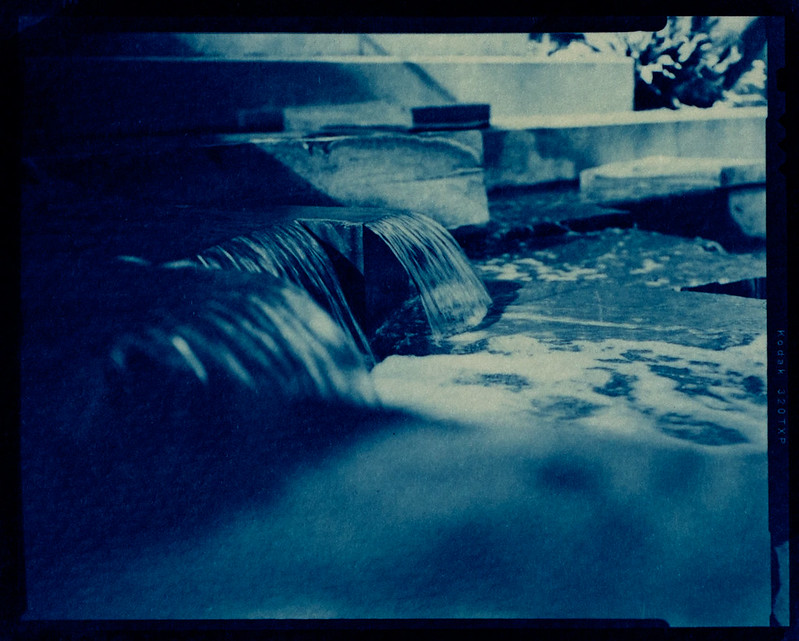
I went downtown to the art supply store here in San Diego. I wanted to buy a pad of hot press watercolor paper to make some cyanotypes with. Well, either they don't make hot press in pads, or this store doesn't carry them, or both. So I ended up getting a small pad of Strathmore 400 cold press. It just says "heavy weight", but feels like 140#. One sheet (5.5x8.5 in) is just the right size for 2 4x5 negatives. So I cut it in half and coated it up with my traditional cyanotype solutions which are a year or more old, but still kicking. I left it in the dark over night to dry. The next day, I put everything in my contact printing frame and set it out for a good 7 minutes. That seemed like an adequate amount of time because I am used to using waxed paper negatives which transmit UV light much better than the plastic used in film. Needless to say, when I washed the prints (in dilute white vinegar) there was not much of an image there. The borders were dark, but the image area was very faint. I probably needed around 20 minutes. I set them aside until I could decide what to do. It was too bad I didn't have color separated negs for these photos, because this would be a great start for a tri-color gum print. But I just had the one negative for each image.

So I decided after they were dry, I would re-coat with the cyanotype solution, register the negatives over the existing image and try to print them again. This is where the miracles start happening. Usually, watercolor paper will shrink if you soak it in water then dry it. This paper didn't, at least not noticeably. In fact the negatives seemed to register perfectly over the previous image. I had to just register the edges since I couldn't really see any of the image through the negative. The next day it was completely overcast. I didn't even bother putting the printing frame outside. It was too dark by the time I got home. The next day, I knew I had to do something because the cyanotype was going to start fogging if I just left it unexposed in the printing frame. So when I saw the clouds start to clear at work, I called home and had my wonderful bride put the printing frame outside. It was still sort of cloudy, so I told her to leave it for an hour then bring it in. Then suddenly the clouds broke and the sun was out! We exchanged a couple of text messages and I figured the whole thing was a wash. There was no way to tell how much UV exposure it had, and I would just start over on the back sides of the prints. I came home and took a peek under one of the negatives and it wasn't completely dark, so I figured what the heck. I did the same vinegar wash as before and cleared it in fresh tap water. What came out was about the best cyanotypes I think I have ever made. The tonal scale is nice and long (for a cyanotype), the edges are clear, just the whole thing came out about as good as I could have wished. So through two printings of some unknowable exposure combined with sitting out for a couple of days in the air, I got a couple of beautiful prints. I can not explain how it happened, and I will never be able to reproduce the process. Anyway, here they are.

Artyom-Cyanotype

Water

Monday, October 21, 2013

Moving Pictures

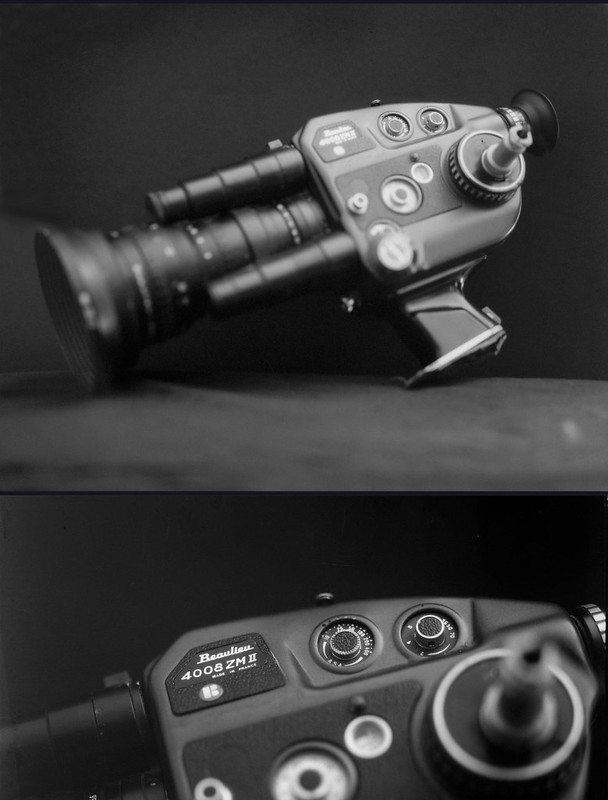
I have always liked the look of film. Even when our first child was born in 1997, I didn't rush out and buy a 'video' camera. I did some research and bought a mid-70's model French made Super-8 movie camera. It is the Beaulieu 4008 ZM II.

Beaulieu Diptych I really disliked the aesthetic of the 'handicam' and don't get me started on the quality of the images and sound. The ultra sharp/contrasty quality along with the ghosting and interleaving effects common in consumer video recorders of that time just left me cold. I did eventually buy one at the urging of my wife who wanted sound and more immediate results, but I still love my Super-8 movies. Recently I had them telecined and burned to a dvd. The shop didn't do a very good job of it, but at least I can share them now without forcing people to sit in front of my movie screen in my living room. Besides, the belt in my projector broke :(

Here is a small sample of what you get with Super-8 film. This happens to be the venerated Kodachrome which is no longer produced or processed. The scene is at the La Brea Tar Pits near Los Angeles. Our (then) young son was about 5 and walking through a quiet museum for a number of hours was about all his energetic little body could take. Once we got outside, he found an open space and cut loose!

Sunday, October 20, 2013

Diffraction

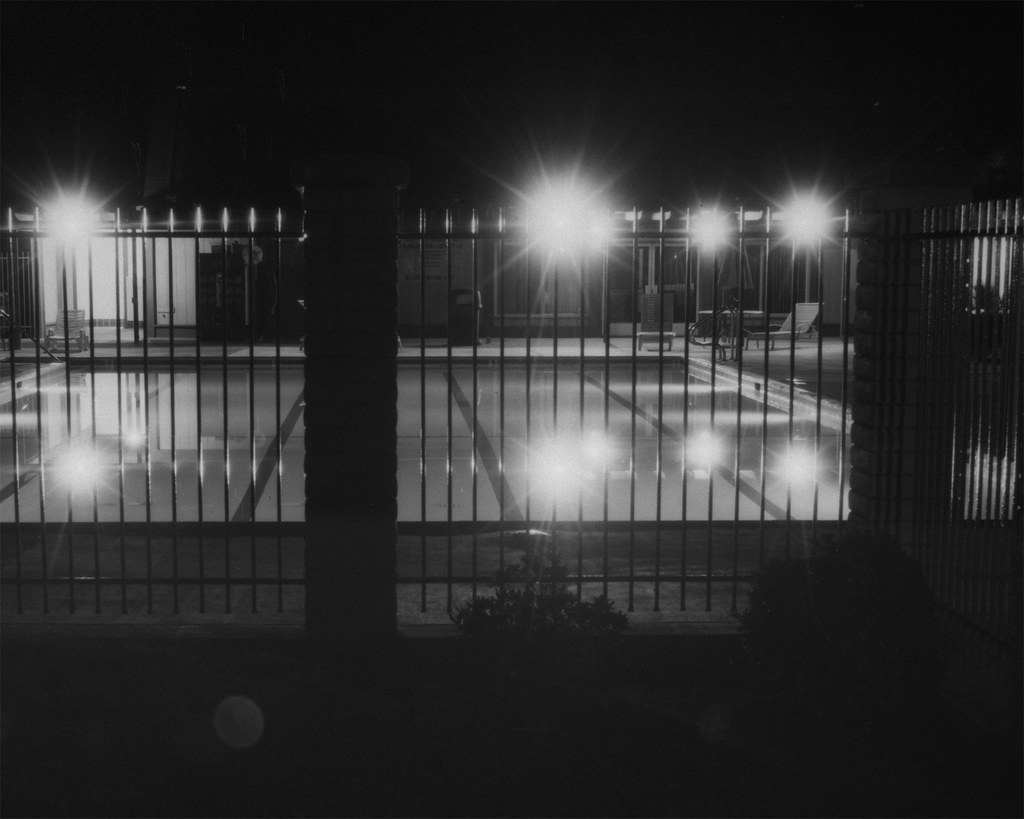
I generally stay away from the higher (smaller) apertures on most of my lenses. Why? Diffraction. This happens when the light has to pass through a small opening. It tends to scatter and your photos will be less sharp. It gets noticeable above say f/11 or so. Also , those small apertures cut the amount of light hitting your film, so unless you are shooting high speed film (or pushing your film higher than its 'box speed') the shutter speeds get long-ish. So when I walked out to the pool the other night I was planning on shooting my lens wide open even though my camera was mounted on a tripod. But when I got out there and saw the light and realized I was looking at a very high contrast scene that might be a little boring, I decided to close down the lens to f/32. I spot metered the water in the pool and came up with a 2 minute exposure time. I wasn't sure if the x-ray film I had loaded in the Speed Graphic would have the latitude to compensate for any reciprocity failure, but I decided just to shoot at the metered value and see what I got. The pool isn't going anywhere and I can re-shoot this scene any night of the week. What I was hoping for with that small aperture was to see some diffraction of the bright lights to give the composition a little 'umph'. Most lenses will also make stars out of points of light at small apertures because of the imperfection of the circle made by the aperture mechanism. I like how this photo came out. It looks pretty much the way I saw it in my head. It's not deeply meaningful or poignant, but kind of a cool night shot of something I see every day.

Night Pool

Monday, October 14, 2013

1/100 Strangers

So I decided to embark on the 100 Strangers Challenge. It is a pretty simple concept. Take a portrait of 100 strangers. That's it. Okay, it's a little more involved than that, but not much. The idea is to take portraits, not candids from 200ft away with a telephoto lens. It is designed to improve two things; your portrait photos and your ability to connect with your models. I am personally terrible at connecting with my subjects. I am on the far end of the introversion scale and striking up a conversation with a complete stranger has a very high threshold energy for me. Making a request is even harder. So I need to improve and that means practice.

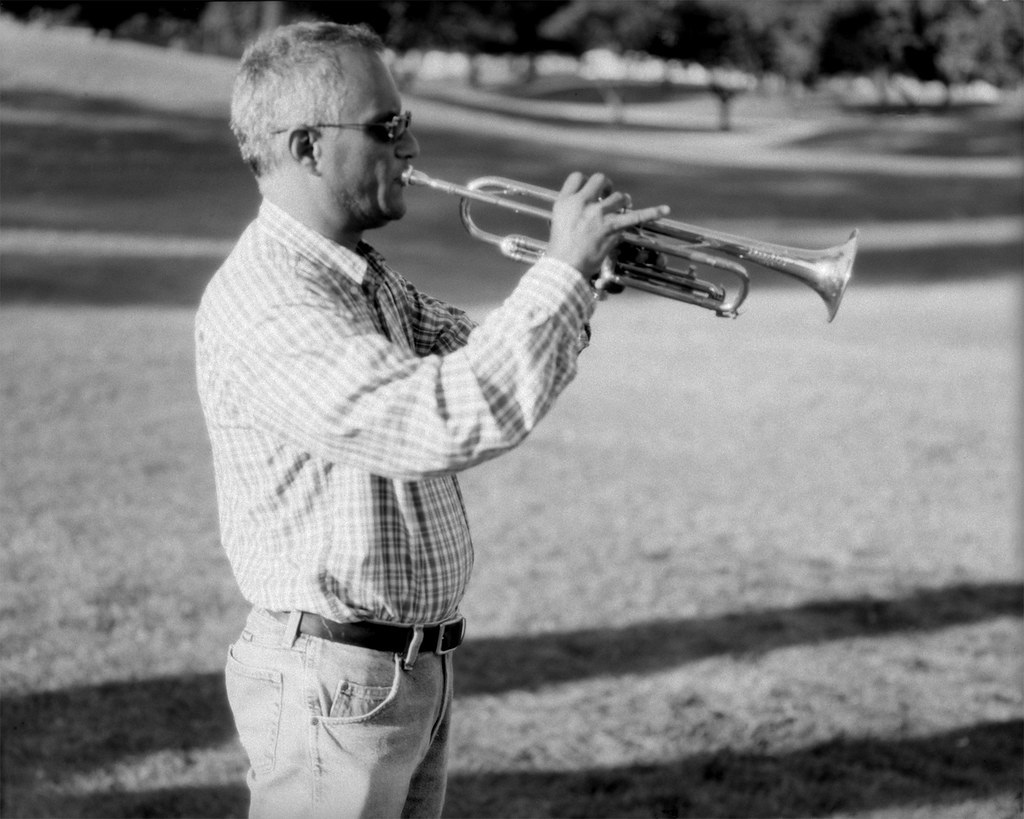
I drive past a high school in my neighborhood almost every day. For the last month or more, I have noticed a school bus parked out on the street, presumably waiting for athletes or some other group that is at school late. Inside the bus, the driver is waiting, but not just waiting, practicing. He is playing a trumpet... every time I drive by. So I thought that this guy would be a good first subject. He was already inspiring me with his dedication to his art.

I pulled over and carried my Speed Graphic over to the open bus door and explained that I drove by each day and asked him what kind of music he was playing. We talked for a short time and I explained that I would like to take his photo. He agreed and said that he wanted to do it out on the grass. I thought it would be a great shot inside the bus, but he was clearly uncomfortable with that, so I didn't press it. Anyway, here it is. Unfortunately, I think I over-developed it, so it is quite grainy. I don't know, sometimes that grows on me. I will have to look at this one a few more times.

This is my first stranger.

100 Strangers 1/100 - Roberto

Thursday, October 10, 2013

The Front Standard

I am kind of going by intuition here, so if anyone sees me going completely off track, let me know.

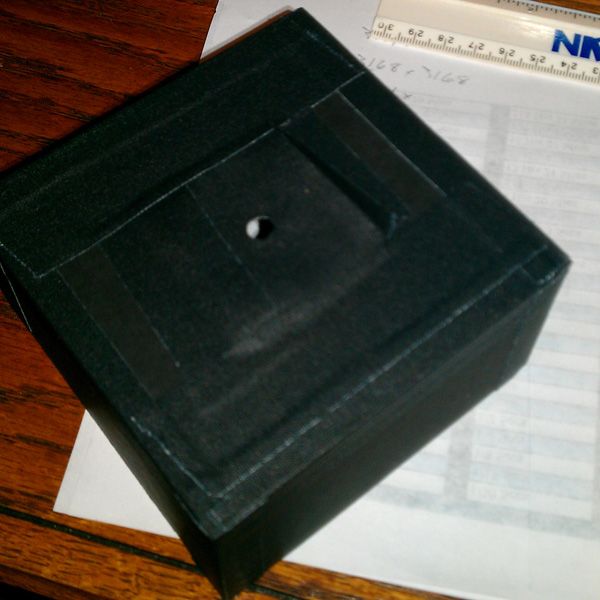
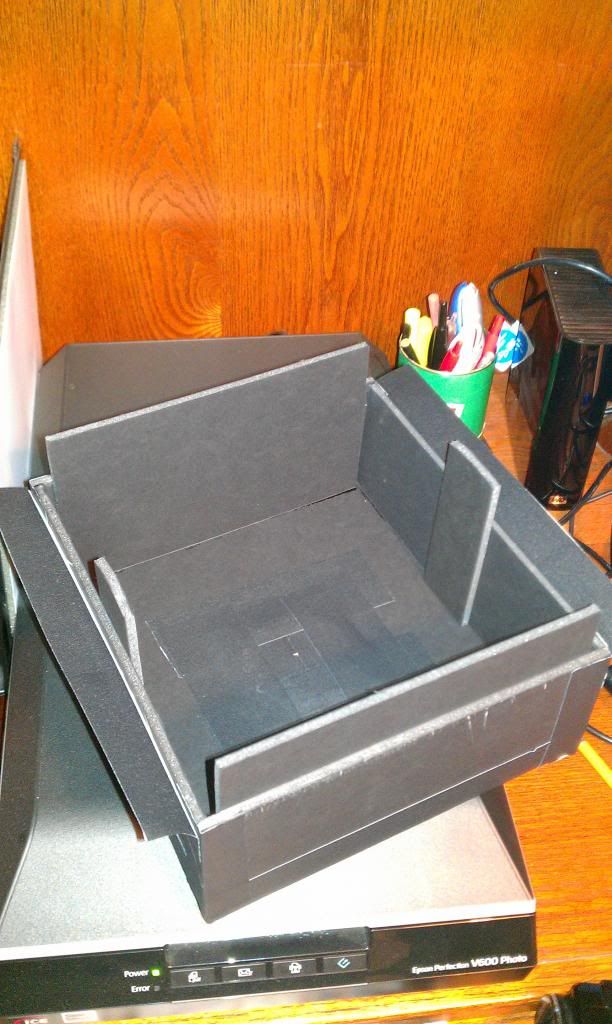
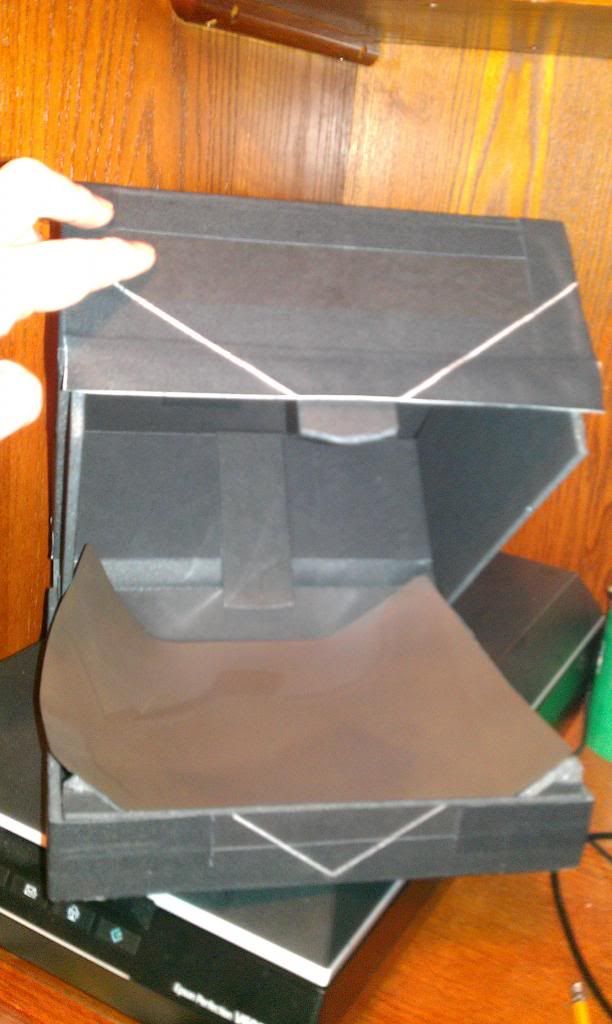
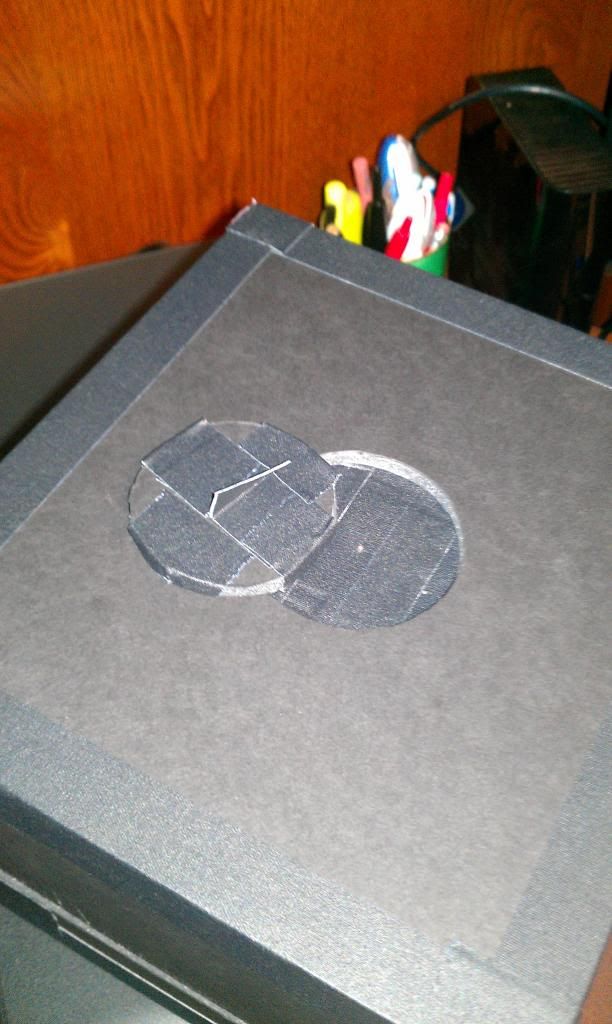
I finished taping up the joints on the front standard and devised a pocket for the pinholes to slide into (also with gaffer's tape). I generally use gaffer's tape to "mount" the pinholes which I got from Earl over at f295.org. The holes come as 3mm disks with the hole in the center, so I tape around them. You can see better below than I can explain here.

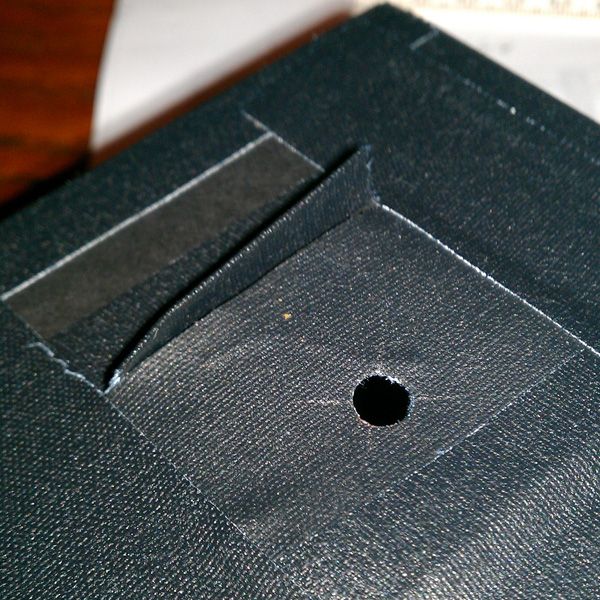
Front standard with pocket photo IMAG0346_zpsd8532fe1.jpgSo I started with the standard with a big-ish hole so that the edges of the foam core don't interfere with the light transmission to the outer edges of the image. I folded a piece of gaffer's tape in half and punched a hole in it using a regular paper hole punch. That got taped over the hole in the front of the standard. This pic is blurry, but I think you can make out what is going on there.

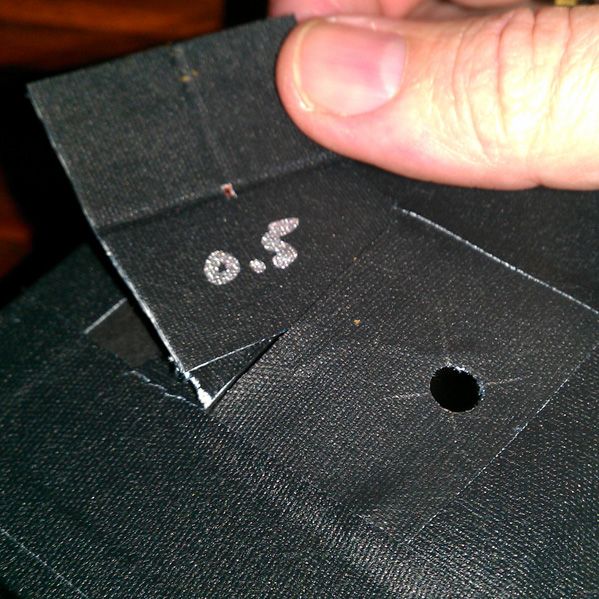
Front pocket photo IMAG0347_zps98513509.jpgI made a flap where the pinholes slide into the pocket so that I don't get light leaks behind the pinhole.

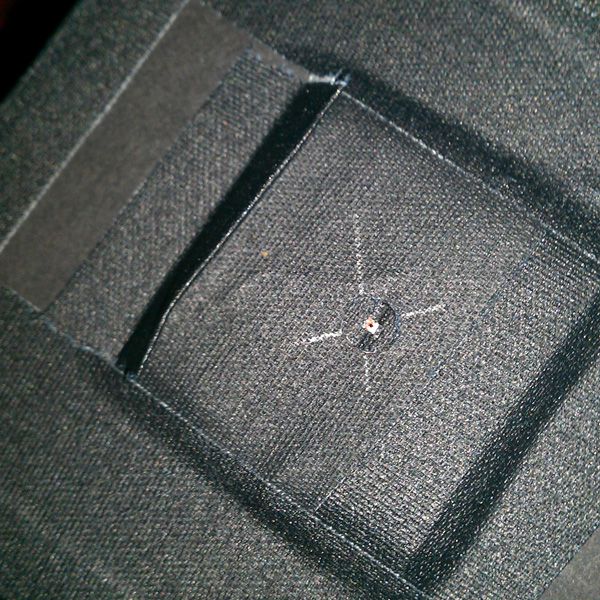
Inserting pinhole photo IMAG0348_zpsd3c9db8f.jpgThe pinhole is mounted in a 'standard' (for me) square of gaffer's tape, so that all of my pinholes look the same except that the diameter is written on the tape. So these now slide behind the smaller hole piece.

pinhole inserted photo IMAG0349_zps653c4dae.jpgSo this is what it looks like with the pinhole inserted. The flap sticks out a bit, so it might even make a small rudimentary lens hood for mid-day shots!

Wednesday, October 9, 2013

Going For It

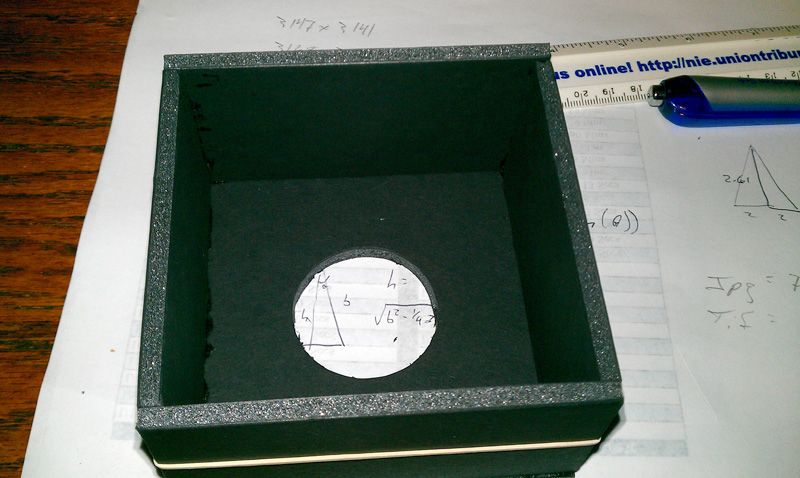
Ok, enough thought and practice. I am going to make the 8x10 pinhole that I want, not the one I think I can build in a weekend. This is going to have interchangeable pinholes and adjustable focal lengths. It will use a bag bellows with incorporated 'sleeves' for changing film (like a changing bag).

Here is step one. The front standard.
 photo IMAG0345_zps3fbd0f5c.jpg.

It is 4"x4"x2" (10x10x5cm). Stay tuned for step 2!

Sunday, October 6, 2013

Flawed Mod

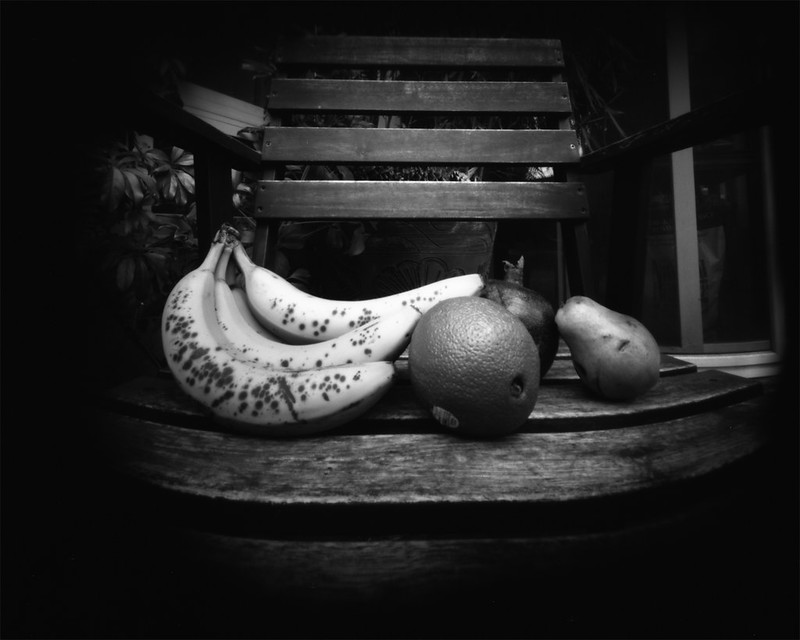
If you were fortunate enough to read my scintillating previous post about the pinhole camera, you probably finished it scratching your head, thinking... "Why would he shorten the focal length to get more coverage on his film?" The truth is that I was doing the same thing. It didn't make sense intuitively. If the pinhole is closer to the film, that should just make the image smaller. How would that effect the area of coverage? The answer is this... it actually doesn't make the image smaller, but it does change the magnification. It is the same effect of changing from a 50mm lens on your 35mm SLR to a 28mm lens. Things get smaller but the image stays the same size (36x24mm). This is done through the magic of optics. The glass lens elements manipulate the light path so that you can change focal length and aperture and not change the size of the projected image circle. I don't have any glass lens elements on this camera though. So changing from 115mm focal length to 81mm focal length has the effect of reducing the magnification of the scene, and if the image circle of the pinhole is big enough to cover the size of film you are using, all is copacetic. However, in my case I also changed the size of the pinhole from 0.5mm to 0.4mm, a gigantic 20% decrease! Guess what. When you reduce the size of the pinhole, you reduce the size of your image circle! So now I have an 8x10 pinhole that has an image circle big enough to cover a 4x5 piece of film. Seriously, I kept thinking to myself, "you shouldn't cut that camera down... just make another back for it." and now that is what I will be doing. I will need to calculate the right distance to cover my curved 8x10 (~126°).

For your viewing pleasure, here is a crappy still life I took after cutting down the camera. Back to the drawing board.
Fruit

Saturday, October 5, 2013

New 8x10 Design

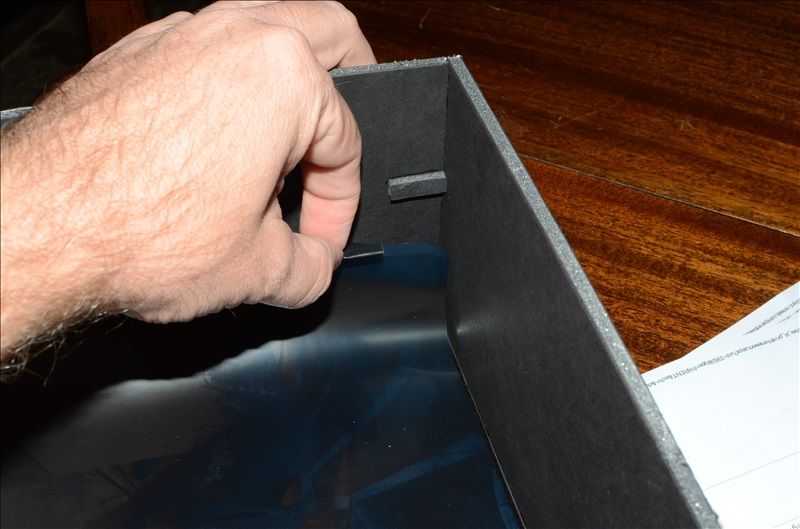
So, the last foamcore pinhole camera was a lesson in light leaks. I tried a number of things, but the fact is that hand-cut foamcore is never going to form a light-tight butt joint. So the way I designed the two parts of the box did not have enough overlap all the way around to keep the light out. The other thing I learned was that I did not really need anything to keep the film in a curved plane. The dimensions of the box were such that the film naturally lay in a curved shape.

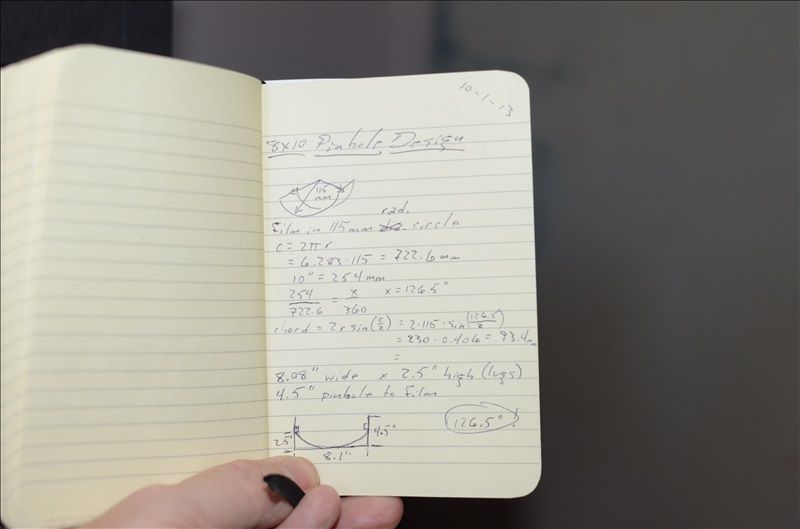
So I decided to make another 8x10 pinhole camera with these things in mind. This first picture is just for the youngsters out there (like my oldest son) who think, "I'm never going to use geometry in real life! Why do I have to take it in school!??". I probably thought that same thing in high school, but here I am in my mid 40's with a hobby that demands the use of math on an almost daily basis. I couldn't have predicted that I would ever want to build a curved plane camera, but had I not been diligent in my math classes, I couldn't; 1.) build this camera, or 2.) help said son with his math assignments. Stick with the math people. It is an investment that will pay dividends later.
 photo DSC_5488_zps1def0cdc.jpgHere is my Moleskine with design calculations.

The construction is simple, so I won't spend a lot of time explaining cutting, gluing and taping foamcore other than to say that you should use a 'fresh' x-acto blade when you start. The foamcore will shred if the blade is not razor sharp, making joinery difficult.

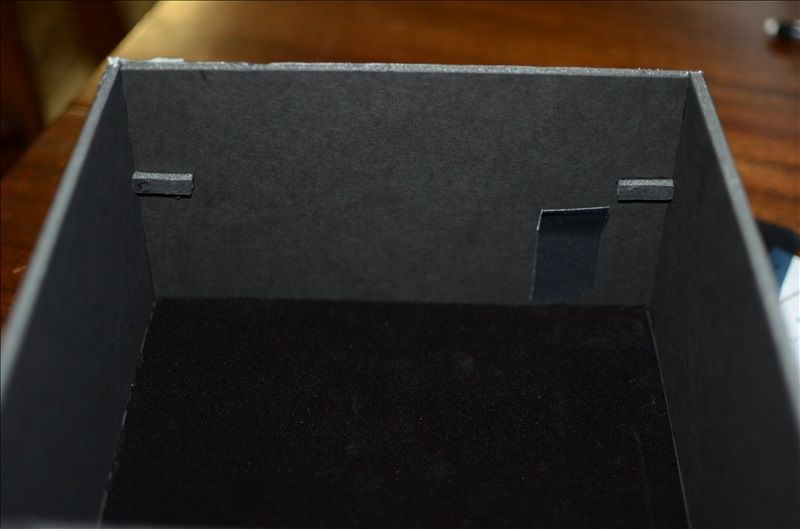
 photo DSC_5479_zpsc6550fdc.jpgHere is the inside of the 'back' of the camera. Note the "lugs" and the flap of gaffer's tape.

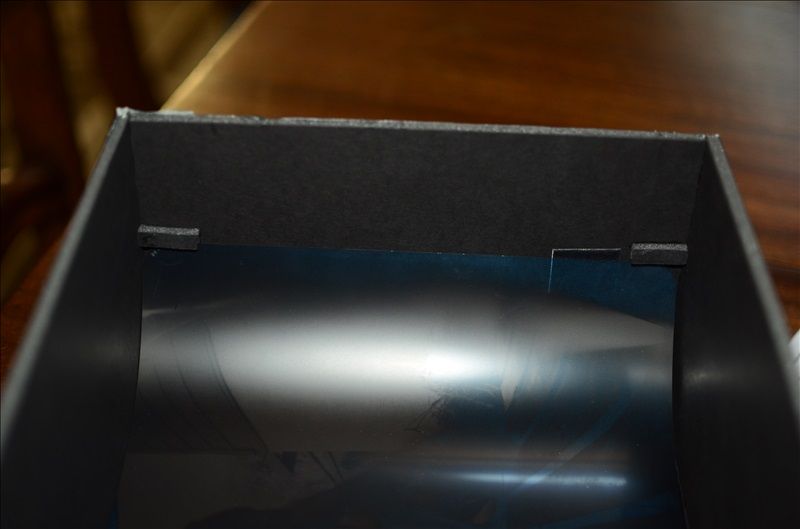
 photo DSC_5480_zpse890df5d.jpgThe film sits under the lugs, keeping it in place and centered and curved to the right arc.

 photo DSC_5481_zpsc296874c.jpgThe flap of tape allows me to pull the edge of the film away from the side of the camera. Otherwise, it is difficult to get the film out of the camera without scratching the emulsion.

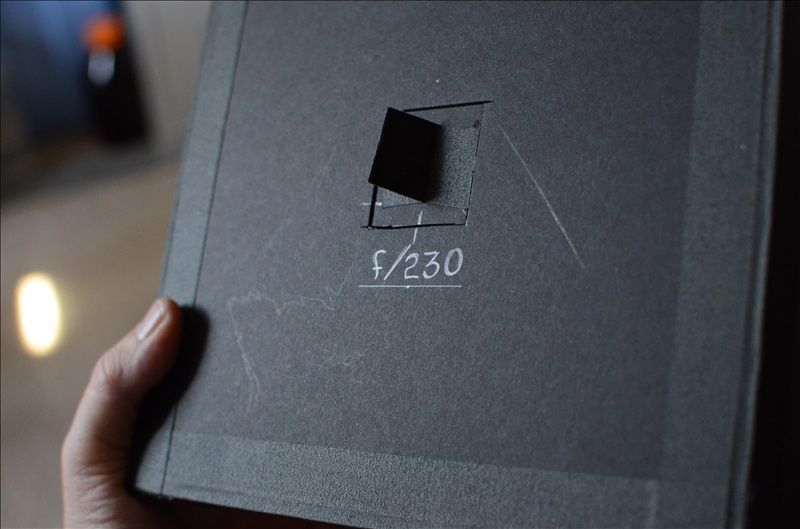
 photo DSC_5485_zpsf0eafea1.jpgThe front of the camera is simpler. Just a box 2" deep that fits over the opening of the camera back. It fits snugly, so no need for more light sealing. The shutter is again a simple 'drain plug' type since exposures are consistently in the >10s range. The focal length (I know it isn't the right term, but everyone knows what I mean) is 115mm, the pinhole is 0.5mm, the effective aperture is f/230 and the field of view is about 109°.

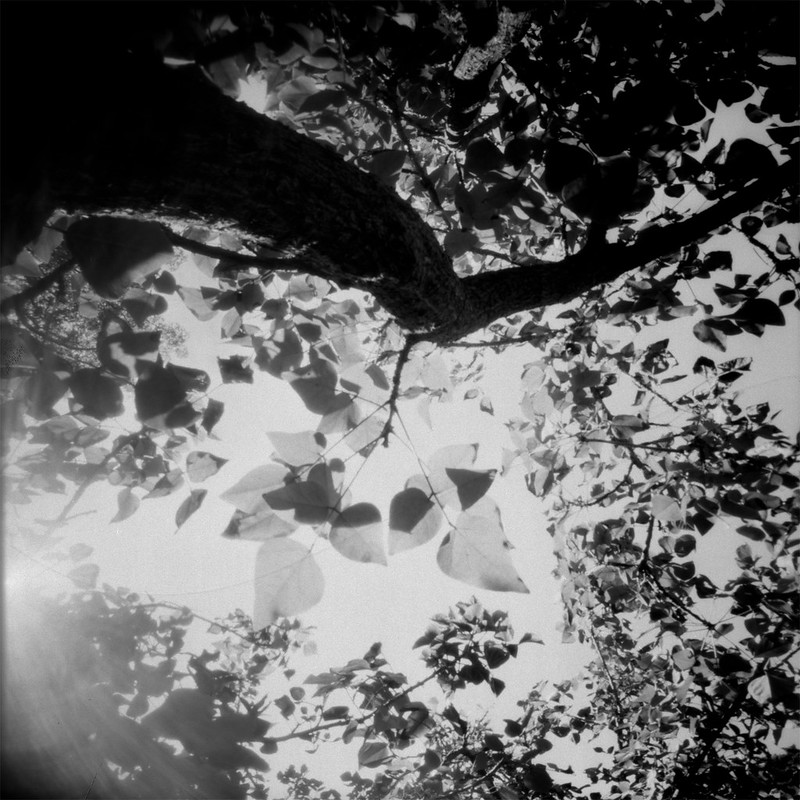
Coral TreeHere is the first shot with this camera. The field of view doesn't quite cover the film, so I cropped it square. This can be remedied by shortening the focal length to about 82mm which should be pretty easy to do. I probably would also need to change to a .4mm pinhole in that case. This picture was made by wedging the camera into a tree. This pointed the pinhole to the sky which is a problem for this x-ray film (blown highlights) it also caught the sun, which I couldn't really tell since the camera was above my head. That accounts for the characteristic pinhole flare. BUT! there are no light leaks that I can see and so I think that this camera with a little modification will be a nice addition to the toolbox. I may even take it to the wedding I am shooting next month. Leave your questions or comments here or on the forum that brought you here. I am glad to answer.

Sunday, September 29, 2013

Toned Cyanotype

I have been wanting to try this for a while and this weekend I finally had some time to read up and give it a go. I had bought some wine tannin a while back since tannin is the primary component in tea that is responsible for toning cyanotypes. With the powdered tannin I can skip the brewing step and be a little more quantitative/reproducible about the process. So what did I do?

The image I used was from a while back. It is a 4x5 negative on x-ray film. For details of that image, look here. The cyanotype sensitizer I used was the traditional formula (not the Ware formula) and I have to admit it has been sitting in my photo box for probably a year or more. That is a testimony to the longevity of those solutions and the archival quality of the prints. The paper is Arches 90# hot press watercolor paper (love that stuff). The exposure was 6 minutes (probably should have done 8) in the waning autumnal sun (5:00pm in San Diego). The first bath was about 1:4 white vinegar:tap water. That was intended to extend the tonal range and I think it worked pretty well. Look at the bellows on the camera and you can see quite a few grays in there. Also, the blacks are 'just black' and not too blocky. This might be lost on the computer monitor, but the print is quite nice. The highlights are blown because I under-exposed the print, but that can be remedied next time. Then I washed in lots of plain water until the highlights cleared and were the same color as the borders of the paper. I then did another quick bath in dilute hydrogen peroxide to fully develop the iron. This can be done by drying the print and just waiting a few days, but I am impatient. Another plain water wash and it was time to tone.

I mixed ½ tsp washing soda in 500mL of distilled water.
I mixed 1 tsp wine tannin in 500mL of distilled water.

Starting with the soda bath, I alternated soda... water... tannin... water... for about 30 sec each until it started looking the way and the color I thought I wanted. Here is what I ended up with.

Voigtlander toned cyanotype

Saturday, September 28, 2013

Blurry Self Portrait

I recently saw a post over on FilmWasters.com where the author/artist posted a whole roll of photos where he admittedly
... made quite a few mistakes with focusing and exposure.
I thought this was quite bold to post publicly some shots that are not one's very best. It makes you artistically vulnerable. Now, granted the FilmWasters community is warm and welcoming and humble; very unlikely to tear apart a fellow 'filmy'. But even at that, I thought it was a really good post. They were putting themselves out there in hopes that they could educate or inform someone. Now here is the 'weird' thing. I actually liked the photos! They were blurry, but still picturesque. They were taken on expired color film, so the color and contrast were shifted slightly which lent more to the painterly qualities.

So I am taking heart from this person and have decided to post a photo of mine that did not turn out the way I expected (or wanted). I was going to just bin it, but after thinking about it for a few days, I am posting it here.

Not Looking

I took this self portrait with my Speed Graphic. Of course there is no 'auto focus' so I had the task of figuring out how to focus on myself. The short answer is that without some elaborate setup with mirrors and magnifiers and perhaps some technology on load from the NSA, I can't. The best I could do was to focus on the back of the chair I was going to sit in and then turn the focus knob back just a bit. Then I stopped the lens down to f/8. This gave me a 1/5 sec exposure which is about as long as I thought I could reliably hold still. Then I loaded the film, attached a long cable release, sat down and tried to visualize where the plane of focus was. "CLICK" Now to the darkroom to see my masterpiece! WHAT!!?? Out of focus!! Well, I'll toss it and try again later. But not this time. I am going out on an artistic branch and posting this photo on Flickr and here. Let's see what the fates bring to this mistake.

Friday, September 27, 2013

Pushing Through X

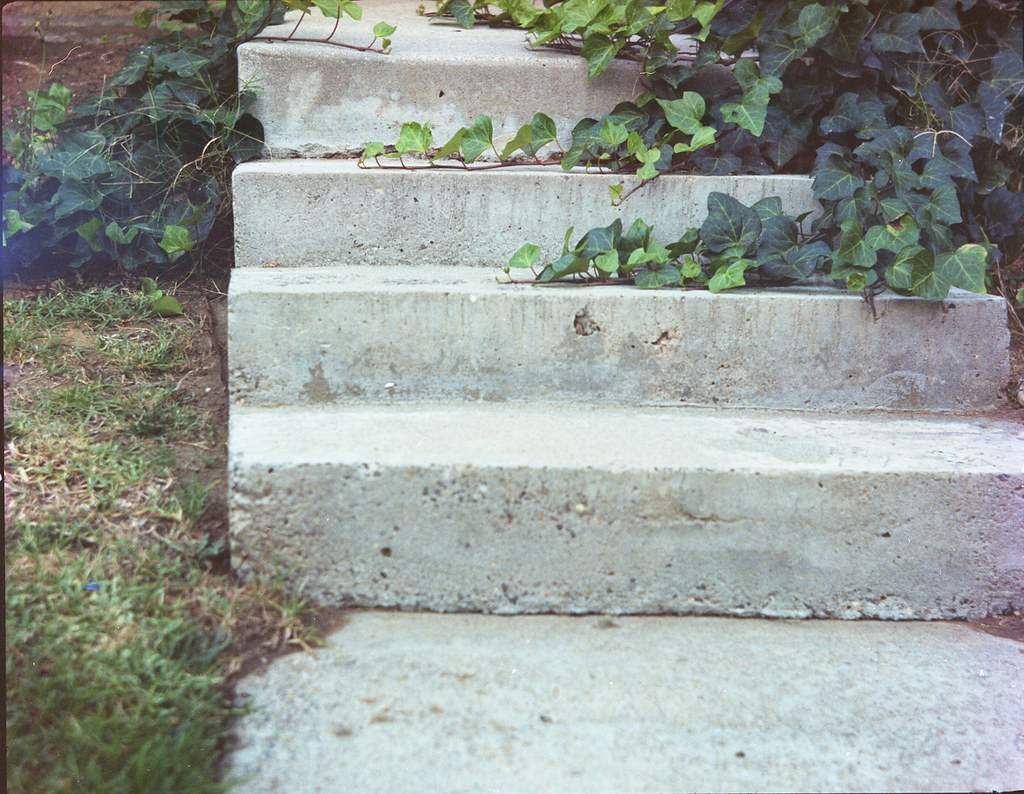
I found this photo on a roll that had been sitting in the refrigerator for a few weeks. I took it with my 1939 Voigtländer Bessa. I had the accessory mask inserted so instead of taking eight 6x9 photos, I got sixteen 6x4.5 photos. It is interesting to have these two options with this camera. Not only do you double the number of exposures on a 120 roll (at the expense of image size), but you get a different aspect ratio. The 6x9 aspect ratio is 2:3 and the 6x4.5 (commonly "645") ratio is 3:4. Of course the closer the ratio gets to 1, the more 'square-ish' the image. So something like 6x12 or 6x17 are really panoramic images while large format 4x5 (8x10) look quite square in comparison. Of course the standard 120 format is 6x6 which is a perfect square, but the 6x7 cameras are very popular too.
But I digress...
pushing through X
This plant isn't so much "Pushing Through" as much as "Taking Over". If you have ever tried to clear ivy, you will know that it can penetrate masonry and concrete easily with its little rootlets. This makes it quite invasive and difficult to control. One might even think of it as a pest, but not me. I find it beautiful in both appearance as well as principle. It does not 'care' what barriers man erects. Even the most permanent of monuments are merely a stairway to brighter sunlight for this survivor. Next time you walk by a building with ivy growing up the sides, stop and take a moment to appreciate the ingenuity of this plant which uses the barriers raised against it to mount up to the heavens and thrive all the more. I think there is a lesson in there for all of us.

Wednesday, September 25, 2013

Ornamental Shrubbery

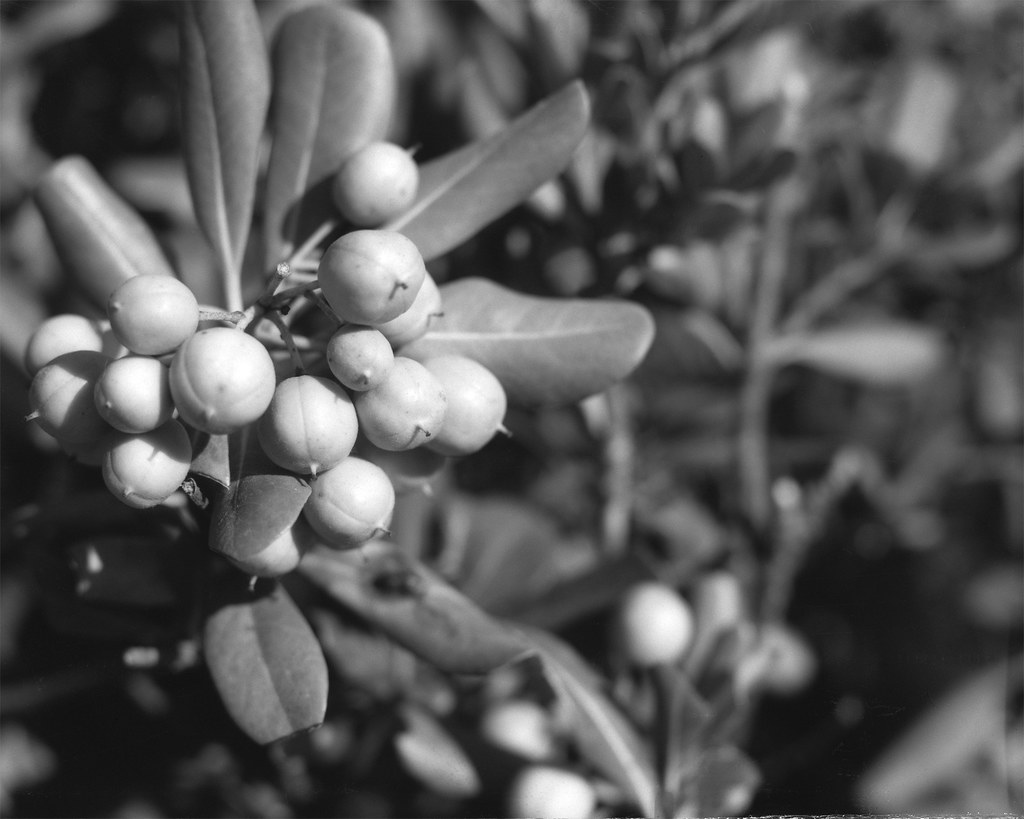
Berries
I took this photo with my '51 Graflex Speed Graphic camera. I was walking around with it hand-held, which I don't do very much because it is heavy and my eyes aren't always good enough to use the range finder effectively. So usually, I tripod up and focus on the ground glass. This day though, was bright and the sun was just starting to get a little angular, so the shadows were good, but there was still enough light to see the overlapping images in the range finder. I shot this at f/8 x 1/200 sec on Kodak CSG x-ray film rated at iso 80. I developed the film in Adox Adonal (Rodinal) 1+100 for 4.5 min in a Patterson tank with a MOD 54 film holder. I scanned the negative at 2400 dpi with an Epson V600, taking two passes and stitching the two scans in Photoshop.

WHAT!!?? 2400 dpi?? Yes, I had the scanner set that way because I had been scanning some 6x6 photos from an engagement shoot I did earlier in the week. I didn't notice until I saw how long the first scan was taking and by then, I thought what the heck, just let it go at 2400. When you scan a 4x5 negative at 2400 dpi, you get about 115 megapixels. That is a huge image and really unnecessary unless you are doing billboard work. But I had it anyway and didn't feel like tossing it and re-scanning (note to self: next time toss it and re-scan it). The problem with such an enormous image comes when you go to load it up in Photoshop to do some dust spotting with the healing tool. At 2400 dpi every single microscopic spec of dust is visible (note my screen resolution is only 1366x768) and with a 15px brush, that takes a LOOOOOONG time to go over and click each speck and hair. Save yourself some trouble and scan at 800 or 1200 dpi for normal sized prints.

The very cool thing about these berries is that they are now just sort of yellowish green, but once "winter" comes to San Diego and things get really dry, they turn bright yellow and they pop open along the seams. Inside is sort of a shiny, creamy white with three bright red seeds inside. It is really beautiful. I will try to get some photos this year and post them here to follow this up.

Anyway, I hope you enjoy the photo. I think it came out well.

Monday, September 23, 2013

Pushing Through IX

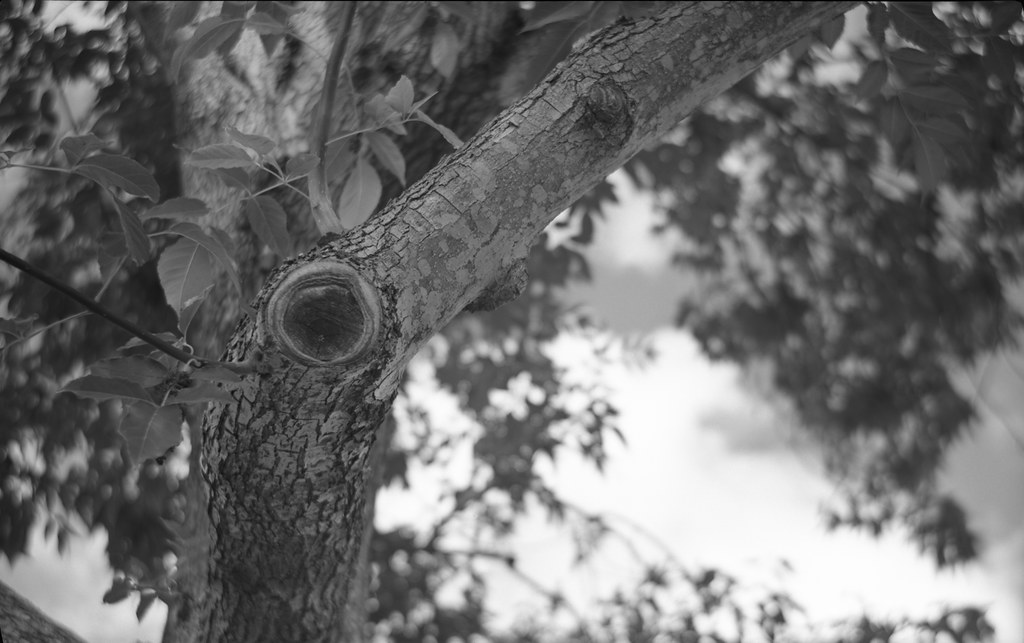
This is a little bit of a departure from the theme of the first 8 in this series, but I think that it is well within the overall theme of plants defying man's attempts to control them. In this case, the landscapers have pruned back a branch on a tree. The tree's response? Re-grow that branch of course (sprouting from the lower left of the scar). After all it was there for a reason.
I took this photo with my '39 Voigtländer Bessa 6x9. I had it loaded with one of my favorite films, Fuji Neopan Acros 100. I also was holding a deep yellow filter in front of the lens (there is no way to mount a filter on the front of this lens). I think the filter helped with contrast and with distinguishing the sky and clouds in the background.
See the rest of this series HERE. Pushing Through IX

Monday, September 16, 2013

New 8x10 Pinhole

So I decided to make another pinhole camera. For this one I had contact printing in mind. That meant BIGGER NEGATIVES! So I have a box of 8x10 sheets of Kodak CSG x-ray film in the freezer that I have been cutting down to 4x5 for the Speed Graphic. Why not burn through some of that cheap stuff and have some fun along the way? I also happened to have some left over black foam core from my previous 6x12cm pinhole camera. So I went to the drawing board (literally) and sketched out some ideas. I like the curved film plane, but this time I thought I would keep a constant distance to the pinhole instead of the constant f-stop of the 6x12cm. I went and downloaded Pinhole Designer to do the calculations for me. That is a really great program and I highly recommend it to anyone interested in making a pinhole camera. I found the optimal pinhole size and it also gave me the right angle of view so that I could make the curved plane the right radius. I came up with a 115mm film distance with a 0.5mm pinhole. That makes an f/230 camera with a field of view around 109°. Here are some crappy phone digipics of the camera as it is today.
This is the back where the film sits. There are four stand-offs in the corners to make it curve upward on the ends. You can see too that I put some camera flocking material in the back since x-ray film doesn't have an anti-halation layer and the foam core is not perfectly flat black.

 photo CameraBack_zpsbe3552ed.jpg

Here is the same piece with a sheet of film in it.

 photo CameraBackwithFilm_zps400f7b43.jpg

Here is the front of the camera. There are two stand-offs that hold the center of the film's long edges down against the back of the camera, keeping the curve 'curvy'. The other pieces on the short ends are light traps that just slide down inside of the back. They also create friction that keeps the whole thing together without rubber bands.

 photo CameraFront_zpsccb2ed78.jpg

And here it is going together.

 photo CameraFittingTogether_zpsbf6c006b.jpg

Finally, I just used a 'drain plug' style of shutter. The exposures for this f/230 camera are long enough, especially with iso 80 x-ray film, that I don't need anything mechanical or spring loaded.

 photo CameraShutter_zps519c7e04.jpg

Here is my first 'successful' 8x10 image from this camera. Obviously, I need to put something in that will keep the film centered and I also have some light leaks to deal with. But for a first image from a basically cardboard camera, it's not too bad.

Three-Trees

Saturday, September 7, 2013

Unsafe Light

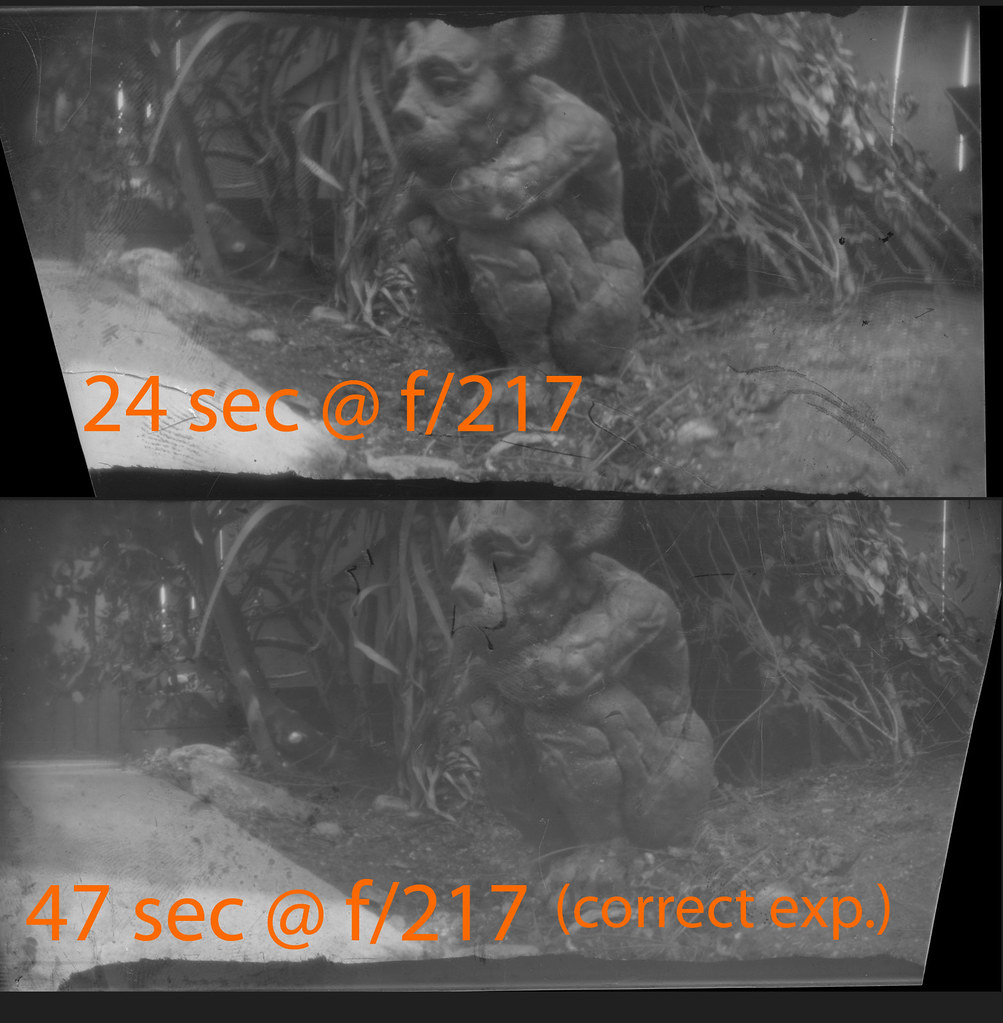
I had had a couple of failures using Kodak CSG x-ray film in my pinhole camera. They came out WAY over-exposed. One was this photo of Jim's Beemer. I had a nagging suspicion in my head that the problem was with my safelight. I used a 3-LED headlamp. It is pretty bright, but I usually point it at the ceiling and not directly at the film. However when I was developing these, I had shone the light right down into the developing tray. So I needed to do some experiments. What if I cut, loaded and developed in complete darkness? That would give me information about the safelight variable. I was also curious about whether the film had somehow changed or maybe the pinhole had been damaged and I was over-exposing in the camera. So I took the same photo twice; once at my 'normal' calculated exposure (47 sec in this case), using iso 80 for the CSG. Then I took another photo one stop down (24 sec). This would tell me something about the accuracy of my exposure table. So here are the results.
x-ray-compare
I developed these together in the same tray of 1+100 Adonal for 4 minutes in complete darkness. Don't mind the scratches. I wasn't being particularly careful with this film, I just wanted to get an idea of the exposures. You can see that both exposures are passable. The one stop 'push' came out with a bit more contrast as you would expect, but both negatives are of normal density.
So I think I narrowed the problem down to the safelight. The LEDs must just be too bright. It could also be a wavelength thing. I am not sure what the spectrum looks like for these led lights. They might have an overlap with the sensitivity of the x-ray film even though it is classified as 'orthochromatic'. Anyway, there you have it. X-ray film will be developed in the dark from now on and I will continue to use my same old pinhole exposure chart with this film rated at iso 80 or 100.