Showing posts with label parodinal. Show all posts

Sunday, October 14, 2018

Worthy of Redundancy

Ultrafine Xtreme! It seems a little silly to brand something with "Ultra" and "Extreme" in the title. In Latin, the prefix 'ultra' means 'extremely' or 'beyond'. So they are trying to send a message here. They want us to know that this film is fine grained. Now if you've shot enough film, you know that these claims are largely created by the marketing department of the film company and don't always hold true in real life. Especially with black and white film, grain is affected by so many variables from EI (exposure index or apparent iso) to the plethora of developers, dilutions, temperatures, agitation schemes... The list goes on. So I'll be forgiven if I approach "Ultrafine Xtreme" film with a touch of skepticism. This is compounded by the very (not Xtremely) reasonable price, which in Western culture means lower quality. I bought 10 rolls of 120 Ultrafine Xtreme 100 for around $5 per roll. For comparison, Ilford Delta 100 and Kodak T-Max 100 are both over the $6 mark (what? no more Acros 100?? BOOOOO! to Fuji!!!). So let's see what my $1 per roll savings is going to cost me.

I loaded my roll up in my 'chrome-tastic' Bronica S2a (read more about that camera here) with the always pleasant and reliable Nikkor-O-C 50mm f/2.8 lens. This is the sharpest medium format option I have and a great camera to use, so why not? I shot the film at iso 100 because that's what the box says on it. Can I push it? Can I pull it? What are it's reciprocity characteristics? None of these questions mattered. I just wanted to shoot it straight and see what the baseline is. And that's what I did.

Before I get to the shots, I'll describe my development scheme briefly for the home developers out there that nerd out on this kind of stuff. I used two DIY developers mixed together. First was My-tol (Kodak X-tol look-alike). I mixed that up at 2:1. Then I added some Parodinal at 1:100. I developed the film for 11 minutes at around 70F using the usual agitation scheme (constant for the first minute and then 4 inversions every 30 seconds). Fixer was Ilford Rapid Fix 1:4. There, how's that for brief?

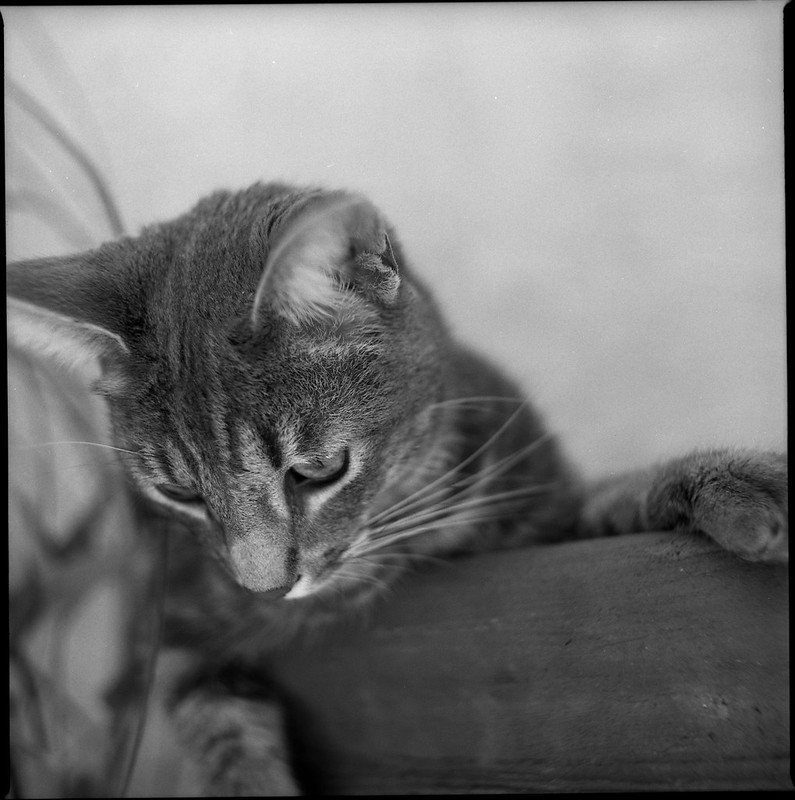
One of the tough subjects when it comes to fine grain and sharp lenses is animal fur. I scanned this shot at 1200 dpi and I think I am running out of pixels before I run into grain.
Scratchy McBiterton

Here is a 100% crop of that shot.

I have to say I was impressed. At least with this developurr combination (sorry), this film does indeed show very very fine grain. Is it "Ultrafine"? Well, we are dealing with sort of subjective, qualitative terminology here, so I'm going to say YES! It is Ultrafine! Put this film behind your sharpest lens, develop it with a high accutance developer, and be confident that you are going to get some Xtremely good results. "But James", you say. "Doesn't high accutance and sharpness mean that the low contrast areas are going to look grainy?" Let's see. Here is a 100% crop of the blank out of focus wall behind the subject.

The answer is "yes, there is some visible grain." Is it distracting? Is it "golf ball grain"? No. It is what I would characterize as "filmy" grain. It's the grain that lets you know that you are shooting film. I personally like grainy film (usually). The exception to that rule was Fuji Acros in Caffenol-CL. That was so smooth and creamy and lovely. I could just stare at the blurry backgrounds. But usually I like to have some grain in the image just as a creative device, sort of like the way I left the S2a film mask in this image as a border. It's a layer of abstraction that adds interest.

Now we come to the 'caveat emptor'. Here we see what saving $1 cost me. There were two shots on the roll of 12 that had artifacts. These looked like perfectly round clear spots on the film. I don't think that they were air bubbles that didn't get developed since that is not ever a problem with my agitation and there were only two of them on the whole roll. I think these are actually flaws in the emulsion. Take a look near the bottom of the gate. I'll keep an eye out for more of these in future rolls. I hope this is a Xtremely rare slip up by the QA department. If it is truly a "feature" of this film, I'll probably spend the extra $1 per roll and use T-max. But if not, if it turns out that Ultrafine Xtreme 100 is a good reliable fine grained film, then I will certainly buy more.

Wednesday, September 13, 2017

An Unexpected Leak

That's like a chapter title from a bad spy novel (or maybe a bad plumber's manual). Anyway, I just thought I would make a brief post to show the dangers of using thin base films. Generally we think of film as just emulsion layered onto a sheet of flexible thin plastic that is then cut, perforated (optionally) and rolled. I realized when I started developing my own film that the 'base' support is quite different for different films. Certainly color films are different than black and white. The support material on most color films is some shade of orange, while on black and white films it is either clear or a neutral grey. But what I hadn't really thought about was that the support material is different thickness depending on the film and it's intended purpose. Movie film needs to be thick and strong enough to stand up to the forces that are pulling it through a movie camera. Still camera film can be thinner so that more exposures can fit into a standard roll. Then you have specialty films like Kodak Plus-X Aerecon II. I have written about this film before, but I don't think I have mentioned much about the consequences of rolling it into standard 35mm cartridges. Standard cartridges have a little fuzzy piece of fabric around the inside of the opening where the film leader comes out. That serves dual purposes. First, it keeps the metal edges of the canister from scratching the film. Second, it acts as a light seal so that light does not enter the canister through the slit and fog the film. Well that's all fine if your film has a thick base support layer and it takes up all of the space between the two light seals on either side of the slit. However, Aerecon II was intended for aerial reconnaissance photography. When flying long distances, it is important to economize on weight so that your fuel will last for the entire mission. So the film was made with a very thin base so that a big roll of a few hundred or a thousand feet would weigh significantly less than it's consumer counterparts. This means that the film does not fill up the space between the light seals in a standard 35mm cartridge and if you are not careful, the light will come in and make nice stripes on your beautiful pictures. So let this be a warning to all of you shooting thin base films. Load and unload in the DARK! Not the shade, and not 'subdued light'... the DARK. Cautionary photos to follow.


K1000-AereconII-001
K1000-AereconII-002
K1000-AereconII-003

Tuesday, June 28, 2016

Putting That Chemistry Degree To Work

I have been a user (if not a devoted one) of caffenol ever since I ran into Reinhold's blog and saw the wonderful results he and others like Jon Caradies get with that simple 3-ingredient developer. I do enjoy weighing the ingredients on my little 3-beam balance and making the solution. The smell is a little funky, but I think it's growing on me and I don't mind it so much anymore. I even have my own modest gallery on Flickr where I upload various films both expired and fresh that have been processed with this earth-friendly concoction. Here is the first photo I ever developed and shared that was processed with caffenol-C-L.

Youth Football Trophies

I even went out on a limb and made my own variant, substituting ground up eucalyptus bark. I called it eucalyptol. You may have read about it HERE. That one needs to be revisited with a little different methodology, but I'll save that for another post. For this post, I want to talk about something very different. Okay, maybe it isn't "very" different. It is still a 3-ingredient developer made with things that are readily available at your local drug store and/or online. I chose to get my ingredients online just because it is easier than driving around to different places trying to find things. So what is this "different" developer? It is called Parodinal because it is a Rodinal clone based on Paracetamol. Paracetamol, also known as Acetaminophen, is the active ingredient in Tylenol which is cheap and abundant. Here is the shopping list and the amounts I use for a single 250 mL batch.

  • 30x 500mg Paracetamol tablets
  • 50gr of Sodium Sulfite (Anhydrous)
  • 20gr of Sodium Hydroxide (Anhydrous)
  • Water (distilled) to make 250ml

I based this recipe on what I found over on Martin Zimelka's blog. He in turn learned about it on APUG (I think).

For my first batch, I went simple. I made the Sodium Hydroxide (drain cleaner crystals) solution, then I just crushed up the Tylenol tablets with a stainless steel mortar and pestle and tossed it in. The Sodium Sulfite did not dissolve even in warm water, so I just combined the two as best I could and figured it would either work or it wouldn't and if it didn't, I'd try something different. But guess what? It worked!

S2a-acros-001

It was a cloudy suspension for sure. The binders and coatings of the ground up tablets did not dissolve and just sort of sat there. They didn't seem to have any effect on the action of the developer and that jives with things I read online. It's just sort of disconcerting to have a cloudy developer. You get the feeling that that all of that sediment is somehow ending up on your film. To get around this, some people either start with neat paracetamol. That gets around the sediment problem, but it is a little more expensive and a little more difficult to obtain. Others filter the binders out of the solution, I suppose with something like a coffee filter. That is also effective, but sheesh! That can take a loooong time to filter. Who has the patience for that? So what is a chemist turned data scientist to do? Extract the paracetamol away from the binders! Alright, so that isn't really going to save me any time. In fact, it's probably going to take a lot longer since I don't have a roto-vap handy. Ah well, it would be fun and interesting to see if I could get a clear developer that worked.

So off I went to the hardware store to find an organic solvent that would dissolve the paracetamol and leave the binders behind. I had done some internet research and found out that methanol is great at dissolving paracetamol. But pure methanol is hard to buy because it is quite poisonous. Next best? Ethanol. Denatured alcohol is mostly ethanol with a little bit of methanol thrown in to make it undrinkable. I ground up 36 tablets, just in case the extraction efficiency was low. I ground them up very fine and poured it into a bottle with 200 mL of denatured ethanol. I shook that for a few minutes. Then I let it settle and poured the supernatant (the clear part) through a coffee filter into a plastic tub. Thinking back, a shallow glass dish would have sped things up. That took about 2.5 days to evaporate. Yeah, I know. Filtering would have been faster, but this has more 'cool factor'. Once the ethanol evaporated, I had a pink-ish powder. I scraped it off the walls and bottom of the tub and weighed out 15g. I ended up with a few grams left over, so that means that the extraction efficiency is quite high. Now I used that as my paracetamol source and followed the recipe as before. Bingo! A nice clear solution (with some of the sodium sulfite settled on the bottom). I let it 'age' for a few days and a sort of 'crust' formed on the top. So I gave it a shake and re-filtered this off along with the extra sulfite. The next day, the usual 'rodinal' crystals formed on the bottom of my bottle and I knew I was in business. I had a nice clear parodinal with preservative crystals. The only thing left to do was to develop some film. So that's what I did.

Isolette-Acros-010

So what are you waiting for. Get out there and make some developer! :)