Friday, October 31, 2014

Perforating 126 Film

A while back, I got the idea that I wanted an Instamatic camera. Why would I want an archaic camera for which film is nigh impossible to find? In fact, the only place to find "new" 126 format film is at the Frugal Photographer with an anything but frugal price tag of $25/roll! That's over a dollar a shot for what is essentially 35mm film in a fancy cartridge. The fortunate part of this is that 126 film is, well... essentially 35mm film in a fancy cartridge. That means that (according to the Google) you should be able to manually load the 35mm film of your choice into an empty 126 cartridge and be on your way. Well, yes and no. Most of the instamatic format cameras were quite simple with fixed focus, single aperture, single shutter speed lenses. The winding mechanism worked on the principle that there was a single perforation along the top edge of each exposure, so as you wind the film, a pin in the camera pokes through that single perforation and stops the winding mechanism until the shutter is tripped. Well, 35mm film has 8 sprocket holes for each (24x36) exposure, so that pin no longer works for spacing. The 'work around' most instamatic cameras allow is that you fire the shutter for your picture, then you hold the shutter release button down again when you wind the film and instead of the camera telling you where to stop, you guess and by trial and error, you figure out how many actuations of the winding lever you need to make the right frame spacing. Unfortunately, the camera I have is a Kodak Instamatic 500. I say "unfortunately" not because I don't like the camera. Quite the opposite. This camera has full manual control of a good quality lens and shutter. However, it does not allow the "hold down the button" trick to work. Once the shutter is fired, the pin is up. If you have 35mm film in the cartridge, you have to try to power through the sprocket holes (note: forcing dials, knobs, and levers on a camera is never a good idea). So what to do with a perfectly working camera that is impractical to use with current film?? The only rational thing I could think to do is to make my own 126 film.

There are a couple of options here. First would be to use some sort of tape to cover the unwanted perforations in current 35mm stock. It would have to be done in the dark and working with sticky tape and film in the dark is just a recipe for disaster and frustration. The other option is to buy unperforated 35mm film and make the perforations myself. Again, it will have to be done in the dark, but a hole punch is a lot easier to deal with than sticky tape (I think). The trick then is figuring out where to punch the holes in a reasonably accurate way and then lining them up with corresponding holes in the backing paper (should you choose to use it). The answer is to use a 'jig' that will guide the hole punch to the right places. First, I made a prototype with cardboard. I used an existing authentic roll of old 126 film as a guide to put the holes in the right places.

The two pieces fold together to 'sandwich' the film, holding it steady with some bulldog clips. Here is a picture of the jig with film loaded.

The first time I tried punching the holes with my eyes closed, I accidentally punched an extra hole. When I make the real jig with acrylic sheet, that won't happen because the hand held hole punch won't be strong enough to punch new holes. It will just punch through the pre-drilled holes through the film. Otherwise, it worked perfectly and the film holes lined up with the paper holes.

Getting the film positioned correctly on the backing paper in the dark is a little tricky, but usually I will put a crease in the paper where the film end is to be taped down. Also, the holes in the backing paper are sort of oblong, so there is some tolerance for misalignment. The alternative is to tape the film to the paper first and then punch the holes through both at the same time. Then alignment is pretty much assured.

I have yet to test this in-camera, but I am hopeful that I will be able to use this unperforated film to get this camera running. I will update soon with results.

Update: Go see PART II.

Monday, October 20, 2014

Motion Picture Film

Ever since Cinestill hit the market, shooting movie film in still cameras has become all the rage. Not being one to miss a passing bandwagon, I thought I would jump on and see where the ride went. However, being err... "thrifty", I did not want to pay $10/roll + s/h for 35mm film. Also, I seem to have a good thing going with expired film, so why fix what doesn't seem to be broken? With that philosophy in mind, I went searching for the cheapest movie film I could find on a reasonably sized (<400ft) roll. I want to try it, not shoot it exclusively for the next 10 years. I looked at a LOT of different sellers and emulsion numbers. I also started researching the "remjet" issue. I would have to get that layer of black gunk off the back of the film either before shooting it ("premoval") or after exposing, but before developing. The remjet layer is there for anti-halation as well as anti-static for when the film is whizzing through a motion picture camera. Anti-halation is nice and most still films have a layer of dye on the back of the film to keep light from reflecting off of the pressure plate inside the camera and making glowing "halo's" in the highlights on the film. Premoving the remjet will eliminate this benefit, but if you are going to send the film off for processing, it has to be done. The machines that process film will not remove it and when it comes off in the machine's chemistry and mechanics, the operator will be unhappy with you. Cinestill removes the remjet for you, so that is part of the price you pay (which is fair, but for me unnecessary since I dev my own C-41). So what did I do?? I did both premoval and nothing. Keep reading and I'll explain.

I rolled up one 12-exp roll just like I would for any other bulk film. This will be the "control" sample and I will not do anything special to it regarding the remjet. The other roll, I measured the length and spooled it onto a Paterson developing spool and put it in the tank for 15min with a solution of 2Tbs Borax in 500mL water. At the end of 15min, I agitated the tank vigorously for about a minute. I really shook it hard. Disappointingly, the liquid that came out was just sort of a weak greenish solution. Subsequent rinses were clear. There was no sign of black flakes, so either, my solution did nothing to remove the remjet, or the remjet was really thin. A third option is that there is no remjet on this film. I'm not sure what remjet looks like, so I can't say, but the film is Super F-Series which does appear to have a remjet backing according to the interwebz. So at this point, I just dried the film in a 'dark' place and rolled it up into a canister. Here is what the two treatments look like side by side. The premoval roll is on the left and the untreated roll is on the right. There is clearly a difference between them, but is it remjet or just anti-halation dye?

I shot both rolls at iso 400 in the same camera, mostly in cloudy daylight. For this test, I'm not so much interested in color rendition as much as just the processing workflow. I fully expected to see some black bits stuck to the film and/or floating in my developer. The developer came out clear as always, so I figured the remjet must still be stuck fast to the film and I would have to do a removal at the end. To my surprise though the film was clear. The two films were developed in the same tank at the same time and I couldn't tell which was which until I looked at the specific images. There was no sign of remjet anywhere. Here are a couple of images from the "control" roll that was not pre-treated. I scanned these on an Epson Perfection V600 using the auto color correction, but nothing else in post. The color is shifted/cast a little as you might expect with cross processing, but other than that, there is nothing notable. The grain is there and looks about how my other expired color films look, so that's that.

Fujifilm 8572 Fujifilm 8572

Here are a couple of shots from the premoval roll. It looks like the film got fogged during the drying process. I did my best to keep it absolutely dark, but probably failed to some degree. There also seems to be some damage to the film. This is either chemical from the borax or mechanical from the vigorous shaking. Hard to say without more testing. Having said that, I will probably not do any more tests since the untreated roll came out nice without any ill effects from the remjet. I will just shoot this like any other color negative film.

Fujifilm 8572 Premoval Fujifilm 8572 Premoval

Monday, October 6, 2014

Flash Bulb Magic

I shot a wedding last weekend for two dear friends. The days before the wedding were fraught with the anxiety of shooting a wedding and what gear to take. The DSLR went with a short prime telephoto and the bride lent me her better-than-mine DSLR with a medium telephoto. So that covered the "safe" option. I would get all of the photos that I "expect" from myself when shooting a wedding. Now... what to take to get the photos that I "desire"? 35mm format is covered by the digicams, so I left the 35mm film cameras at home. If I was going to carry the weight, I should make it count. Medium format: Yashica Mat 124G (I only took 2 or 3 with that) and Brownie Hawkeye Flash Model (I think I only took one with that). The sanctuary was pretty dim, so the film I generally shoot with was too slow for moving subjects. You think that people getting married are just up front standing still, but they aren't. They are fidgeting and looking at each other and then at the pastor and then they go light candles, etc etc. After the ceremony, I did all of the formal family & friends photos, again mostly digital, but I did keep one surprise in reserve. The Graflex Speed Graphic! I brought this monster out to the enthusiastic "oooh's" and "aaaaah's" of the expectant crowd (okay, that may be a bit hyperbolic). Pose; meter; focus; aperture; focus; meter; aperture; dark slide out; cock shutter; focus; "One-Two-Three---CLICK"; dark slide in.

Portrait1

If Kodak Tri-X 320 was a food, it would be butter. I developed this in Adox Adonal 1:100 for 70min with agitation at 0 and 35min. You might think I did a lot of correcting in post after scanning, but you would be wrong... dead wrong. Now get your things and get off of my blog! Just kidding. You should stay for the rest. It's going to get good. I promise.

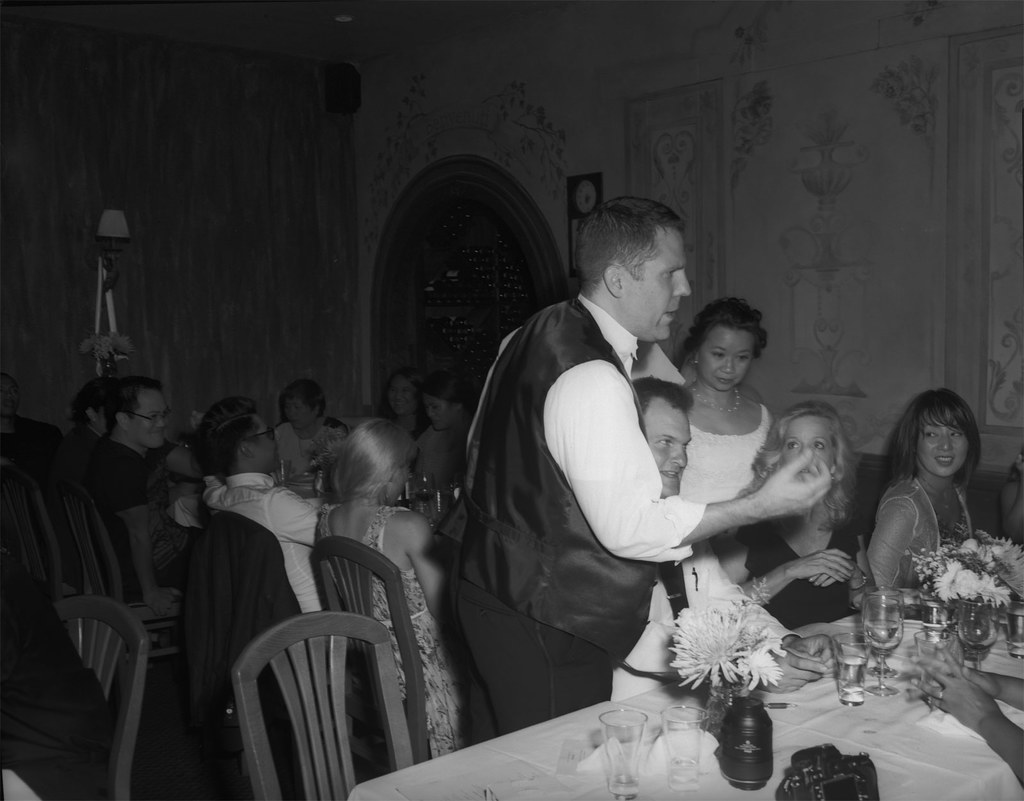
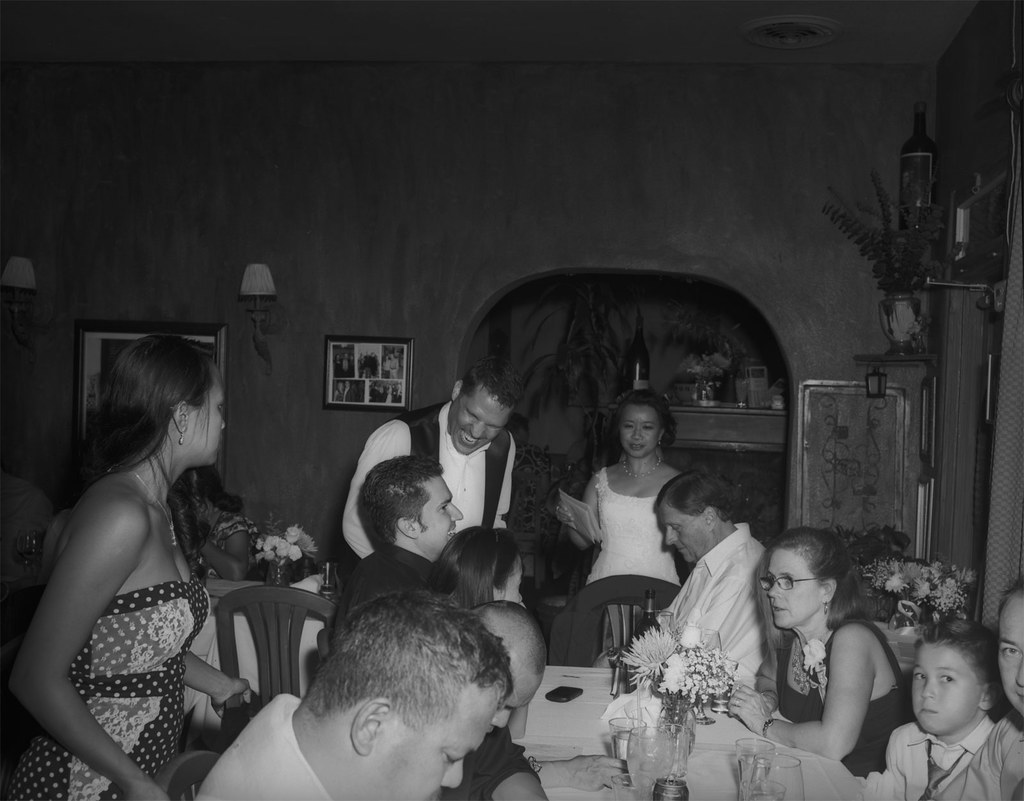
I took another just like that one for safety (good thing too). Then it was off to the reception. It was a small room in an Italian restaurant in La Jolla, CA. I did what I could with the DSLR, but the flash was just making me cranky. I had it dialed down to -2.0, with a cup diffuser, bouncing off the walls and ceiling. Everything short of a soft box to get some light but minimize the shadows. They turned out okay, but I am so used to film, the digital rendering of the scene was just missing something. Out comes the Speed Graphic, along with the flash and 7-inch reflector. I loaded up with Tri-X again and popped in a GE #5 bulb. I had done the calculation the day before. Iso 320, Guide Number at 1/100 sec is 300, that makes if f/30 for a subject 10 feet away. I decided to open it half a stop and hoped that the highlights wouldn't get blasted. Expose for the shadows, develop for the highlights, right? Now there's something about flashbulbs. First, the 7-inch reflector is mirror polished and makes a BIG cone of light that is hot in the middle and falls off at the edges. Also, it flashes over time. It seems instantaneous, but over the life of the bulg, it is starting out dim and soft, then ramping up to full power, then falling off. Depending on where in that cycle the shutter opens, there will be a dramatic difference in the look of your photo. Generally though, the light is on the soft side (for a direct flash) and hot in the middle. The shadows are there, but they aren't the harsh outlines you are used to seeing. So take a look at these two photos I shot at night in a very dim restaurant and tell me there isn't something magic about this flash and camera.

Reception1

Reception2