Showing posts with label Agfa Isolette III. Show all posts

Tuesday, February 2, 2016

Isolette III Overhaul part 6

If you have read parts 1-5 in this series, you might have been left wondering "What happened?? Where are the pictures???" Well, I'll tell you. The bellows I made (seen in part 5) were not light tight in the end and there were light leaks apparent in the photos. I am not strictly opposed to light leaks (EXHIBIT A), but in this case, I was hoping to realize the full potential of this camera in the sharpness and contrast categories. So I was unhappy with my results and I took the bellows off and put the camera parts back into the box of disassembled cameras. Sad really. When Christmas rolled around however, I decided to put a custom-made bellows on my list. I knew just where to get it and gave all the details to Santa's little helper. For the benefit of my readership (hi, mom) I'll let you know that the craftsman is Sandeha Lynch and his site is found at http://www.sandehalynch.com/camerawork/bellows.html. It is a beautifully made bellows and fit perfectly without any trimming or fussing.

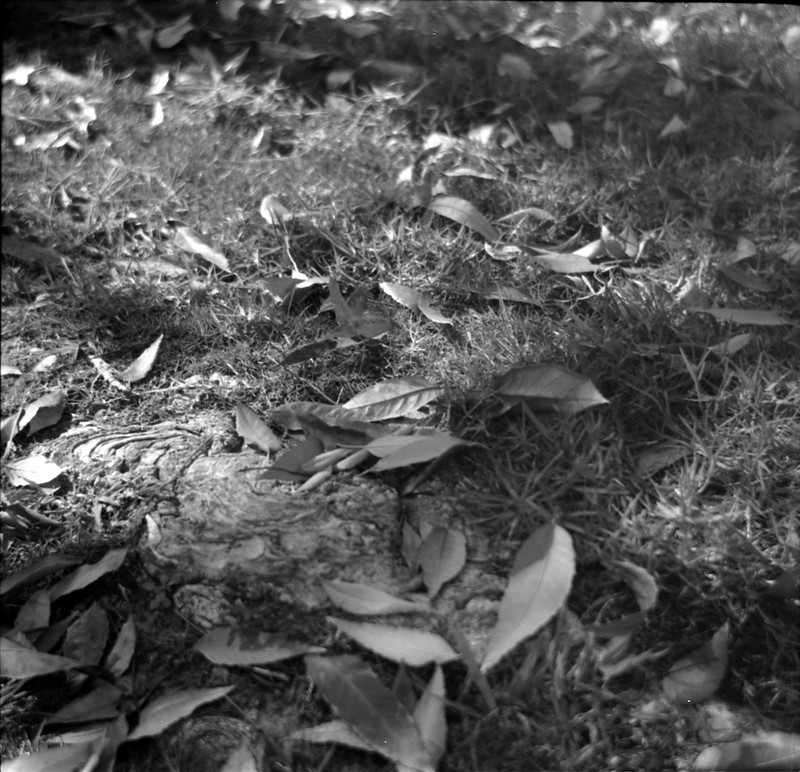
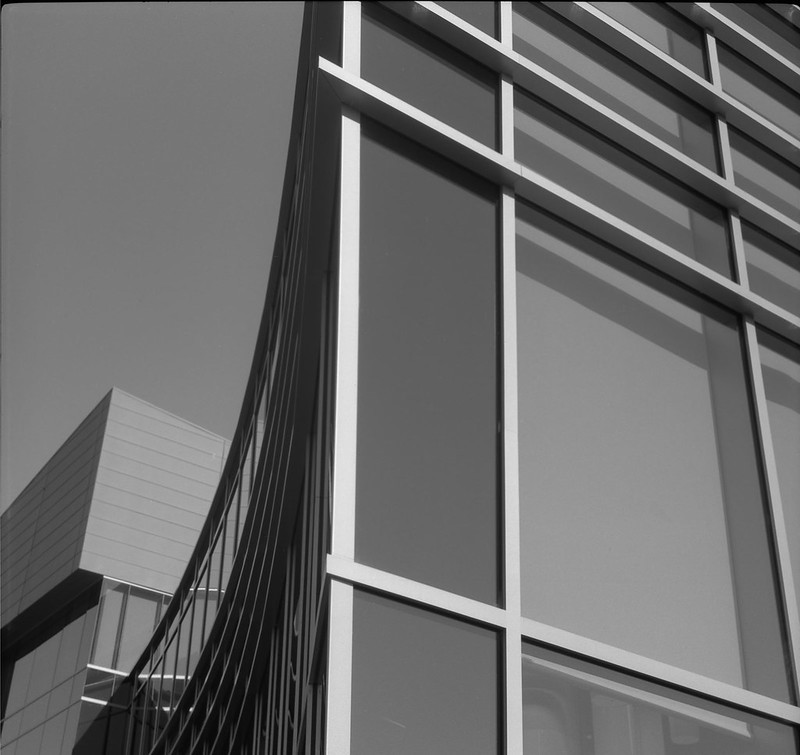
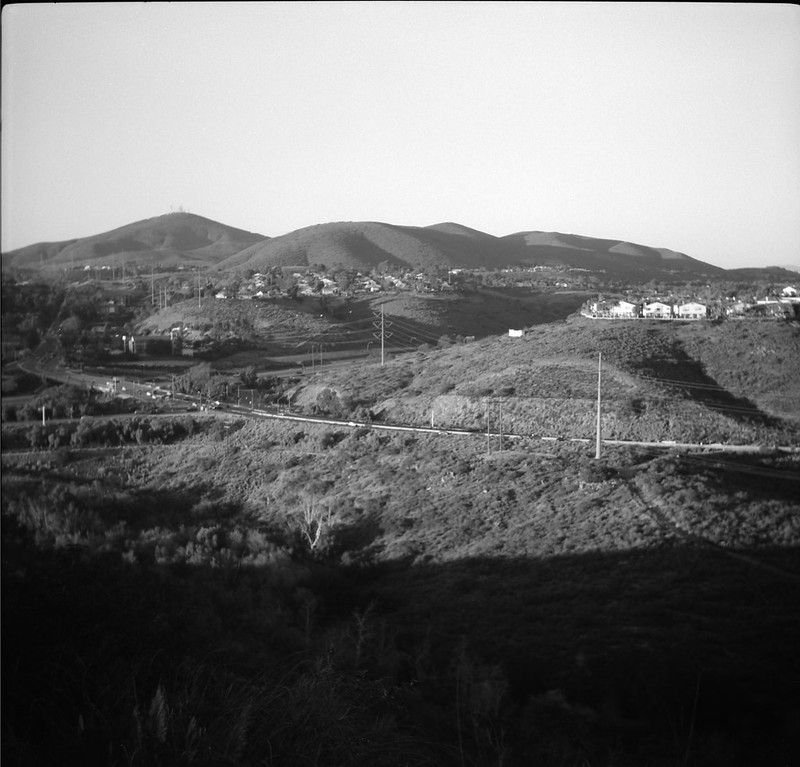
The one struggle I had was getting the retaining ring on the back of the lens plate, but eventually that went on and I loaded a roll of Fuji Acros 100 and started shooting. Here are a few shots from that roll, developed in Rodinal 1:100 x 60min.

Isolette-Acros100-005
Isolette-Acros100-003
Isolette-Acros100-006

Now I'm happy. This camera is fun to use and the results are quite good (technically). The range finder needs a little vertical adjustment, but I think that the lens collimation was successful and especially when stopped down, the Apotar lens produces good sharpness and contrast. This was a good experience overall. I think it is good to get out the tiny screwdrivers once in a while and get a feel for the ingenuity of these little machines. It certainly increased my appreciation for this camera and its manufacture. If you get a chance, pick up an Isolette and see how it works for you.

Tuesday, May 20, 2014

Isolette III Overhaul part 5

Ok, two posts in one day must be some kind of a record (for me). Actually, I should have just waited and added this last part to part 4, but I didn't so here it goes.

The (almost) last step is to re-attach the focusing ring to the outer (front) lens element so that when you turn the ring, the front element turns as well. The trick is to make sure that what the ring reads is actually the distance at which the lens is focused. That process is called collimating the lens. First, you need two cameras; the one you are reassembling (camera A) and another with an accurate infinity focus (camera B). First though, we need something on the film plane of camera A on which to focus camera B. I used a couple of pieces of cello tape and drew an 'X' at (or near) the center. Like this:

Screw the front lens element of camera A all the way in (to the right), but not too tight. Now open the shutter on camera A either with a 'T' setting or with a remote shutter release cable and a 'B' setting. My Isolette doesn't have a 'T' setting, so I am using option 'B'. :) Once the shutter is open, point the cameras at each other. I read online that it doesn't matter how far apart they are from each other, but after a few frustrating minutes, I found that camera B must be farther away than the minimum focusing distance of its lens (duh!). I set camera A on the mantle with a light shining behind it (to light up the 'X'), and put camera B on a tripod at the same height.

Line things up so that you can see the 'X' on the tape through the viewfinder of camera B. Now focus camera B at infinity. The 'X' will probably now be out of focus. Start turning the front lens element of camera A counter-clockwise about a quarter turn at a time. You should see the 'X' getting clearer (in my case I couldn't see the whole 'X', but part of it was good enough to focus on). Keep going until the 'X' is in sharp focus.

That's it!! Now I just put the focusing ring on so that the infinity (sidways 8) lined up with the focusing mark and tightened the three set screws. The front element doesn't turn real easy, but I was extra careful not to nudge it and lose my focus point. Now I have a fully functioning Isolette III! I immediately loaded up a roll of expired Tri-X and started shooting. I read somewhere that the springs on these cameras are so powerful that they can suck the film away from the pressure plate and ruin the focus of a shot. So the workflow for this camera goes:

  1. Unfold
  2. Wind on
  3. Focus with the rangefinder
  4. Transfer the number from the rangefinder to the focusing ring
  5. Cock the shutter
  6. Compose and shoot
  7. Fold

Stay tuned to see some photos from this camera. So far, just using it while I walked my dog this evening, I am really impressed with the ease of focusing and the quietness of the shutter. I think this will be one of my regulars from now on.


Isolette III Overhaul Part 4

Well, first let me apologize for dragging this out so long. Making bellows turns out to not be recommended for the faint of heart. The first one I made (see Part 3) was really a 'learner'. I didn't really expect that one to work, but it would have been a nice surprise if it had. Mainly, what I learned was that my materials were right on the edge of being too thick, especially on the seams, and the glue I used to attach the outer covering was too goopy and I couldn't spread it evenly. Also, it was hard to get it to fold neatly. Partly this was my fault because I made the inner seam and outer seam on the same side, so it got really thick there. So here is what I did differently...

First, I changed the stiffeners template to include trapezoids for the top and bottom instead of using plain rectangles all the way around. I decreased the thickness by making the seams on opposite sides (top and bottom) and also by cutting a piece out of the middle of the stiffeners right where the inner seam was. That is the thickest part of the bellows, so every little bit helps. Cutting and gluing all of those pieces on individually was a pain. I will find a better way next time.

Next was gluing on the outer cover. I made sure to position the seam on the opposite side from the inner seam. Also I diluted the glue 1:1 with water and used a broad brush to apply it to the cloth. That made it pretty wet, but not dripping. That actually helped to spot and press out any air that was trapped between the layers. I let that dry overnight. I know it doesn't look that good here because the fabric is wet and nearly transparent.

Once it was dry, I went about folding the pleats. Remember, the wide stiffeners go 'up' from front to back. That's partly how it gets bigger at the rear. It folded up pretty easily with the new improved stiffener shapes. Once folded, I put a piece of paper over it and a heavy object on top of that to help set the creases. That sat for a few hours that way. Now for installation!!

It was pretty straightforward, just a reversal of the disassembly process. I started at the front, putting the brass plate in place. That was a pretty tight fit and I ended up cutting off the front most pleat. Then I put the lens/shutter in place on the front plate/standard and screwed the rear retaining ring (inside the bellows) to the threads on the rear lens element. Then I applied a little contact cement to the back flange where the other bellows was attached and folded over the back pleat of my bellows. Again, I cut off the rear most pleat for a better fit. There is still plenty of length for the camera to extend. I had to wrestle the mask back into place, but once there, it lined right up with the screw holes in the film roll wells and I got it screwed down. Finally, I replaced the film roller rods and folded the camera. It worked!! The camera folded up and closed. It's a little tighter than the original, but I was very excited that I got this thing to work at all.

Now all that is left is to collimate the front lens element, so that it is focused on infinity and replace the front focusing ring. Once that is done, I will have a fully functioning Isolette III. Stay with me for one more post!


Sunday, May 11, 2014

Isolette III Overhaul part 3

In the last post, I left off after assembling the aperture. The shutter leaves go together in a similar fashion only they are all identical and there are only 5. If you took pictures before (I document almost every step with my phone) it should be easy to put it back together like it was. Now the trick is to put the two 'halves' back together. It took me a couple of tries since the shutter leaves tend to move out of position, but I got it back together without too much hassle. One thing I didn't check before putting the screws in was the self timer. It turns out that it doesn't stay cocked. These are notoriously fickle on many old shutters and I don't plan on taking any 'selfies' with this camera, so for now I'm going to leave it. I might change my mind later and take it apart again, but that will take a little more disassebly of gears and whatnot.

I had some trouble getting the front lens element screwed in to the middle element assembly. It just wouldn't start on the threads. The threads are VERY fine and the metal is a little on the soft side, so forcing it is going to end only in sorrow. I sent an email to Jurgen over at Certo6.com and he was very kind and gracious enough to give me this advice.

Hmmmm, happens often with Zeiss front lens units... almost never with Agfas.... hmmmm. Well, when I do run across this annoyance, I make sure I really really clean the threads, first with q-tips and a solvent. Then use a dremel wire brush ( without glass in the brass holders ) to really make sure its clean... this is for both the front lens unit and the middle one that the front screws into. In both cases having removed the glass. If it is still tight or "can't find the thread", then I have to use a very fine polish compound on the front lens unit and work it till it goes in and smoothly. This is really tough on the hands and must be done with the glass in the holders and having the correct size clamp tool on the middle unit ( which is being screwed into ).

A little extra time cleaning the threads with solvent and q-tips and adding a tiny bit of lithium grease did the trick. I got the front element on and screwed all the way down. Notice that the focusing ring isn't on yet. That will be the last step, recollimating the infinity position.

Next I needed to reassemble the top. Before that, I needed to loosen up the rangefinder wheel. It was frozen with the same green grease that tends to freeze the focusing helicoid. I carefully dripped a little bit of Ronsonol lighter fluid being extra super careful that none got anywhere near the mirrors. The coatings on the mirrors are delicate and if you mess them up, your rangefinder is toast. The rest of the top assembly is pretty straight forward. My model has the focusing range reminder on the left, so those small screws took a little finesse to get into their tiny holes.

Now the shutter and the body are assembled. On to the bellows!!

Fist I had to get the old bellows out. There is a roller bar on either side of the film mask. These are just held in by the tension of the metal at the top and bottom on the pins at the ends of the rollers. Push up at the top and down at the bottom near the roller and it will drop out. The rollers are unique, so note which one goes where. Next the film mask needs to come out. There are two screws on either side in the film roll wells. Remove those. Now there is a bit of glue holding the bellows between the mask and the frame of the camera. Start wiggling the mask around gently until you hear the glue start to crack. Then pry gently with a screwdriver or a butter knife. Eventually, the mask will come off. Now pry the bellows out and away from the frame of the body. It will probably tear a little, but we are throwing it away, so no biggie. Use fingernail polish remover to clean the dry glue off of the frame and the mask. It probably doesn't need to be perfectly clean since it is just going to be glued again.

There is a brass plate glued to the front of the bellows that you will need. Get it out and clean off any dry glue or other remnants of the old bellows. You will now need an Isolette III bellows. There are sources to buy them pre-made on the interwebz, but if you have come this far, you may as well make your own, right? There are patterns for free download. I used these from the Most excellent resource RolandAndCaroline.co.uk:
Agfa Isolette Replacement Bellows L&C.pdf
Agfa Isolette Replacement Bellows Ribs.pdf
The first template is for the inner and outer fabric coverings. The second is for the paper stiffeners and for the gluing tower. Download and print two of each.

Now there are some decisions to make. First, what will you use for a light-tight layer? I had a blackout curtain panel laying around. One side is black fabric and the other is coated with white rubber making it light-tight. I used one of the 'L&C' templates to cut out the piece I need. It turns out that the template is a little bigger than I need, but it's easy enough to trim later. Next I cut the stiffener ribs out of a thin card stock. It is a little stiffer than regular paper, but not much thicker. You have to be conscious of the thickness of these layers because if they are too thick, they won't properly fold into the camera. It will still take photos, but you just won't be able to fold it and take advantage of one of the awesome features of these MF cameras. I also cut one of the stiffener panels in half so that the overlap would happen in the middle of a panel and not at a corner. That is more of an aesthetic choice than a practical one. Here you can see that the opaque cloth is going to have a lot of overlap when I go to glue it. I trimmed it down so that it only extends about 1/4 inch past the stiffeners.

Once I glued the stiffeners down to the cloth, I let the glue dry and cut the 'support' sides off of the paper stiffeners so that only the 'ribs' are left. Then I cut the cloth as described above.

Next, I needed to make a structure that would hold the flexible (I might even call it 'limp') cloth/stiffeners assembly so that I could glue the seam. I used foam core and Gorilla Tape. I cut two of the 'stiffener' panels from the pattern linked above. Then I cut two more that were narrower by the exact thickness of the foam core. It just so happened that the 'border' lines on the pattern are exactly the thickness of my foam core, so I just cut along those inner lines and it came out to be the perfect width. I also cut all of the pieces a couple of inches longer than the template. I taped them all together and then measured the dimensions of the opening at the bottom of the 'pyramid'. I cut a square of foam core to that dimension and taped it in. This gives the structure more rigidity and keeps things square.

I then put some contact cement on the edges of the cloth and wrapped my 'bellows' around the tower so that the edges of the 'half-ribs' all lined up.

Next will be to glue the outer covering on to the bellows, fold them and install them into the camera. Stay tuned to see it all come together (fingers crossed).

Thursday, May 8, 2014

Isolette III Overhaul part 2

If you haven't read it, Part 1 is here.

I received my lens tool from Hong Kong and that made getting the shutter out of the front standard a snap.

Next step was to get the focusing ring off and see if I could get the front lens element off. I had to file down one of my smallest screwdrivers to get it into the tiny retention screws holding the focusing ring on. I could barely see them, let alone loosen them. If you are playing along at home, remember NOT to remove these. Only loosen them until the ring comes free. Here are the rear lens element, paper gasket, rear retaining ring and the front focusing ring.

For this I went to my favorite degreaser, Simple Green. A few hours' soak and the front element came right off. It turned the Simple Green a nasty black too. A quick rinse with Ronsol and I was ready to go on to the shutter/aperture. Note that the paint on the numbers of the aperture indicator will come off if you soak it, so remove that piece before you do all of this. Also note thta there are two different screws that hold this piece on. If you keep track of which goes where you won't have to figure it out later. It's not hard though. Look carefully at where they screw in and you will see that the metal is different thickness. The longer one goes into the thicker metal.

The aperture was totally frozen. After asking around, it sounds like this is an uncommon problem. If you don't absolutely have to, DO NOT DISASSEMBLE THE APERTURE!! If you do absolutely have to, be aware that there are 10 aperture blades that come in 4 different varieties. Take it apart carefully and document explicitly where each of those blades go! The blades are made of very thin metal and will tear or crease more easily than you would think.

I got mine apart (they were really stuck together good), cleaned them up and after about 4 tries, got them reassembled. I found that if I put some painter's tape on the back side where the rivets stick through, it held the blades in place a little better. You will lose your mind trying to move the blades into place and keep them in their holes. Don't use clear cello tape. It is too sticky and will be difficult to get off when you go to put the aperture back in the housing.

Notice a couple of things. I work on a sheet of white paper. White cloth might be better at capturing tiny screws that are trying to make a break for it, but the lint and fibers are the price you pay. I work in my kitchen which has a hard laminate floor. If something rolls off the table, I can generally hear what direction it went and then use a strong magnet to find the escapee. The best thing though is to not lose those things to begin with. See that I have taped the screws down to the paper I am working on. I also have a good pair of forceps with a fine point that makes handling little things easier.

So one by one, put the blades into their respective holes. There are a couple of methods to doing this. I chose to have the blades sticking outward away from the center. Then once they were all in their holes, I started rotating them clock-wise. When they start to touch, lift them lightly so that they overlap the adjacent blade. Keep moving/rotating them bit by bit, being careful that none of them leave their holes. Once you have them all overlapping so that it looks like a circle, you can put the retaining ring on top. Sorry, I don't have a pic of that, but it ends up looking like this, with the 'top' rivets sticking through the slots in the retaining ring. You will have to wiggle things a bit to get them all to the right position.


That's probably enough for one post. I will be back to cover the rest of the assembly and making new bellows in subsequent entries.

Tuesday, April 8, 2014

Isolette III Overhaul part 1

I have never done my own CLA (Clean, Lube and Adjust) on a camera before, but I just recently got a wonderful Agfa Isolette III that has some problems. The Isolette III is a medium format folding camera with an uncoupled range finder. That means that when you look through it, you look through a range finder (not through the lens) that gives you a distance to your subject. You then transfer that distance reading to the focusing ring of the lens. A coupled range finder would have gears and levers that would move the focus mechanism on the lens for you when you adjusted the range finder. I like old mechanical, "figure it out yourself" kinds of cameras, so this one is perfect. It has good glass (an Apotar which is a good Cooke triplet) and the build quality is what you would expect from a mid-century German made camera (excellent). Now I mentioned that there are problems, and there are.
  • There is a light leak in the bellows, so the bellows will need to be replaced.
  • The wheel that turns to adjust the range finder is very stiff, probably from coagulated grease.
  • The focusing ring is completely frozen, probably from the same grease.
  • The shutter works, but the blades move very slowly.
This may seem a bit daunting at first, but there were so many of these cameras made and made well, that they are still around today in very good numbers. The problems I listed above are pretty common too, so there is a good amount of documentation on how to go about fixing these and bringing them back to their former glory, or maybe even making them better!

Instead of jumping right into the lens/shutter assembly, I thought I would start with the "easy" part of getting the top cover off and seeing if I couldn't get the range finder wheel to move a little more smoothly. Unfortunately, I couldn't find any documentation about removing the top cover on this model. But how hard could it be? There are a few screws. Take those out and the cover should lift right off, right??? Well, sort of. The two tiny screws that hold the distance/aperture reference ring on the left side are pretty straight forward and there is a larger screw under that. There is a tiny screw on the right end that has to come out as well. Then there is the film winding knob. There is a large screw in the middle of that. The slot in it is super thin and I didn't have a screwdriver with a narrow enough blade to unscrew it. I have some small screwdrivers, but they didn't provide enough leverage to loosen it. This thing was TIGHT! I went to the hardware store hoping to find something narrow and wide that would provide the leverage to get this thing out. No luck. So I tried the dull edge of a razor blade held in a pair of needle nose pliers. This fit the slot just fine, but after breaking every one, that screw had still not budged. So I thought I would use my rotary tool with a cut-off wheel to widen the slot on the screw just enough to get a regular screw driver in there and really apply some torque. So that's what I did. It didn't take much and I was able to get a regular screwdriver blade in there and really put some muscle to it. Still it wouldn't turn, not even a millimeter! I sat back and started contemplating how I was going to have to drill out the screw and find a replacement. I stared at that takeup spool knob with its little counter-clockwise arrow mocking me. Wait... the arrow... You turn the knob counter-clockwise to wind on the film. I wondered if maybe the screw turned the other way in order to keep it tight over time. Well anything was worth a try at this point. So I slotted the screwdriver blade and made a clockwise turn. BAM!!! It turned!!! Unbelievable. I had to give a little growl of protest to the ingenuity of the German engineer who came up with this brilliant idea that keeps the winding knob from getting loose. Klaus, wherever you are... Thank you, and I hate you.

So now the top was off. There is usually another internal cover over the optics of most range finder cameras. It helps to keep the dust out. This was no different. There were four screws visible and I started taking them out, not paying any attention to the piece of old cello tape that fell off of one of them. But when I got to that one, I noticed that it felt different. It wasn't coming out. I turned it back the same number of turns I had turned it out. It was not holding the cover on. It was an adjustment screw. It is in the center of the cover at the edge toward the back of the camera. The rest of the screws came out fine and the cover came off revealing the simple optics that make up the rangefinder. The glass needs some gentle cleaning, but I will be careful not to touch the half-mirror. It is coated and if you remove any of the coating, you will ruin the whole thing. I still need to get the thumb wheel off, clean off the grease and add a tiny bit of lithium grease, but that should be pretty straightforward. The only hitch will be getting the wheel off. It has a pin-screw head. That means instead of slots, it has tiny holes that require a special tool to loosen. Mine is on the way, so I should be getting that going very soon. Here is a photo of the camera with the top cover and the internal dust cover removed.

Stay tuned for more Isolette fun!