Showing posts with label alt-process. Show all posts

Tuesday, December 6, 2016

Like I Need Another Alt Process

I have a project in mind. That usually means I will be spending more than I have of two different things... time and money. I have toyed with the idea for a while of getting into wet plate photography. It is all the rage apparently. I love the look. I love the 'one of a kind' aspect. I don't like the 'wetness'. Having to pour, sensitize, focus, compose, expose, develop and fix all within 10 minutes is too much of a push for my little brain. I need time. I need to think and rethink. I need to decide whether or not I even want to take that photo. These things become more difficult with the constraints of wet plate photography. So I will continue to enjoy the marvelous efforts of others working in that medium. So what do I do if I like the product but not the process? Well, I do what Richard L. Maddox did in 1871 and I use a similar process that uses DRY plates instead of wet. The dry plate process still uses plates of metal and glass coated with silver halides suspended in, let's call it 'goo' which is then allowed to dry in the dark and then exposed like regular film (sort of). This takes the rush of getting to the fixing step before the plate dries out of 'the picture'! (insert sad trombone sound here)

For my first foray into this process, I thought I would just start in the shallow end of the pool and get a dry plate tintype kit. These are sold by Rockland Colloid and come with 8 blackened aluminum plates (4x5), AG-Plus emulsion (light sensitive, open only in the dark), developer (top secret formula) and fixer (standard hardening fixer). Here are a few things I wish I had read before I wasted 4 plates.

  • The emulsion is solid, so you have to heat it in a hot water bath to liquify it. That is outlined in the instructions included with the kit. What they don't tell you is that it will instantly solidify when you pour it onto a room temperature plate. That seems intuitive, but it caught me and I ended up with a big mess. So my solution was to get a regular old heating pad, like you use for sore muscles. Take the cover off and put some paper towels or newspaper on it. Now put your plates on that and let them warm up while the emulsion warms up in the water bath.
  • Even warm, the emulsion is about the consistency of Elmer's Glue. It isn't going to flow nice and easy over your plate even if everything is warm. My first attempt, I tried spreading it around as evenly as I could with my finger. That didn't work well at all. Mostly, the emulsion was too thin and the image turned out to be too faint. Also, it was not at all evenly spread. I later settled on using a small rod to pull the emulsion across the plate. It was still imperfect, but much better and easier to control. I think with a little practice, this could work quite well.
  • The spectral (light color) sensitivity of the emulsion does not lean toward blue. It IS blue (and uv). I tried exposing this under bright studio fluorescent lights and it just wasn't enough. Full sun or some other strong ultraviolet light source will be necessary. Under full sun, the iso comes in around 0.5. That means 1 second exposure at f/8. Now is a good time to mention that the developer starts to die when you open it. It takes about 2 weeks for it to really die, but your iso is going to suffer more and more as the developer ages. Development is done by inspection under red light, so you can extend it, but if development happens slowly, you will get greenish blue swirls (see my examples below).

Okay, enough blah blah. The bottom line(s) are:

  1. Coat mechanically with everything warmed up
  2. Expose in full sun.
  3. Use fresh chems.
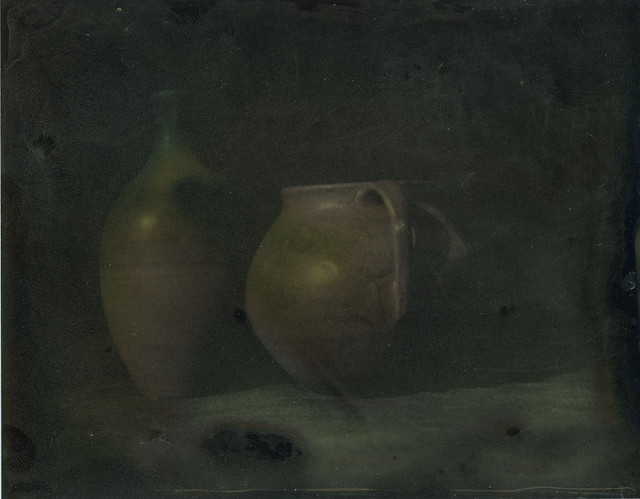
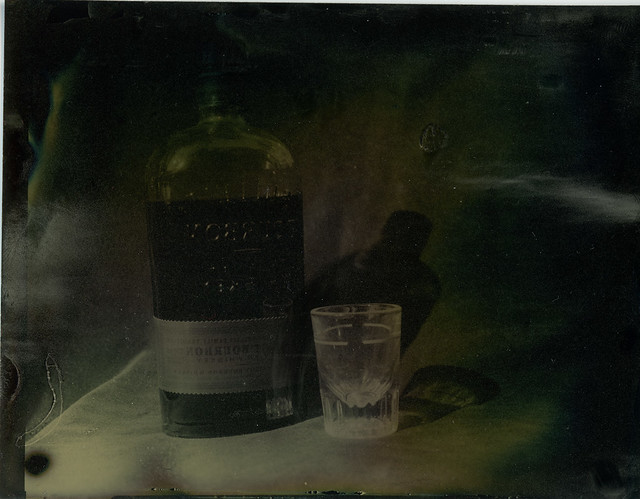
Here are the two images I ended up with following the above advice. They aren't perfect, but they are a step in the right direction.

SpeedGraphic-Tintype-001
SpeedGraphic-Tintype-002

Monday, September 14, 2015

My First Salt Print

I like making prints. Having something to hold in my hand at the end of the day is just more satisfying than looking at the inverted image of my scanned negative. The image on the screen is enough to keep me going with the whole photography thing, don't get me wrong, but there is something special about holding that paper with the image I created on it. Alas, I don't have a darkroom or an enlarger. I don't currently have the space to set it up, so it just isn't an option. Enter "contact printing"! Taaa Daaaaa! Contact printing is where you put your negative (or in some cases positive) in contact with a piece of paper that has been coated with light sensitive chemicals. This creates an inverted image on the paper... a print. This is very different than making an 'enlargement' from a negative. That involves projecting light through the negative onto photographic paper. The paper is then developed, washed, fixed and washed again. With most contact printing processes, there is no development step. It is called POP or Print Out Paper, which means that the image emerges during exposure. There is a literal ton of information on these interwebz about how to do this, so I won't rehash the history or list all of the different variations and recipes. I will just go briefly over the process I used for this, my first foray into silver-based printing.

The salt solution is:

  • 20g sea salt
  • 20g sodium citrate
  • enough purified water to make 1L

I brushed this solution onto Strathmore Bostick 100 lb hot press watercolor paper and let it dry. I chose this paper because it was lightweight (recommended) and smooth, so it wouldn't require an additional step of sizing to keep the chemicals on the surface. You don't want thick spongy paper that will absorb the chemicals or your prints will look 'soft', or not quite as sharp as the negative image you are using.

Next, I made this solution:

  • 12g Silver Nitrate
  • enough purified water to make 50mL

And this solution:
  • 6g citric acid
  • enough purified water to make 50mL

I made these two in amber dropper bottles with clear labeling. Silver nitrate is not to be trifled with. It will cause blindness if you get it in your eye, so absolutely wear eye protection when handling powder or solutions!! It will stain anything it gets on so cover counters and wear an apron and some sort of latex or nitrile gloves if you don't want black dots on your skin and clothes.

When you are ready to make a print, go to a dimly lit room (I use a room with a window, but keep the curtains drawn) and combine 1:1 the silver and citric acid solutions. I just eyeball it with the glass droppers. There isn't going to be any noticeable difference if you are 10% off one way or the other. I then use a brush to apply a thin coating of the solution to the dry salted paper. At this point a replacement reaction occurs and NaCl combines with AgNO3 to make the inert product NaNO3 and the light sensitive product AgCl. Let the paper dry, or use a cool hair dryer to get it nice and dry. I had good luck adding another coat when using a brush. The first print I did only had a single coat and there were visible brush marks in the image area.

Salt-Print--002

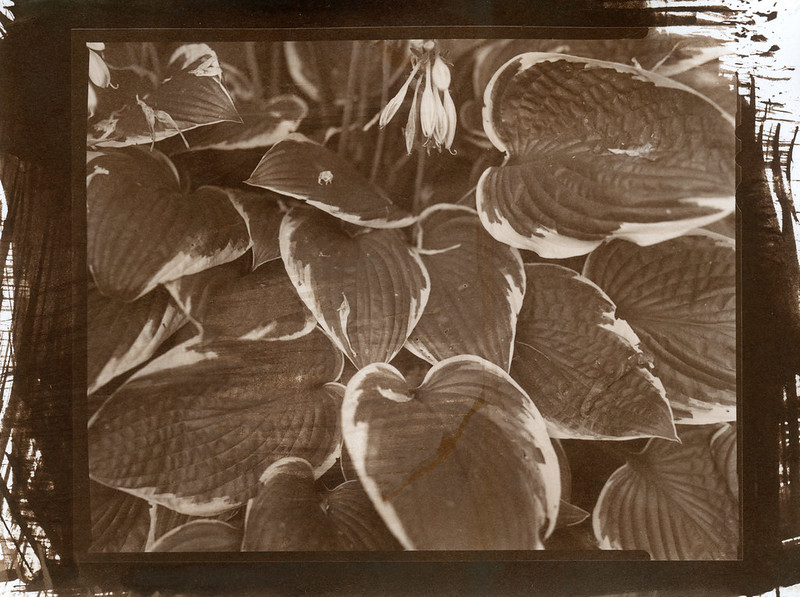
But I'm getting ahead of myself. I happen to have a nice printing frame that my lovely, beautiful, kind, generous and supportive wife (are you reading this darling?) gave me as a gift. If you don't have one (the printing frame, not the amazing wife), a piece of glass or two will do. As long as you can sandwich the negative between the glass and the sensitized paper, you will be fine. I made sure that the silver emulsion on the negative was pressed against the silver coating on the paper. That will give you the sharpest possible image. Then I set the whole thing out in the blazing San Diego sun for about 6.5 minutes. My printing frame has a split back that allows me to check the progress as I go, so there really isn't much guessing and I got a well exposed print on my first try. That's the one of the hostas just above this paragraph.

The print looks sort of orange/brown right out of the frame. Take a quick look in that dim room, but don't dilly dally. Start rinsing the print either under gently running water or in a water bath, agitating and changing the water frequently. "What do you mean by 'frequently'", you ask. Well, it gets a bit fuzzy here. People who live where there is more water than you know what to do with, can just let the water run and run for 10 to 20 minutes. But I live in drought-ridden So. California where the water police are watching and just waiting to double your water charges if your usage increases over last year. So I am probably under-washing my prints and they will only last 50 years instead of the 400 years that the museum archivists like. Since my prints will never darken the walls of a museum, I don't care. So I rinse under running water for a minute or two and then let the print sit in an appropriately sized tub with a couple of inches of water in it for 5 minutes and change the water 3 or 4 times. I figure that has got to provide at least a 1:1000 dilution of the unexposed AgCl left on the paper. If that isn't enough, then I apologize to the future generations of people with bad taste who might have appreciated my prints, but can't because they are too dark.

Next I fixed the print using this solution:

  • 100g Sodium Thiosulfate
  • enough purified water to make 1L

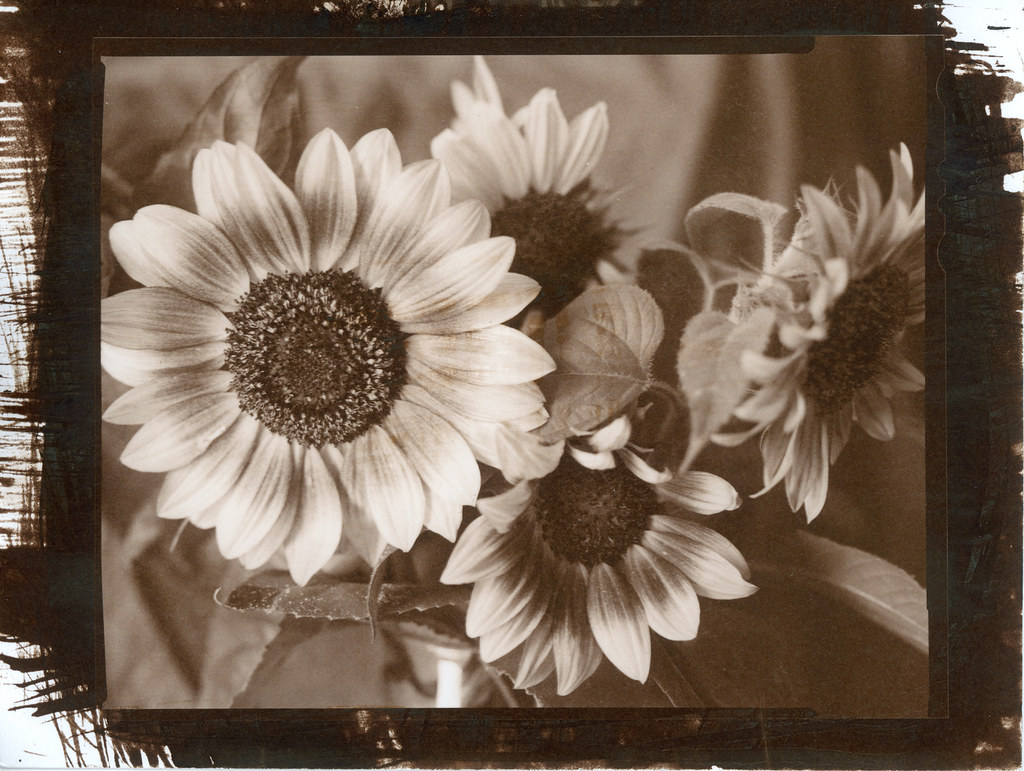
I just pour enough in the washing tub to cover the print, maybe 1/2 inch deep and let it soak with some gentle agitation for about 5-6 minutes. Then rinse again with the same scheme as before. When that is done, hang it to dry and bingo... salt print deliciousness!

Salt-Print--001

Saturday, June 21, 2014

Toning Cyanotypes

I've discussed this topic before, but this morning I was doing some experimenting and thought I would share some insights.

First, I started off with a 4x5 Tri-X negative from my Speed Graphic. I scanned it and inverted it to a positive. Then I made a few adjustments and removed any dust spots. That image looks like this.

Nice, huh? I thought so. I needed some prints of this, but rather than sending the negative to a custom darkroom (expensive) or having it digitally printed on a nice ink printer (not the quality/look I want), I thought I would make some cyanotype contact prints right here at home. Of course, I could print using the original negative, but I can only print one at a time and the exposure times are quite long, even in bright sun (around 20min or so). So I decided to re-invert the scan and print it on regular printer paper, then make waxed paper negatives of the image duplicated. Like this.

Then I coated some Canson Aquarelle 140# Cold Press watercolor paper with the traditional 2-part cyanotype formula. UV light penetrates the waxed paper much better than it does the plastic film base of photographic film, so the exposures worked out to be about 4 min. Unfortunately, I over-estimated the time needed and started with 12min, then tried 10min and 8min before I settled on the 4min exposure. So now I had six prints that were quite over-exposed. I could just toss them, but that goes against my frugal nature. I decided I would see if bleaching and toning would recover some contrast. Bleaching is done with dilute washing soda (sodium carbonate). On my first attempt, I had the solution WAY too strong (~1/2Tbs in 2c water) and it completely bleached the print almost immediately. In this picture you can see the over-exposed, unbleached print next to the one I just bleached.

At that point, I diluted the washing soda about 100x and that was much more manageable. Next is the toning step. For this, I use wine tannin. I put about 1/2tsp in 2c water. Some people put these solutions in trays and dip the prints, but I like to just brush them on. It gives me a little more control, I think. So here is a picture of the same two prints. The second one was 'gently' bleached and then the tannin was applied to both.

The lower one isn't really coming back, so that is probably just a loss. This is how we learn. :) I continued on with this method of bleach for a minute or so, followed by a rinse followed by toning until it 'looked right' and I must say that the over-exposed prints actually look pretty good with improved contrast and a little interesting color. It's almost like a split-tone which is a look I like. Here are a couple of the 'correctly exposed' prints after toning.

This is tons of fun and really cheap. I plan to send these off to friends as postcards which is even more fun. I hope this is informative. Put a link to your toned cyanotype in the comments. I'd love to see them!


Addendum:
I decided to make a print out of the 'other side' of the postcard, so I did a quick something in Photoshop, printed it, waxed it and cyanotyped it. I think it looks pretty good and completes the package in an artistically coherent way.

Thursday, October 24, 2013

A Cyanotype Miracle

I believe that miracles really happen. In spite of the title, this is not one of them, but the word is apt in a figurative sense to describe the improbability of what happened with these two prints. Allow me to start at the beginning.

I went downtown to the art supply store here in San Diego. I wanted to buy a pad of hot press watercolor paper to make some cyanotypes with. Well, either they don't make hot press in pads, or this store doesn't carry them, or both. So I ended up getting a small pad of Strathmore 400 cold press. It just says "heavy weight", but feels like 140#. One sheet (5.5x8.5 in) is just the right size for 2 4x5 negatives. So I cut it in half and coated it up with my traditional cyanotype solutions which are a year or more old, but still kicking. I left it in the dark over night to dry. The next day, I put everything in my contact printing frame and set it out for a good 7 minutes. That seemed like an adequate amount of time because I am used to using waxed paper negatives which transmit UV light much better than the plastic used in film. Needless to say, when I washed the prints (in dilute white vinegar) there was not much of an image there. The borders were dark, but the image area was very faint. I probably needed around 20 minutes. I set them aside until I could decide what to do. It was too bad I didn't have color separated negs for these photos, because this would be a great start for a tri-color gum print. But I just had the one negative for each image.

So I decided after they were dry, I would re-coat with the cyanotype solution, register the negatives over the existing image and try to print them again. This is where the miracles start happening. Usually, watercolor paper will shrink if you soak it in water then dry it. This paper didn't, at least not noticeably. In fact the negatives seemed to register perfectly over the previous image. I had to just register the edges since I couldn't really see any of the image through the negative. The next day it was completely overcast. I didn't even bother putting the printing frame outside. It was too dark by the time I got home. The next day, I knew I had to do something because the cyanotype was going to start fogging if I just left it unexposed in the printing frame. So when I saw the clouds start to clear at work, I called home and had my wonderful bride put the printing frame outside. It was still sort of cloudy, so I told her to leave it for an hour then bring it in. Then suddenly the clouds broke and the sun was out! We exchanged a couple of text messages and I figured the whole thing was a wash. There was no way to tell how much UV exposure it had, and I would just start over on the back sides of the prints. I came home and took a peek under one of the negatives and it wasn't completely dark, so I figured what the heck. I did the same vinegar wash as before and cleared it in fresh tap water. What came out was about the best cyanotypes I think I have ever made. The tonal scale is nice and long (for a cyanotype), the edges are clear, just the whole thing came out about as good as I could have wished. So through two printings of some unknowable exposure combined with sitting out for a couple of days in the air, I got a couple of beautiful prints. I can not explain how it happened, and I will never be able to reproduce the process. Anyway, here they are.

Artyom-Cyanotype

Water

Wednesday, May 29, 2013

A Tale of Two Prints

One of the reasons I got a large format camera was so that I could use the negatives for contact printing with 'alternative' printing techniques. Alt techniques aren't really 'alt' at all. They are just out-dated. They are the techniques used by the early photographers of the 19th and early 20th centuries. These are wet plate collodion, daguerreotype, salted paper, ambrotype, kallitype, albumen, gum bichromate, etc. These techniques are definitely still in use and there is an entire photographic sub-culture that enjoys getting their hands dirty with paper and chemistry in order to create images that capture the imagination. I personally love the simplicity of the cyanotype. As you might infer from the name (cyano) this is a blueprint, only instead of printing architectural plans, I print photographs.
It is a very straightforward procedure. Two chemicals (potassium ferricyanide and ammonium citrate) are mixed separately and in this form they are quite stable and can be kept for a long time. Once mixed in a 1:1 ratio, they become (mildly) photo-sensitive. The solution is applied to a surface into which it will soak and/or stick. Generally people use watercolor paper, but cloth, wood or other substrates can be used. I use a brush and just paint it on, but many people use a glass or plastic rod to push the solution across the paper to achieve a very even coating. The paper is allowed to dry (I am impatient, so I take a hair dryer to it in a dark bathroom). Then a negative is laid (emulsion side down) on the coated paper and a piece of glass is placed on top of that to keep everything in contact and flat. I use a contact printing frame that is designed especially for doing just this. The cyanotype emulsion (and also many others) is sensitive to UV light, so either buy an expensive printing light, or if you live in a sunny climate, just use sunlight. I take my printing frame out into the sun and let it sit for anywhere between 5 and 30min depending on the density of the negative. Once the exposure is done, you have to 'develop' the print. Fortunately, the only chemical needed for development is good ol' water. I usually rinse the print under gently running water for a minute or so and then let it soak face down in the sink for another 10-20min. I end up with something like this.

daisy

You can see some specks and other artifacts indicating that I didn't blow the dust off of the paper and/or the negative before I made the print. It all adds to the imperfection and uniqueness so don't sweat it.

While I was waiting for some other cyanotypes to dry, I decided to get the Speed Graphic out and load up a couple of sheets of Harman Direct Positive paper. This is photographic paper that creates a regular photograph, sort of like a Polaroid except that you have to develop it in the darkroom. One of the photos I took was of my work area I was using to do the cyanotypes. This paper is very 'contrasty' and you can lose shadow details very quickly. The solution is to 'pre-flash' the paper. That just means to expose it to a little bit of light before you put it in the camera. That way the darkest parts of the image are brightened a little, thereby reducing the overall contrast. This is another fun way to make photos and what you end up with is 'one of a kind' since you are not going to make any more prints because you don't have a negative. Obviously, I scanned the photo, so it isn't really as unique as if I put it in a frame and it could only be viewed by coming to my house, but you get the point. (note: the daisy cyanotype is in this photo and you can see the brush marks where I applied the chemicals to the paper)

Cyanotype work area

So there you go. Browse over to Photographer's Formulary and pick up a cyanotype kit. It is tons of fun!!