Showing posts with label film development. Show all posts

Sunday, October 14, 2018

Worthy of Redundancy

Ultrafine Xtreme! It seems a little silly to brand something with "Ultra" and "Extreme" in the title. In Latin, the prefix 'ultra' means 'extremely' or 'beyond'. So they are trying to send a message here. They want us to know that this film is fine grained. Now if you've shot enough film, you know that these claims are largely created by the marketing department of the film company and don't always hold true in real life. Especially with black and white film, grain is affected by so many variables from EI (exposure index or apparent iso) to the plethora of developers, dilutions, temperatures, agitation schemes... The list goes on. So I'll be forgiven if I approach "Ultrafine Xtreme" film with a touch of skepticism. This is compounded by the very (not Xtremely) reasonable price, which in Western culture means lower quality. I bought 10 rolls of 120 Ultrafine Xtreme 100 for around $5 per roll. For comparison, Ilford Delta 100 and Kodak T-Max 100 are both over the $6 mark (what? no more Acros 100?? BOOOOO! to Fuji!!!). So let's see what my $1 per roll savings is going to cost me.

I loaded my roll up in my 'chrome-tastic' Bronica S2a (read more about that camera here) with the always pleasant and reliable Nikkor-O-C 50mm f/2.8 lens. This is the sharpest medium format option I have and a great camera to use, so why not? I shot the film at iso 100 because that's what the box says on it. Can I push it? Can I pull it? What are it's reciprocity characteristics? None of these questions mattered. I just wanted to shoot it straight and see what the baseline is. And that's what I did.

Before I get to the shots, I'll describe my development scheme briefly for the home developers out there that nerd out on this kind of stuff. I used two DIY developers mixed together. First was My-tol (Kodak X-tol look-alike). I mixed that up at 2:1. Then I added some Parodinal at 1:100. I developed the film for 11 minutes at around 70F using the usual agitation scheme (constant for the first minute and then 4 inversions every 30 seconds). Fixer was Ilford Rapid Fix 1:4. There, how's that for brief?

One of the tough subjects when it comes to fine grain and sharp lenses is animal fur. I scanned this shot at 1200 dpi and I think I am running out of pixels before I run into grain.
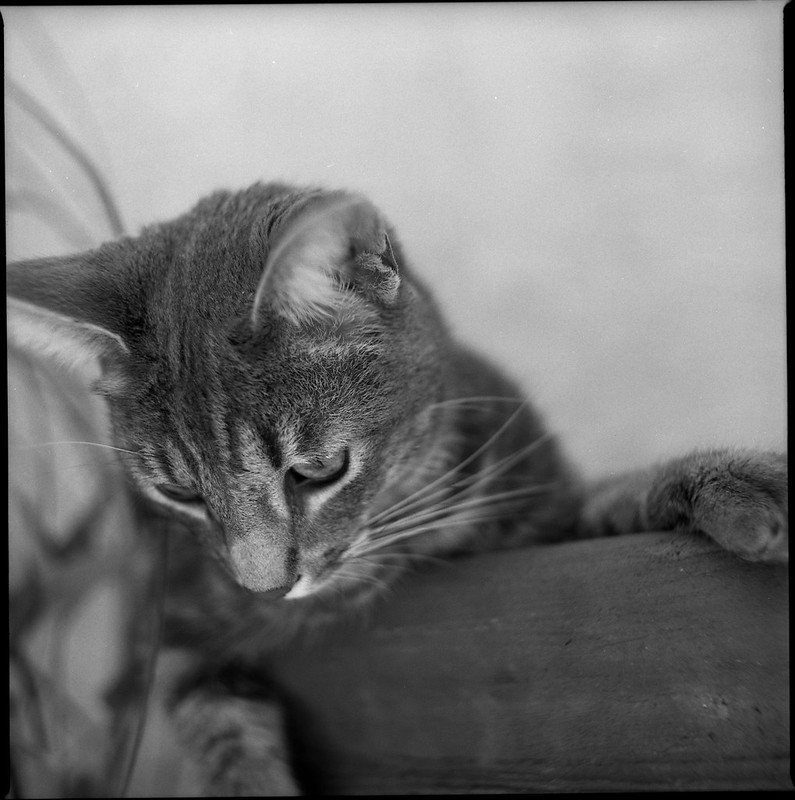
Scratchy McBiterton

Here is a 100% crop of that shot.

I have to say I was impressed. At least with this developurr combination (sorry), this film does indeed show very very fine grain. Is it "Ultrafine"? Well, we are dealing with sort of subjective, qualitative terminology here, so I'm going to say YES! It is Ultrafine! Put this film behind your sharpest lens, develop it with a high accutance developer, and be confident that you are going to get some Xtremely good results. "But James", you say. "Doesn't high accutance and sharpness mean that the low contrast areas are going to look grainy?" Let's see. Here is a 100% crop of the blank out of focus wall behind the subject.

The answer is "yes, there is some visible grain." Is it distracting? Is it "golf ball grain"? No. It is what I would characterize as "filmy" grain. It's the grain that lets you know that you are shooting film. I personally like grainy film (usually). The exception to that rule was Fuji Acros in Caffenol-CL. That was so smooth and creamy and lovely. I could just stare at the blurry backgrounds. But usually I like to have some grain in the image just as a creative device, sort of like the way I left the S2a film mask in this image as a border. It's a layer of abstraction that adds interest.

Now we come to the 'caveat emptor'. Here we see what saving $1 cost me. There were two shots on the roll of 12 that had artifacts. These looked like perfectly round clear spots on the film. I don't think that they were air bubbles that didn't get developed since that is not ever a problem with my agitation and there were only two of them on the whole roll. I think these are actually flaws in the emulsion. Take a look near the bottom of the gate. I'll keep an eye out for more of these in future rolls. I hope this is a Xtremely rare slip up by the QA department. If it is truly a "feature" of this film, I'll probably spend the extra $1 per roll and use T-max. But if not, if it turns out that Ultrafine Xtreme 100 is a good reliable fine grained film, then I will certainly buy more.

Monday, December 11, 2017

Film Hack - Fuji Eterna

I like shooting movie film. It is cheap and plentiful and with my new DIY ECN2 chems, it is super cheap to develop at home with accurate color. The one and only down-side is the remjet. For the uninitiated, remjet is a powder-coat on the back of movie film that serves as the anti-halation layer as well as an anti-static agent for films that travel at high speed through a movie camera. There are numerous approaches to dealing with remjet, but they do not include just sending the film off to your usual color lab. The remjet comes off in their machines and tends to get redeposited on your (and everyone else's film). That makes them unhappy with you and you will be invited to never send them any film again. So I choose to develop color films of all sorts at home, but I still need to deal with the remjet for the same reason. I don't want it coming off in my developer, bleach or fixer and then getting redeposited into the emulsion of future films. So I use a sodium bicarbonate (baking soda) solution (about a tablespoon per liter) as my first pre-soak (about 2-3 minutes). Then I shake it like crazy... I mean really shake it like you are trying to prank your little brother with a can of root beer. Shake it for a solid minute, then pour it out. It should look grey. Then rinse and pour until the rinse water is clear. Now the remjet is gone and you can continue with your regularly scheduled development process. That's it! Well, not quite. If that was it, then this post would be done, but it isn't. Keep reading.

Often, the soak-shake-rinse process is imperfect. That means that there are places on the film where the remjet doesn't come off. So at the end I will take the film off of the developing reel and gently, oh so gently, rub the back of the film with my thumb under warm running tap water. Even then, there are places I miss, but I can't tell where they are until the film has been hung, dried and scanned. Then I see something like this.

GAAAH! What a mess! Now what? One alternative is to make another bath of bicarb and try some more gentle rubbing to see if I can get it cleaned up. But that is an iterative process that could take a loooooong time, and I am impatient. I honestly can't remember how I discovered the second (and much better) alternative. I must have been desperate, or maybe it was an accident. Here it is, the secret to quickly and easily (and completely) removing bits of remjet from your film. Hand sanitizer. That's right. Get a couple of those little cloths that you clean your glasses with. Lay the film emulsion-side down on one. Then get a little dab of the sanitizer on your finger and gently rub it on the back of your negative. Don't rub so long that it evaporates, just long enough to dissolve the remjet. Then use the other cloth to wipe it off. This is what I get after that process. Note: I did not correct, adjust or clean either of these scans. They are "straight outta scanner".

"But James", you ask, what happens if I get the hand sanitizer on the emulsion side by accident?" I honestly don't know. My intuition says that in all the times I have done this, I must have at some point gotten sanitizer on the emulsion, but I have never noticed any smudging, smearing or any other artifact that made me think I had. So the usual disclaimers apply. This is the internet. I am not a professional (or even trained) film cleaning expert. I claim no responsibility for the destruction of every frame you shot at your cousin's wedding if you try this procedure. Try it first on a crappy shot of a Christmas concert! Happy shooting!!

Sunday, June 11, 2017

70 + 35

I finished off two rolls of color film. Nothing exciting there. One of them was 35mm. Still nothing. The other was 70mm (616 format). That's a little more interesting, since I don't have a developing tank with a spool that holds 70mm film. Standard Patterson spools will take 35mm, 127 (46mm) and 120 (60mm). So I improvise... I take apart a standard spool.

The bottom half is the 'outer' piece that has a bigger hole through the middle. That slides on the center post.

The upper part slips down on top and I use a rubber band around the column as a 'stop' that holds it at the right place for 70mm. Loading the film is a little fiddly to get started. Doing a good job estimating the height is important. It will be about a millimeter shorter than the backing paper, so use that as a guide. If you have to adjust it in the dark, it's not that hard. This has to be done with the two halves on the center post, of course.

Then I slide the 35mm spool on top of that (after loading the film). One liter of chemistry will cover these two films in this configuration. I didn't check that before I started, but noticed when doing the stabilizer step that they were covered (whew!)

The camera I used for the 616 film was an old Agfa PD16 Clipper. I love the simplicity of this point and shoot viewfinder. Fixed focus, fixed aperture, fixed shutter speed. Literally, point and shoot. The film is Vericolor III (expired 1989). In good sunny conditions, this pair works pretty well together.

Reflected

The camera I used for the 35mm roll was a Kodak 35RF I got in a trade.

Pencils