I have a box of 4x5 Kodak 4325 Commercial Internegative Film that expired in 2004. I got it cheap, as I do most of the film I shoot. Internegative film was used to make a negative from a color corrected positive that would then be used to make positive copies for distribution. Normally you see this in the motion picture industry using 35mm stocks, but I suppose magazines and such could use the same process with sheet film. As you might imagine, this was not intended to be used 'in-camera'. It is copy film that would be used in a very controlled environment in a copy machine of some sort. It is tungsten balanced (again not for daylight use) and very fine grained. After all, if you went to all the trouble of making a good positive, you don't want to lose information by copying onto grainy internegative film. With very fine grain comes a very low ISO rating. I rate this film at about ISO 1. That is really slow. I could go as high as 5, but 1 is easier for me to remember. Why is 1 easier to remember than 5?? The human mind continues to be a mystery.
Being tungsten balanced means that colors look 'normal' when this is shot under tungsten (incandescent) light which is a warm yellow color. Out in the daylight which is a bright slightly blue/white, things look quite blue. The 'analog' solution to this is to use color correction filters. These are filters you put on the front of your lens to change the color of the light entering the camera from something like daylight to something like tungsten (orange filters), or vice versa (blue filters). Since I have tungsten balanced film that 'expects' yellowish light and I want to shoot out in the blueish sunlight, I need the orange filter known as 85B. There is an 85C also that is less intense for use later in the day when the light is already turning orange outside.
I took a couple shots of the same thing out in the garden, one without a filter and one with the 85B. Then I developed them normally in C-41 chemistry and scanned them, only adjusting for contrast. Then I took them into Photoshop and corrected each of the RGB histograms, adjusting them each to full scale. Then I masked off the left half to see what the image looked like out of the camera compared to what it looked like corrected in PS.
First the unfiltered shot:

And the one with the 85B:

Looking at the left half of each shot, you can see a clear difference made by the filter. On the right side that has been further corrected in PS, the shadows are still sort of blue/green on the uncorrected shot. I could probably work that out with some more time and effort on the computer, but the point of being careful and intentional with analog photography is so that I don't have to spend my life on the computer. I want to make nice photos in my camera and on the negative. Sometimes that means putting a filter on the front of my lens to get the colors looking the way I want them.
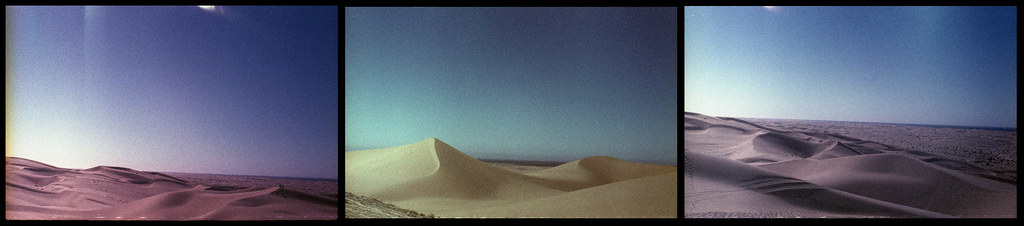
Finally, here is a shot out in the broad daylight, also shot through the 85B. This one is a little more colorful and interesting. It is your reward for reading through my article, so enjoy!