Showing posts with label bellows. Show all posts

Tuesday, February 2, 2016

Isolette III Overhaul part 6

If you have read parts 1-5 in this series, you might have been left wondering "What happened?? Where are the pictures???" Well, I'll tell you. The bellows I made (seen in part 5) were not light tight in the end and there were light leaks apparent in the photos. I am not strictly opposed to light leaks (EXHIBIT A), but in this case, I was hoping to realize the full potential of this camera in the sharpness and contrast categories. So I was unhappy with my results and I took the bellows off and put the camera parts back into the box of disassembled cameras. Sad really. When Christmas rolled around however, I decided to put a custom-made bellows on my list. I knew just where to get it and gave all the details to Santa's little helper. For the benefit of my readership (hi, mom) I'll let you know that the craftsman is Sandeha Lynch and his site is found at http://www.sandehalynch.com/camerawork/bellows.html. It is a beautifully made bellows and fit perfectly without any trimming or fussing.

The one struggle I had was getting the retaining ring on the back of the lens plate, but eventually that went on and I loaded a roll of Fuji Acros 100 and started shooting. Here are a few shots from that roll, developed in Rodinal 1:100 x 60min.

Isolette-Acros100-005
Isolette-Acros100-003
Isolette-Acros100-006

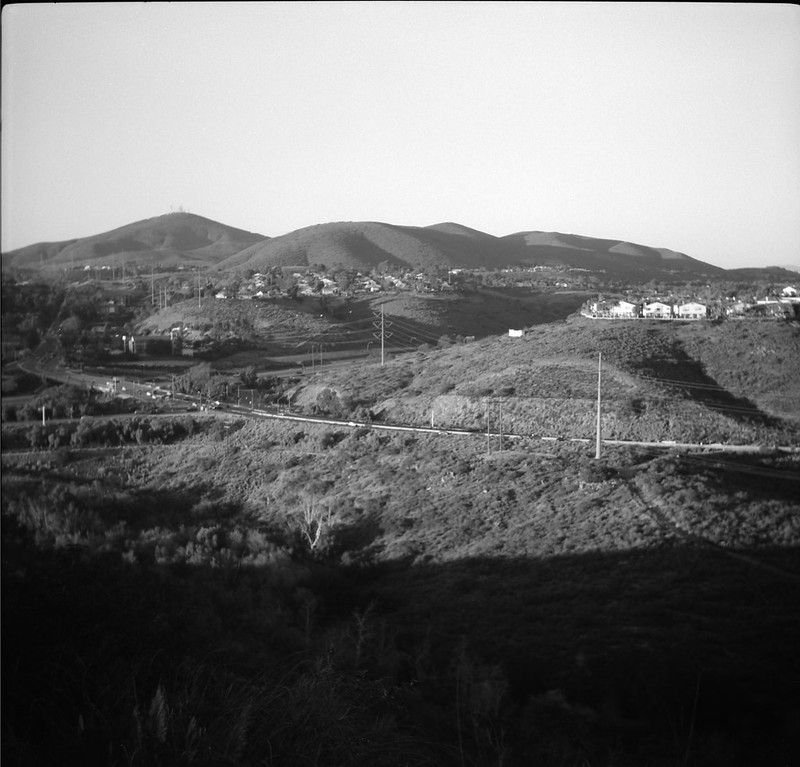
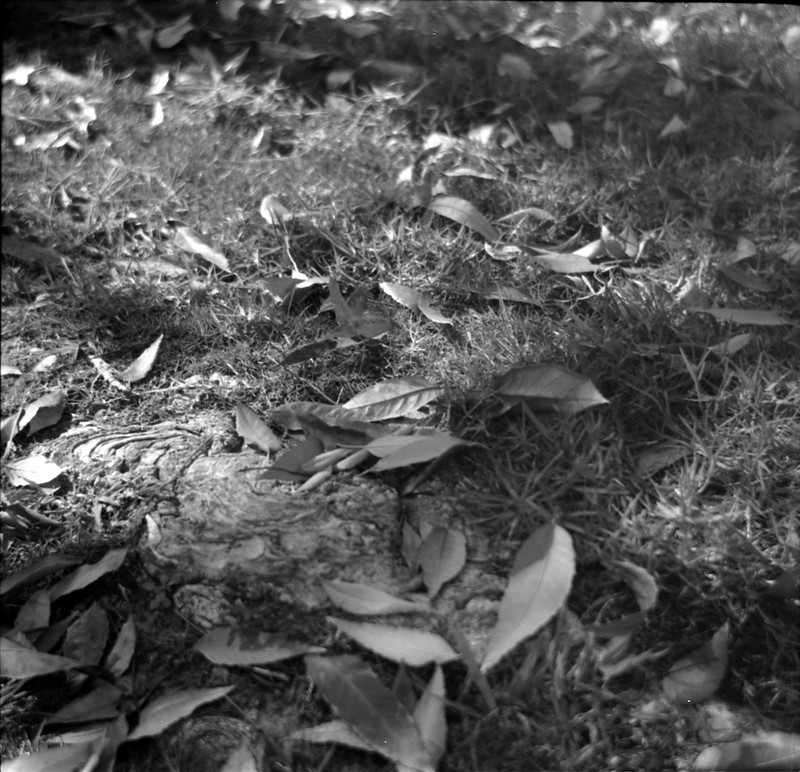
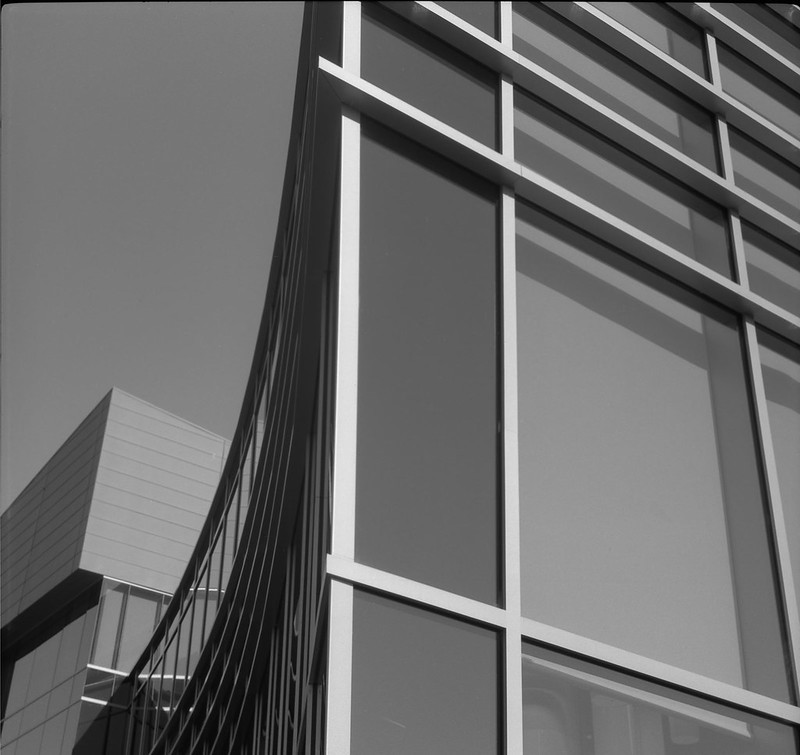
Now I'm happy. This camera is fun to use and the results are quite good (technically). The range finder needs a little vertical adjustment, but I think that the lens collimation was successful and especially when stopped down, the Apotar lens produces good sharpness and contrast. This was a good experience overall. I think it is good to get out the tiny screwdrivers once in a while and get a feel for the ingenuity of these little machines. It certainly increased my appreciation for this camera and its manufacture. If you get a chance, pick up an Isolette and see how it works for you.

Tuesday, May 20, 2014

Isolette III Overhaul Part 4

Well, first let me apologize for dragging this out so long. Making bellows turns out to not be recommended for the faint of heart. The first one I made (see Part 3) was really a 'learner'. I didn't really expect that one to work, but it would have been a nice surprise if it had. Mainly, what I learned was that my materials were right on the edge of being too thick, especially on the seams, and the glue I used to attach the outer covering was too goopy and I couldn't spread it evenly. Also, it was hard to get it to fold neatly. Partly this was my fault because I made the inner seam and outer seam on the same side, so it got really thick there. So here is what I did differently...

First, I changed the stiffeners template to include trapezoids for the top and bottom instead of using plain rectangles all the way around. I decreased the thickness by making the seams on opposite sides (top and bottom) and also by cutting a piece out of the middle of the stiffeners right where the inner seam was. That is the thickest part of the bellows, so every little bit helps. Cutting and gluing all of those pieces on individually was a pain. I will find a better way next time.

Next was gluing on the outer cover. I made sure to position the seam on the opposite side from the inner seam. Also I diluted the glue 1:1 with water and used a broad brush to apply it to the cloth. That made it pretty wet, but not dripping. That actually helped to spot and press out any air that was trapped between the layers. I let that dry overnight. I know it doesn't look that good here because the fabric is wet and nearly transparent.

Once it was dry, I went about folding the pleats. Remember, the wide stiffeners go 'up' from front to back. That's partly how it gets bigger at the rear. It folded up pretty easily with the new improved stiffener shapes. Once folded, I put a piece of paper over it and a heavy object on top of that to help set the creases. That sat for a few hours that way. Now for installation!!

It was pretty straightforward, just a reversal of the disassembly process. I started at the front, putting the brass plate in place. That was a pretty tight fit and I ended up cutting off the front most pleat. Then I put the lens/shutter in place on the front plate/standard and screwed the rear retaining ring (inside the bellows) to the threads on the rear lens element. Then I applied a little contact cement to the back flange where the other bellows was attached and folded over the back pleat of my bellows. Again, I cut off the rear most pleat for a better fit. There is still plenty of length for the camera to extend. I had to wrestle the mask back into place, but once there, it lined right up with the screw holes in the film roll wells and I got it screwed down. Finally, I replaced the film roller rods and folded the camera. It worked!! The camera folded up and closed. It's a little tighter than the original, but I was very excited that I got this thing to work at all.

Now all that is left is to collimate the front lens element, so that it is focused on infinity and replace the front focusing ring. Once that is done, I will have a fully functioning Isolette III. Stay with me for one more post!