Showing posts with label Voigtlander Bessa. Show all posts

Saturday, November 5, 2016

Where'd the Numbers Go!?

I just loaded a roll of Kodak Ektar 120 into my 1939 Voigtländer Bessa 6x9. I started winding, looking for the 1 to appear in the ruby window. I wound and wound, but the 1 never appeared, neither did the 2! I was certain that I had wound far enough, but no numbers! I must have done something wrong with the loading or the turning of that little winder thing. It seems simple and I've done it many times before, but hey I wouldn't put it past myself to screw it up somehow. So I went into the dark bathroom and wound the film back onto the supply spool and tried again. Guess what. The same thing happened. I know it is the definition of insanity to keep doing the same thing and expect different results, so I didn't try it a third time. I went where every puzzled photographer goes... the Googlez! It seems that some others have had their Ektar 6x9 numbers go missing as well. Kodak must have recently changed the position of these numbers, because I know that I have shot this film in this very camera in the last few years and not had this problem. Anyway, I pulled out an empty Ektar backing paper and compared the position of the numbers to the position of the window and sure enough, they don't line up. The numbers are too close to the edge of the paper.

Now that I had the problem clearly identified I needed a solution. Moving the window to accommodate the numbers wasn't really an option, so I had to move the numbers. One option for moving the numbers was to just spool the film onto a different backing paper that has numbers in the right place, like Acros. I decided that was sub-optimal since I might get confused later and develop it in the wrong chemicals. So I took that old Ektar paper and wrote on a new set of numbers in the correct position. Then I rolled the film onto the new paper. Voilà!! There are my numbers in the ruby window!

I hope someone finds this useful. I know I did. :P

Thursday, March 24, 2016

Fuji Super HR Microfilm

If you have accidentally stumbled across my blog and found yourself with nothing better to do than read it, you might know that I like to shoot expired film, and in addition I like to shoot expired non pictorial film. Non pictorial film is that film that was intended for other uses like radiography and copying documents. Recently, while perusing a large auction site, I came across some microfilm made by Fujifilm. This was truly microfilm in that it was 35mm film, but it has no sprocket holes. Most 35mm cameras need sprocket holes in the film for the winding mechanism and/or the frame spacing/counting mechanism to work. So needless to say, demand is pretty low for film without them. When I saw this film it reminded me of a 100'roll of sprocketless Konica 160 I have in the freezer that I have used in my Kodak Instamatic 500. Granted, I did have to add some spacing holes in it for the camera to work properly, but that's not too difficult. So my intention was to use this Fuji film in the instamatic. But I digress. What I want to talk about is what I actually did with this film when I got it. It is not unheard of to put 35mm film into medium format cameras and expose it edge to edge over the sprocket holes. Lots of people do that, so I thought I would do that with this film and not be bothered by the pesky hipster holes. So that's what I did. I taped it down to a 120 film backing paper. Getting it centered and straight in the dark was a challenge, but after a few tries rolling it up and unrolling it, straightening it out and re-rolling it, I finally got it all rolled up. I found it easiest to tape down the leading end, roll it onto a 120 spool and then re-roll it from the untaped end onto another 120 spool. That makes it so that you don't end up having to untape and retape the leading end because the film slid past the paper as you were rolling. I thought later of making some sort of a jig that would hold the paper flat and let me use both hands to align the 35mm film. That might be worth thinking about later. But today, I just need to show some pictures. These are full width 35mm taken in a 6x9 camera (Voigtländer Bessa) so 90mm wide. That is a fully manual camera with a viewfinder and range estimation focusing. On top of that, I had to sort of envision where the 'film' was in the viewfinder. So I was picturing a skinny mask running across the middle of the viewfinder in order to compose my shots. I got 8 shots on a roll which is good for me since I don't have a lot of patience. 36 exposures is torture. The film didn't have an iso rating marked, so I went to the googlz and found the spec sheet. From there, I found that the film's manufacturer recommends an iso of "medium". So, I figured "eh... 100??", but it expired in 2001, so I thought "ummm... 25??" So that's what I shot it at. I developed it in Adox Adonal (Rodinal) 1:100 for 60 minutes with 30 sec. initial agitation and 10 sec. agitation at 30 minutes. When I pulled the negatives out of the fixer, I thought, "Woah, that's a lot of contrast.", and it is, but not as bad as I initially thought. Most of the photos were shot in bright midday sun, so contrast is what you get. The first shot is fogged because I was taking too long to get it rolled up, but it turned out okay since it was a shot of a foggy landscape. :)

Bessa-HR20-007

This is a snake in the grass.

Bessa-HR20-006

Here are some more without the bad jokes.

Bessa-HR20-005
Bessa-HR20-001
Bessa-HR20-002

I hope you enjoy these photos. I sure had fun making them and am looking forward to having more panoramic fun with this sprocketless film.

Tuesday, July 29, 2014

Pushing Through Addendum

When I wrote the last two Pushing Through articles, I used a couple of photos from one of my favorite cameras; my 1939 Voigtländer Bessa 6x9. I love using that camera and am always wonderfully surprised when I see the results. There is a lot of fuss made about lenses these days. How many elements in how many groups, what kind of coating, rotating or fixed front element, etc. Here's what I have to say about that. Photography is art (unless you are doing scientific or some other kind of strictly documentary photography). The artist needs to use the tools that will give him or her the results that are pleasing to them. If you like tack sharp perfection of contrast and color, then you should stick with modern lenses, preferably high-end ones. I have gone that route and even got caught up in 'pixel peeping' to make sure that my images were just as sharp as they possibly could be with the equipment I had. Then I rediscovered film via the Holga. This 'opened my eyes' to a world of color and shapes and blur and haze that I sort of knew existed, but never thought much about. That little plastic meniscus lens opened doors into creative spaces in my brain that I didn't know were there. Then I started buying old cameras and old film to see where that would lead and it took me deeper into those places. These days, I don't mind taking a shot or two with my DSLR or even on my phone (if required), but when I want to really be creative, I get out an old camera. Maybe it has a really nice lens (for its day), maybe it doesn't. In the case of these photos taken with my Bessa, the lens is a decent 'triplet' type without any coatings. The focus is done by estimation of the distance to the subject and exposure is measured either with a hand-held meter or by 'sunny sixteen'. These are not the sharpest, most contrasty, color accurate photos I could make, but I love the way this camera 'interprets' the light. It fits well with my artistic vision.

These were taken on Kodak Ektar 100 film. I don't shoot this film very often, but it does a very nice job rendering color in a vivid but accurate way. Compare these to the shots done with the same camera on expired Tri-X. Leave a comment if you have an opinion about which are better. Lake Morena Oak

Lake Morena Ruins

Monday, July 21, 2014

Pushing Through XV - The Final Entry

I have really enjoyed putting this series together. Looking for examples when I was out walking around my suburban environment turned out to be easy. Finding somewhat unique examples at a time of day that rendered them aesthetically pleasing was a bit more of a challenge. I always had in mind the photo I wanted to end the series with and so when I saw it while hiking around Lake Morena, I took a couple of shots with my '39 Voigtländer Bessa on some expired Tri-X I had loaded. It was mid-day, so the light is less than desirable, but I took the photos anyway and now I think it is time to bring this to an end and move on to another photo project. I hope you have enjoyed the series and look forward to any comments you would care to contribute.

Saturday, July 19, 2014

Pushing Through XIV

This entry into the series is a little different. The theme of these photos is nature "pushing through" the obstacles set up by mankind. However in this case I found nature pushing through its own obstacle. We recently took a long weekend holiday out to the east of San Diego near Campo, CA at a place called Lake Morena. It is an old reservoir intended to store water for the city of San Diego. It was also a fishing lake that was stocked with various types of fish for sportsmen to catch. Recently, the decision was made to drain teh water down to other storage reservoirs closer to the city. This left Lake Morena at just 4% of it capacity. Really it is now a very small body of water and from our camp site, we could not see the lake, but we had a nice view of a meadow where the lake used to be. Right between our cabin and the meadow was a very big, very old California Live Oak. That is not very interesting, but what was interesting was that it was growing out of a crack in a huge outcrop of solid granite.

I can imagine a bird or squirrel dropping an acorn there in a small crack and maybe there were a few wet winters and mild summers that allowed the little sprout to get some roots down. Over the decades this tree has grown and actually pushed against the sides of the crack to expand it, sending roots deeper and growing bigger. Today it is truly beautiful and its branches spread out over the granite making a nice cool spot for animals and people to escape the summer heat.

This tree won't live forever, but it will live for a few hundred years, after which there will be a bright spot over a roomy crack in a big granite boulder... a perfect place to put an acorn for safe keeping.

Sunday, September 29, 2013

Toned Cyanotype

I have been wanting to try this for a while and this weekend I finally had some time to read up and give it a go. I had bought some wine tannin a while back since tannin is the primary component in tea that is responsible for toning cyanotypes. With the powdered tannin I can skip the brewing step and be a little more quantitative/reproducible about the process. So what did I do?

The image I used was from a while back. It is a 4x5 negative on x-ray film. For details of that image, look here. The cyanotype sensitizer I used was the traditional formula (not the Ware formula) and I have to admit it has been sitting in my photo box for probably a year or more. That is a testimony to the longevity of those solutions and the archival quality of the prints. The paper is Arches 90# hot press watercolor paper (love that stuff). The exposure was 6 minutes (probably should have done 8) in the waning autumnal sun (5:00pm in San Diego). The first bath was about 1:4 white vinegar:tap water. That was intended to extend the tonal range and I think it worked pretty well. Look at the bellows on the camera and you can see quite a few grays in there. Also, the blacks are 'just black' and not too blocky. This might be lost on the computer monitor, but the print is quite nice. The highlights are blown because I under-exposed the print, but that can be remedied next time. Then I washed in lots of plain water until the highlights cleared and were the same color as the borders of the paper. I then did another quick bath in dilute hydrogen peroxide to fully develop the iron. This can be done by drying the print and just waiting a few days, but I am impatient. Another plain water wash and it was time to tone.

I mixed ½ tsp washing soda in 500mL of distilled water.
I mixed 1 tsp wine tannin in 500mL of distilled water.

Starting with the soda bath, I alternated soda... water... tannin... water... for about 30 sec each until it started looking the way and the color I thought I wanted. Here is what I ended up with.

Voigtlander toned cyanotype

Friday, September 27, 2013

Pushing Through X

I found this photo on a roll that had been sitting in the refrigerator for a few weeks. I took it with my 1939 Voigtländer Bessa. I had the accessory mask inserted so instead of taking eight 6x9 photos, I got sixteen 6x4.5 photos. It is interesting to have these two options with this camera. Not only do you double the number of exposures on a 120 roll (at the expense of image size), but you get a different aspect ratio. The 6x9 aspect ratio is 2:3 and the 6x4.5 (commonly "645") ratio is 3:4. Of course the closer the ratio gets to 1, the more 'square-ish' the image. So something like 6x12 or 6x17 are really panoramic images while large format 4x5 (8x10) look quite square in comparison. Of course the standard 120 format is 6x6 which is a perfect square, but the 6x7 cameras are very popular too.
But I digress...
pushing through X
This plant isn't so much "Pushing Through" as much as "Taking Over". If you have ever tried to clear ivy, you will know that it can penetrate masonry and concrete easily with its little rootlets. This makes it quite invasive and difficult to control. One might even think of it as a pest, but not me. I find it beautiful in both appearance as well as principle. It does not 'care' what barriers man erects. Even the most permanent of monuments are merely a stairway to brighter sunlight for this survivor. Next time you walk by a building with ivy growing up the sides, stop and take a moment to appreciate the ingenuity of this plant which uses the barriers raised against it to mount up to the heavens and thrive all the more. I think there is a lesson in there for all of us.

Monday, September 23, 2013

Pushing Through IX

This is a little bit of a departure from the theme of the first 8 in this series, but I think that it is well within the overall theme of plants defying man's attempts to control them. In this case, the landscapers have pruned back a branch on a tree. The tree's response? Re-grow that branch of course (sprouting from the lower left of the scar). After all it was there for a reason.
I took this photo with my '39 Voigtländer Bessa 6x9. I had it loaded with one of my favorite films, Fuji Neopan Acros 100. I also was holding a deep yellow filter in front of the lens (there is no way to mount a filter on the front of this lens). I think the filter helped with contrast and with distinguishing the sky and clouds in the background.
See the rest of this series HERE. Pushing Through IX

Friday, August 2, 2013

Pushing Through II

Pushing Through II
This photo was taken nearby where I work along the street. You can see the fence in the background. On the other side of that fence there are trees and shrubberies, but it is a hillside, so it is not groomed or manicured in any way. This sort of 'wild' growth tends to send out root runners just under the surface of the ground and in this case under the pavement of the sidewalk. Then it finds a crack where moisture and light come through and it pushes up. You can see in this photo that the larger underground root has pushed the cement block up and away from the sidewalk, creating the 'crack'. I often wonder, "What will this place look like in 100 years, in 500 years?". I wonder if man will perfect the supression of these 'invasive' plants and have perfectly paved walkways with perfect 90-degree angles and none of this messiness. Or will man come to grips with his place in the world and welcome the wild back into his path. Will our cities become more natural or more manufactured? Time will tell I guess. Until it does, I will enjoy the struggle of these little ones pushing through.
Pushing Through I

Thursday, August 1, 2013

Black Butte Ranch

Mt. Jefferson
We had a family reunion of sorts up in Oregon at a place called Black Butte Ranch. It is sort of a typical Northwest resort. It is up in the Cascade range and so there is plenty of mountain air and hiking and glacial run-off. This photo was taken with my '39 Voigtländer Bessa 6x9 folding camera. I thought the corral made a nice compositional element to frame the mountain. One principal of composition I try to keep in mind is framing and frames within frames. This one might have been better composed if I had taken a step to the right and filled the frame with the 'corral frame' a little more. I do like the photo though and the b/w film gives it a classic look.


Woody Reflection
This resort also happens to have a golf course. I don't golf, but this one offered some nice landscape photo ops, so I took advantage since I had my Speed Graphic with me. I splurged a little and used a sheet of my Portra 160 for this. I was pressing my luck a little with the chemicals I had. It was getting along in development cycles and there was some uneven development in some of the images, but this one came out pretty good. There isn't really anything exciting or earth-shattering in the composition, but it is a 'nice' pastoral kind of scene. It conveys the tranquility of the time we spent there (or at least the tranquility I wish we had experienced). Getting four families together under one roof for 'vacation' is a recipe for chaos, but there are still some quiet times and nice memories to be had and this photo hints at those.

Monday, June 10, 2013

"Exotic" films

Gasworks Forest

At first glance, you are thinking "James! Holy cow, take care of your freakin' white balance, will ya?" I thought that too, and I still do sometimes when I see a photo like this. But once you know what this is, you might gain an appreciation for it. This is "red scale" film and it is called that for obvious reasons. The colors are all 'shifted' toward the red end of the spectrum. So what is it and why use it?

Red scale film is simply regular color negative film that has been put on the spool with the emulsion side facing away from the lens. Ok, maybe I should back up a bit. Here is a diagram showing how modern color film is produced.
 Normally, layer 'a' would be facing the lens and light would pass through the layers in a-i order. The layers are made and balanced so that this produces an accurate rendition of the actual image in terms of human vision. However, if you put the film on the spool backward, the light passes through in i-a order. That means that it first passes through the antihalation layer, followed by the base, then the red layer. This completely turns the balance on end and strange things begin to happen. It isn't just taking a photo through a red filter. That would cause blues and greens to look very dark, but that isn't the look you get with red scale film. It is shifted in a strange sort of surreal way. It isn't just white balance either. Take a look at this image that was 'corrected' in PhotoShop for white balance.


Fixture

Now it is almost a sepia tone with the blue sky going grey and the whole thing giving a kind of monochrome (but not really) feel.

Next up is not really an exotic film as much as a misplaced one. What would happen if you took color transparency (slide) film and developed it in negative film chemistry? You would get what is called "cross-processed" images. The result depends on the film you start with and how you expose it, but in general, you are going to get increased contrast and potentially some color shifts. Some colors may saturate and others may wash out. You just have to experiment and see what happens.

Here is an image that I cross processed.

The bee and the coral tree

You can see that the sky has taken a very cyan color .The greens have saturated and the red of the coral tree flower has washed out to orange. To me it makes a kind of retro look as if the film or print has been left out in the sun. You can use regular Fuji Velvia (100 or 50) and either process it yourself or send it to a lab that offers cross processing (usually for a couple bucks more than regular E-6 slide processing). It is a lot of fun seeing what kind of results you get using unusual films or processes. Give it a try. Create something unique!!

Monday, June 3, 2013

X-ray base layer

As I mentioned in my previous post, the base layer of the x-ray film I bought is blue. Here is a color 'transparency' scan of the Voigtlander photo.
  Voigtlander Negative

X-Ray Vision

Ok, that title is a little misleading. I haven't found a new way to see through clothes or walls. I'll leave that to the comic book writers and the pervs on the interwebz. This is about the latest 'thing' in the large format photography toolbox... x-ray film. Believe it or not, they still make this stuff and they make it cheap! I'm sure that budget is one of the drivers behind the popularity of this film. A 4x5 sheet of b/w film can go for between $1US and $4US while x-ray film is going for around 1/10th of that! Now the down-sides may change your mind about it being a bargain, but I enjoy DIY aspects of my hobbies, so I am all in! X-ray film is ortho-chromatic, which means that it doesn't respond to every color of light like pan-chromatic film does. I haven't been able to find the hard data on this, nor have I done any real testing to see where the sensitivity falls off, but it is pretty much agreed that these films are blue/green sensitive and red insensitive. Next, if you have an 8x10 camera, you are good to go. However, if you have a 4x5 camera, you are going to have to cut the large sheets down to size. This can be done with a regular paper cutter and a red darkroom safety light. I got an 11" paper cutter (the kind with a sliding blade) for about $11 at my local office supply store. I marked the 4 inch and 5 inch marks with a silver marker to make them more visible in the dim light as the cutter itself is made of black plastic. I tried a couple of other things with Xacto knives, but it was too difficult to manage in the dark. Save yourself some frustration and just get a paper cutter that will hold the film square and cut straight. I loaded up my holders and set up some test shots. I rated the film at iso 50 for some shots and at iso 100 for others. Then I did a semi-stand development in a 1+50 dilution of Adonal (Rodinal). Agitation was constant for 30 sec and then 10 sec at the 10min mark. I used the MOD54 and a Paterson tank to hold the film. Iso 50 gave better, more constant tones while iso 100 was quite contrasty but still very usable. Here is a shot of my Voigtländer Bessa taken at iso 50. I could probably even go down to 25 or lower and do a longer development cycle. Maybe next time.

Voigtlander Bessa

You can see a couple of marks/scratches at the top and bottom of the image. That is where the MOD54 holder contacts the film. The x-ray film has emulsion on both sides, unlike regular photographic film. It is also very thin. The base and the emulsion layers are quite delicate. I will say that the base of this film is the most beautiful sapphire blue. The negatives are quite stunning to look at. I am using Kodak ClinicSelect Green X-ray film purchased from Deep Discount X-Ray. I have 100 8x10 sheets, so I am sure I will be using this film a lot. I am quite pleased with this first image. Let me know your thoughts.

Sunday, April 7, 2013

Desert "Shooting"

Rifles

I went out to the desert near Anza Borego with a couple of friends with the purpose of shooting our rifles. They both have modern sporting rifles of the AR variety, while I have a trusty 1925 Mosin Nagant 91/30. I find that the AR platform is 'fun' to shoot, but not much of a challenge at 100yds. The Mosin on the other hand is hard enough just to hold, let alone hit something 100yds away. But that's not what I wanted to write about. I also brought a camera (as I am want to do).

I brought the 1939 Voigtländer Bessa 6x9. I really like that camera. It is light, it is rugged (though not weather-proof) and it looks good. On top of that, it takes very nice photos. They are not tack sharp like a digital or modern film camera with high-tech coated optics, but they are 6x9 cm which is a very large medium format image. They also have a character to them that appeals to my aesthetic. This is a digital photo of it (forgive me, I didn't have a film image of it at hand). Everything is manual, so the process goes something like this... Meter the light with a hand-held meter (I usually use my Sekonic Digilite F, but on this trip I left it home and used the 'sunny 16' rule), set the aperture and the shutter speed dials on the front of the shutter, cock the shutter lever (sets the tension on the shutter spring) and estimate the distance to the subject (no range finder on this one), set the focus ring to the appropriate distance, compose the shot through the view finder and actuate the shutter. Don't forget to wind the film with the winder key on the bottom of the camera, watching the red window on the back for the next frame number to come along. It is a process to be sure, but it forces me to slow down and think about the image. Ansel Adams was a big proponent of working backwards. FIRST you envision what the print will look like. Then you go about making that photo. I am not quite there yet, but these older cameras make me think harder about each frame. Part of it is the cost. Obviously, neglecting the initial cost of equipment (I paid less than $100 for this camera), compared to digital images (which are practically free) these are quite dear. 120 roll film is around $5-$7 per roll and I get 8 shots per roll with this camera (that's ¢63 - ¢88 per shot). Then if I send it away to be processed, that is another $10-$12 per roll (that's another $1.25 - $1.50 per shot), so at $1.88 - $2.38 per image, I think before I push the button (usually). Whereas with my digital equipment, I happily snap away (as does everyone), secure in the knowledge that I can trash 99% of the photos and still be ahead.

So why do it? Why not just take the digital images, add some grain, desaturate and call it good? I have certainly done that in the past, so what I say next is from experience. I am not just emoting here. IT IS NOT THE SAME!! Film photography has an experience to it. It is visceral. It costs you something, not just monetarily  but it requires an investment from your soul that I never felt with digital. Digital is about the technology. Not to say that there are not fine artists making amazing images, but for me it feels like I tend to snap away more with less thought, and I see others do it too.

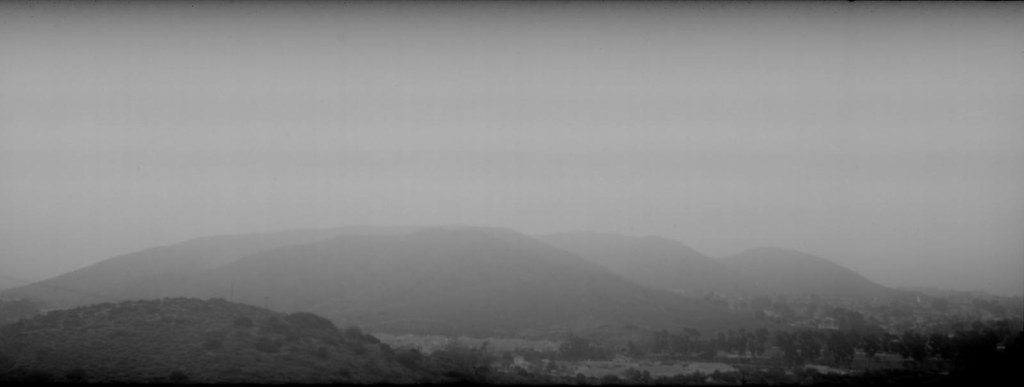
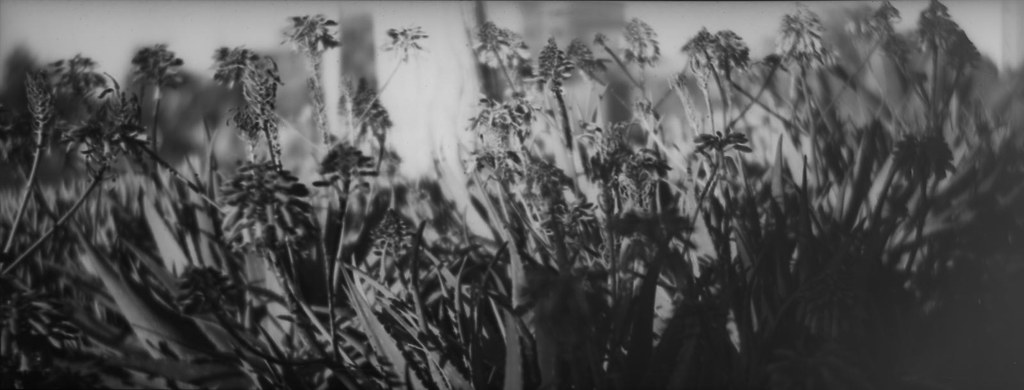
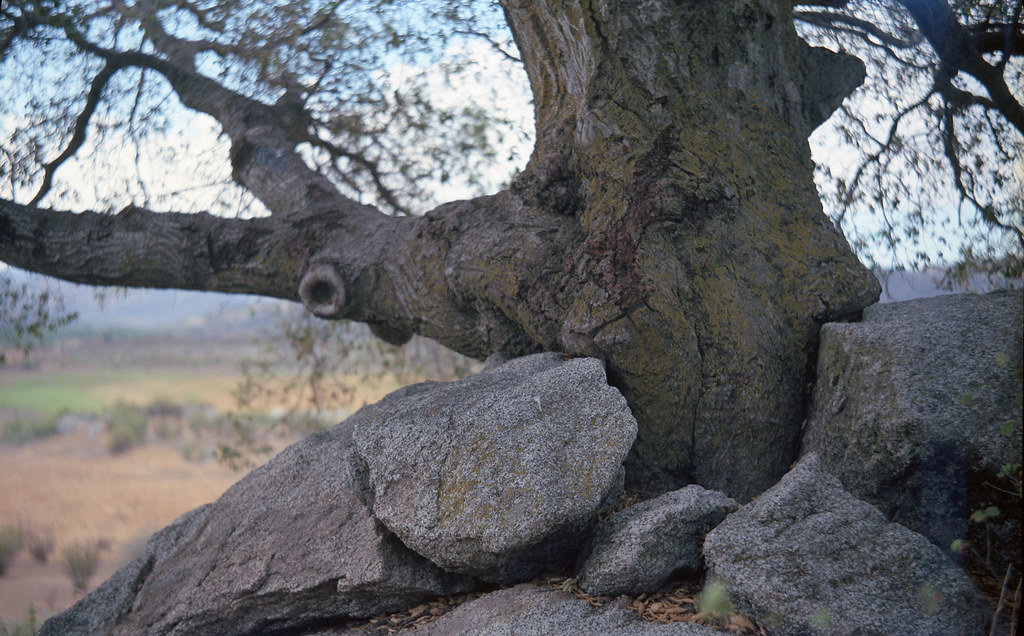
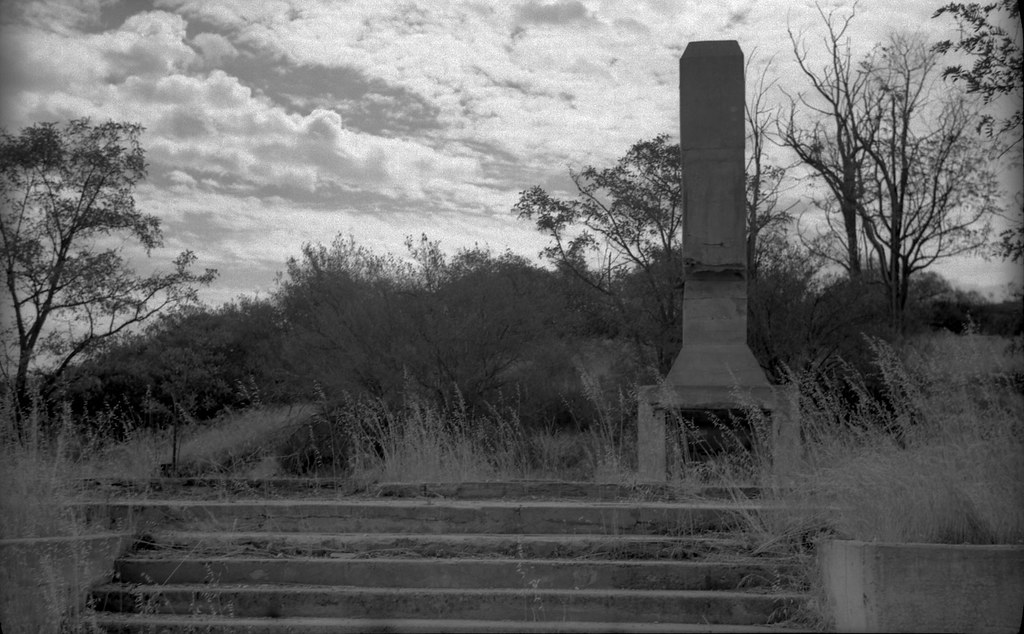
Back to the desert... Between shooting targets (the Mosin packs a punch and my shoulder needs to rest) I would walk around and see what there was to photograph. There wasn't much really. It was a pretty barren place, but I tried switching over to my right brain and 'seeing' what I could see. The ocotillo was blooming. I only had Tmax 100 in the camera, so the colors were not going to be a focus even though the orange blossoms on the strange looking green stalks would have made a nice image. I decided to take a couple of photos anyway since the textures were just as interesting as the colors.
Ocotillo bloom

I enjoyed my time in the desert (sort of). I'm not a huge fan of heat and dessicating winds and sun exposure, but I got a chance to make some photos that I enjoy. I hope you enjoy them too.

Monday, March 25, 2013

Stargazer

I have taken a couple series of photos of this sculpture that is nearby where I work. It is called Stargazer and it is outside the San Diego Technical Institute kind of tucked away off of any main roads where anyone might see it. I used my 1939 Voigtländer Bessa 6x9 camera and shot mostly abstract views of the sculpture. It is quite large and completely accessible, so I can walk around and under it to get different views and angles. Some of the photos are here.

Stargazer

This one was taken mid-day with a bright blue sky in the background. I tried not to get any land features in the frame that would distract from the composition. This also deprives the viewer of any sense of scale. I know what the sculpture looks like, so I know that it is about 35 feet tall and bright red, but that is all lost in the b/w photos. I took these on Acros 100 and developed them in Caffenol-CL. I did stand development, so the grain is exceedingly fine. I was shooting at f/8, but given the size of the subject and the size of the film, the depth of field is shallow-ish which lends more to the loss of scale.

After I looked at the b/w images for a while, I wanted to get some with the vibrance of the colors and contrast between the sculpture and the sky. Velvia RVP50 seemed the right choice. Everything lit by the sun looks amazing on Velvia 50. The scan obviously does not do the film justice, but you get the idea. Drop by my Flickr page and take a look at the complete set (more color images to come including one of the entire sculpture).

Stargazer - in color

Thanks for stopping by.