Showing posts with label film. Show all posts

Sunday, October 14, 2018

Worthy of Redundancy

Ultrafine Xtreme! It seems a little silly to brand something with "Ultra" and "Extreme" in the title. In Latin, the prefix 'ultra' means 'extremely' or 'beyond'. So they are trying to send a message here. They want us to know that this film is fine grained. Now if you've shot enough film, you know that these claims are largely created by the marketing department of the film company and don't always hold true in real life. Especially with black and white film, grain is affected by so many variables from EI (exposure index or apparent iso) to the plethora of developers, dilutions, temperatures, agitation schemes... The list goes on. So I'll be forgiven if I approach "Ultrafine Xtreme" film with a touch of skepticism. This is compounded by the very (not Xtremely) reasonable price, which in Western culture means lower quality. I bought 10 rolls of 120 Ultrafine Xtreme 100 for around $5 per roll. For comparison, Ilford Delta 100 and Kodak T-Max 100 are both over the $6 mark (what? no more Acros 100?? BOOOOO! to Fuji!!!). So let's see what my $1 per roll savings is going to cost me.

I loaded my roll up in my 'chrome-tastic' Bronica S2a (read more about that camera here) with the always pleasant and reliable Nikkor-O-C 50mm f/2.8 lens. This is the sharpest medium format option I have and a great camera to use, so why not? I shot the film at iso 100 because that's what the box says on it. Can I push it? Can I pull it? What are it's reciprocity characteristics? None of these questions mattered. I just wanted to shoot it straight and see what the baseline is. And that's what I did.

Before I get to the shots, I'll describe my development scheme briefly for the home developers out there that nerd out on this kind of stuff. I used two DIY developers mixed together. First was My-tol (Kodak X-tol look-alike). I mixed that up at 2:1. Then I added some Parodinal at 1:100. I developed the film for 11 minutes at around 70F using the usual agitation scheme (constant for the first minute and then 4 inversions every 30 seconds). Fixer was Ilford Rapid Fix 1:4. There, how's that for brief?

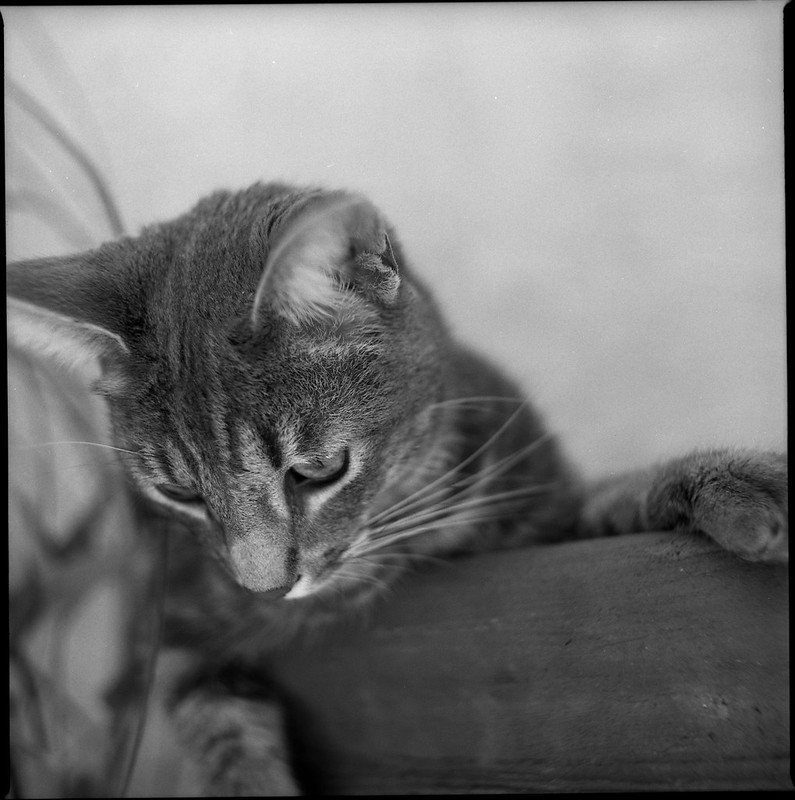
One of the tough subjects when it comes to fine grain and sharp lenses is animal fur. I scanned this shot at 1200 dpi and I think I am running out of pixels before I run into grain.
Scratchy McBiterton

Here is a 100% crop of that shot.

I have to say I was impressed. At least with this developurr combination (sorry), this film does indeed show very very fine grain. Is it "Ultrafine"? Well, we are dealing with sort of subjective, qualitative terminology here, so I'm going to say YES! It is Ultrafine! Put this film behind your sharpest lens, develop it with a high accutance developer, and be confident that you are going to get some Xtremely good results. "But James", you say. "Doesn't high accutance and sharpness mean that the low contrast areas are going to look grainy?" Let's see. Here is a 100% crop of the blank out of focus wall behind the subject.

The answer is "yes, there is some visible grain." Is it distracting? Is it "golf ball grain"? No. It is what I would characterize as "filmy" grain. It's the grain that lets you know that you are shooting film. I personally like grainy film (usually). The exception to that rule was Fuji Acros in Caffenol-CL. That was so smooth and creamy and lovely. I could just stare at the blurry backgrounds. But usually I like to have some grain in the image just as a creative device, sort of like the way I left the S2a film mask in this image as a border. It's a layer of abstraction that adds interest.

Now we come to the 'caveat emptor'. Here we see what saving $1 cost me. There were two shots on the roll of 12 that had artifacts. These looked like perfectly round clear spots on the film. I don't think that they were air bubbles that didn't get developed since that is not ever a problem with my agitation and there were only two of them on the whole roll. I think these are actually flaws in the emulsion. Take a look near the bottom of the gate. I'll keep an eye out for more of these in future rolls. I hope this is a Xtremely rare slip up by the QA department. If it is truly a "feature" of this film, I'll probably spend the extra $1 per roll and use T-max. But if not, if it turns out that Ultrafine Xtreme 100 is a good reliable fine grained film, then I will certainly buy more.

Tuesday, June 28, 2016

Putting That Chemistry Degree To Work

I have been a user (if not a devoted one) of caffenol ever since I ran into Reinhold's blog and saw the wonderful results he and others like Jon Caradies get with that simple 3-ingredient developer. I do enjoy weighing the ingredients on my little 3-beam balance and making the solution. The smell is a little funky, but I think it's growing on me and I don't mind it so much anymore. I even have my own modest gallery on Flickr where I upload various films both expired and fresh that have been processed with this earth-friendly concoction. Here is the first photo I ever developed and shared that was processed with caffenol-C-L.

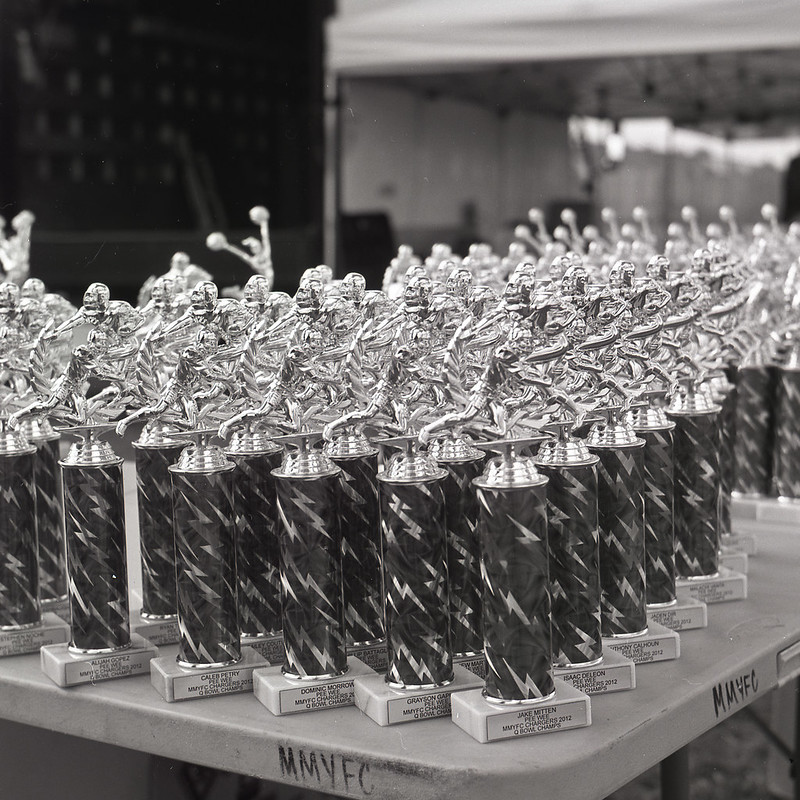
Youth Football Trophies

I even went out on a limb and made my own variant, substituting ground up eucalyptus bark. I called it eucalyptol. You may have read about it HERE. That one needs to be revisited with a little different methodology, but I'll save that for another post. For this post, I want to talk about something very different. Okay, maybe it isn't "very" different. It is still a 3-ingredient developer made with things that are readily available at your local drug store and/or online. I chose to get my ingredients online just because it is easier than driving around to different places trying to find things. So what is this "different" developer? It is called Parodinal because it is a Rodinal clone based on Paracetamol. Paracetamol, also known as Acetaminophen, is the active ingredient in Tylenol which is cheap and abundant. Here is the shopping list and the amounts I use for a single 250 mL batch.

  • 30x 500mg Paracetamol tablets
  • 50gr of Sodium Sulfite (Anhydrous)
  • 20gr of Sodium Hydroxide (Anhydrous)
  • Water (distilled) to make 250ml

I based this recipe on what I found over on Martin Zimelka's blog. He in turn learned about it on APUG (I think).

For my first batch, I went simple. I made the Sodium Hydroxide (drain cleaner crystals) solution, then I just crushed up the Tylenol tablets with a stainless steel mortar and pestle and tossed it in. The Sodium Sulfite did not dissolve even in warm water, so I just combined the two as best I could and figured it would either work or it wouldn't and if it didn't, I'd try something different. But guess what? It worked!

S2a-acros-001

It was a cloudy suspension for sure. The binders and coatings of the ground up tablets did not dissolve and just sort of sat there. They didn't seem to have any effect on the action of the developer and that jives with things I read online. It's just sort of disconcerting to have a cloudy developer. You get the feeling that that all of that sediment is somehow ending up on your film. To get around this, some people either start with neat paracetamol. That gets around the sediment problem, but it is a little more expensive and a little more difficult to obtain. Others filter the binders out of the solution, I suppose with something like a coffee filter. That is also effective, but sheesh! That can take a loooong time to filter. Who has the patience for that? So what is a chemist turned data scientist to do? Extract the paracetamol away from the binders! Alright, so that isn't really going to save me any time. In fact, it's probably going to take a lot longer since I don't have a roto-vap handy. Ah well, it would be fun and interesting to see if I could get a clear developer that worked.

So off I went to the hardware store to find an organic solvent that would dissolve the paracetamol and leave the binders behind. I had done some internet research and found out that methanol is great at dissolving paracetamol. But pure methanol is hard to buy because it is quite poisonous. Next best? Ethanol. Denatured alcohol is mostly ethanol with a little bit of methanol thrown in to make it undrinkable. I ground up 36 tablets, just in case the extraction efficiency was low. I ground them up very fine and poured it into a bottle with 200 mL of denatured ethanol. I shook that for a few minutes. Then I let it settle and poured the supernatant (the clear part) through a coffee filter into a plastic tub. Thinking back, a shallow glass dish would have sped things up. That took about 2.5 days to evaporate. Yeah, I know. Filtering would have been faster, but this has more 'cool factor'. Once the ethanol evaporated, I had a pink-ish powder. I scraped it off the walls and bottom of the tub and weighed out 15g. I ended up with a few grams left over, so that means that the extraction efficiency is quite high. Now I used that as my paracetamol source and followed the recipe as before. Bingo! A nice clear solution (with some of the sodium sulfite settled on the bottom). I let it 'age' for a few days and a sort of 'crust' formed on the top. So I gave it a shake and re-filtered this off along with the extra sulfite. The next day, the usual 'rodinal' crystals formed on the bottom of my bottle and I knew I was in business. I had a nice clear parodinal with preservative crystals. The only thing left to do was to develop some film. So that's what I did.

Isolette-Acros-010

So what are you waiting for. Get out there and make some developer! :)

Tuesday, August 18, 2015

Eucalyptol

One or both of my readers (hi mom) may be familiar with the b/w film developer Caffenol. This is made with instant coffee, washing soda and vitamin C powder. It is environmentally friendly, cheap, high quality, easy and cheap. Alright, I am cheap and Rodinal might be a little cheaper than Caffenol, but there is just something very cool about mixing household ingredients and getting film developer out of it. So I occasionally mix up a batch when I have time. There are examples around here.

Recently, there was a discussion of the active ingredient. It turns out NOT to be caffeine, but caffeic acid. So that begs the question (for me): What else has caffeic acid in it that might be readily available? The answer: The bark of Eucalyptus globulus (according to Wikipedia). This is an Australian native tree that happens to be a common invasive species in So. Cal. where I live. In fact, there are big ones just outside my front door. So it is very simple for me to step outside and collect some bark off the ground, and that's just what I did. I didn't weigh it or anything, this was more of a 'proof of concept' experiment than an optimization. So the best I could say about the quantity used would be 'a couple of handfuls'. I took it inside and broke it into little pieces, then I put those into my coffee grinder. Legal Disclaimer: Do not use anything you plan to later use for food prep when preparing photographic chemistry. I ground it up pretty fine and put it into a pint mason jar. Then I poured boiling water in and let it steep for about 30 minutes. I then poured the liquid through a coffee filter and discarded the used bark. I have absolutely no idea how much caffeic acid is in this tea (if any). I subsequently did some Google Scholar research and found a paper where the researchers could not detect caffeic acid in the bark of Eucalyptus globulus. That was discouraging, but I had come this far, so I decided to at least do a drop test on a piece of film.

To do a drop test, just get an old piece of film, expose it to the light and put a drop of your developer on it. If it turns black, your developer is active, if not, then it isn't. I had a little over 500mL of eucalyptus tea, so I followed the recipe for Caffenol C-L, adding 16g of Washing Soda and 10g of Vit. C. I didn't add any KBr. Then I topped off to 1L with distilled H2O. The film that needed to be developed was Kadak Recordak Dacomatic. This is copy film with a very thin emulsion layer and no anti-halation layer, so probably would be my best bet if the developer ended up being weak. So I cut the leader from one of my rolls and put a drop of the developer (heretofore known as Eucalyptol) on the emulsion. One minute later... nothing. Give it a little shake. Then it happened. The emulsion started to turn. First just a faint brown, then darker and darker. It was working! I swirled the drop of developer onto a different area of the film and there it sat. Maybe there was a little development, but not much. So there it was. A one-shot developer.

Now to decide on a developing time. I figured I would do a stand development, but I didn't want the bromide drag that comes with it on 35mm film. So I decided 1 hour semi-stand with inversions at 20, and 40 minutes. That way, if the dev was weak, at least I might get thin but scanable negs.

Here are some of the results:

N2020-Dacomatic-004 N2020-Dacomatic-003 N2020-Dacomatic-021 N2020-Dacomatic-018 N2020-Dacomatic-014

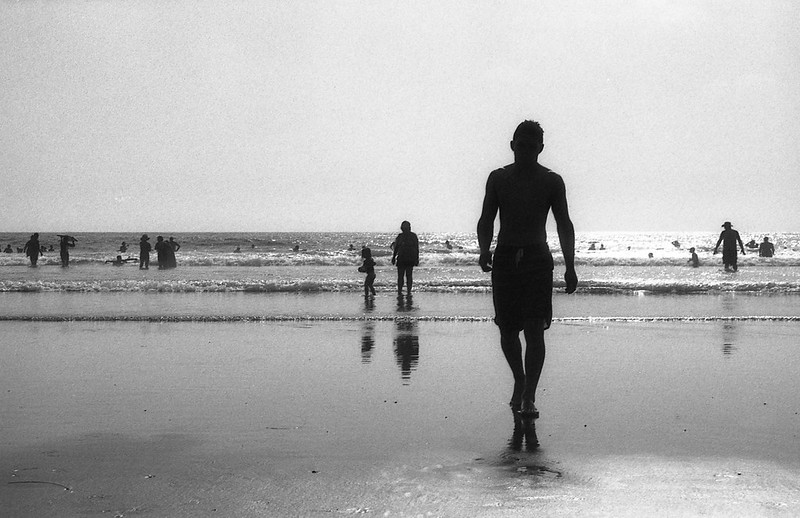
Okay, HCB I am not, but you get the idea. The tonal scale is compressed (more contrast), though part of that is attributable to the fact that I was shooting mostly in full sun, mid-day at the freakin' beach. You won't find many more contrasty scenes than that. Also the film itself is intended for copying documents, so contrast is sort of its thing. Normally, I develop this film in Adonal (Rodinal) 1:100 for 70min with inversion initially and at 30 min. That gives a pronounced grain that I find appealing. It's not for everyone, especially those who enjoy the digital aesthetic, but I like the grain. With this developer, I am going to call the grain "chunky style", but still not so obtrusive as to be distracting. Additionally, while I was doing some light dust spotting in Photoshop, I did notice some very very small pinholes in the emulsion. These appear as tiny black dots on the scan. My intuition tells me that there could be something in the eucalyptus extract that is being hard on the thin emulsion layer of this film. I am doubtful that I would see it with a regular pictorial photographic film (stay tuned).

Over all, I think this is a good alternative to caffenol for those of us who want to see just how far down we can drive the cost of developing a roll of film in a home-made developer. Here's the math. I used about $0.10 worth of washing soda, about $0.76 worth of vit. C powder, and maybe a nickel's worth of distilled water. So that's around $0.90 in ingredients, not counting the film which was practically free (I think I paid about $0.03/ft). To compare, the same amount of Adonal 1:100 would cost about $0.14. So this isn't really a money saving proposition, especially if you consider the time spent collecting, grinding, steeping and weighing. It is more about the adventure of making something that works. It is closely related to the "maker" movement you see in places like the Maker Faire and Make magazine. It lets us explore our creativity while still engaging our left-brained nature.

Sunday, August 31, 2014

Exif Data

Since the beginning of photography, artists have recorded information about their camera, emulsion and exposure. Historically, this was done with pen and paper. I myself have used the archaic method of capturing this 'metadata'.

Indeed there are companies who will sell specialized notebooks just for this purpose. These are very handy and if you like the full analog experience, I highly recommend getting one of these to record your photo details.

For those who shoot digital photos, there is an automatic convenience feature called "exif". This stands for Exchangeable Image File Format. Really, the feature is the "tags" or "metadata" that gets captured and encoded with the image data. These are things like make and model of the camera and lens, focal length, exposure time, iso setting, date/time, etc. In cameras with gps (like smartphones) you even get location data. Now that all seems really cool, but I have to admit that when I shoot digital, I don't care about any of that. I shoot RAW so I have 3 stops of data built in. I can chimp to my heart's delight, so I don't have to accept any bad exposures. There just isn't really any use in my workflow for all of the exif data. On the other hand, when I shoot analog (film) I often want to know which camera I used, what the emulsion was and possibly exposure details. This is because when I go to scan the photos and I have a bad exposure (or a particularly good one), or if I was using an unusual type of film, those details can come in handy for correcting mistakes and not making them again. So how do I get the exif for my film photos? Well, we are in the 21st century after all. There must be "an app for that"... and there is.

I am an Andriod user, and in the Google Play store, there is an app called Exif4Film. Actually it's a pair of apps. One for your phone and one for the computer you use for scanning your film. The phone app allows you to enter your equipment (cameras & lenses). Then you add a roll of film and assign the camera/lens you are using. For each shot you take, you add a shot to the roll in the app. It also records the time/date and location from your phone. You also have the option of taking a 'reference photo' with your phone's camera. At the end of the roll, you upload the data to Drop Box (yes you will need a Drop Box account). Then when you scan the photos, you tell the desktop application which file in your Drop Box location goes with those photos. It lets you match which image file goes with which exif entry. That's it! Now your scans have the exif data you recorded when you took the photo. Cool, huh? Ok, it's a bit more work than pressing a button, but it gets the job done and now you don't need to go try to find the data back in the pages of your notebook. I think it is a very nice app and well worth the price. Oh, did I mention that it's free? Give it a try and see if it fits into your analog workflow.

Friday, August 15, 2014

"-matic" Squared

I picked up a Kodak Instamatic 500 at my local Goodwill via the Goodwill Auction Site. It is a beauty even though the instamatic format was doomed. The film came in plastic cartridges called "126". The film was actually 35mm stock that was perforated differently (one oval perforation per frame) and the images were square. The other difference was that the film was wound in the cartridge with a paper backing like 120 film. This allowed the cartridge and the cameras to have windows in the back where the frame count was viewed (printed on the paper). There are videos online that demonstrate how to spool regular 35mm film into a 126 cartridge, so I won't belabor that here. I took some of my 400' reel of Dakomatic Recordak and taped it to the backing paper (that's not how they do it in the videos, but I thought it was worth a try). The iso is set by a notch in the cartridge, so I couldn't use the internal meter. I hand metered or used Sunny 16 at iso 25. One of the nice things about this camera is that aperture and shutter speed can be set manually. Most other instamatics are full-auto point & shoot types of cameras, but there were a few that gave control to the photographer. One thing I noticed about this camera is that the shutter is for all intents and purposes, silent. I can barely hear it when I am shooting. If I were to shoot from the hip and not hold it up to my eye, my guess is that no one would even know a photo had been taken. The view finder is big and bright with parallax lines for closer subjects. The meter's match needle is at the bottom of the finder and I find that I have to adjust my eye to see it, but unless I am shooting film that matches the notch on the one cartridge I have, I won't be using it. Focusing is by distance estimation in m or ft (range focusing) or by matching little pictures (a la Holga) with the focus mark. The ranges are on the top of the lens and the pictures are on the bottom. I have gotten used to range focusing with my Voigtländer Bessa, so that is the method I use and I am usually close enough. This lens opens up to f/2.8, so I will have to work on my accuracy if I want to shoot those sweet sweet OOF backgrounds.

So here is one of the photos I took. Not super exciting, but it does show the contrast and clarity of the Schneider-Kreuznach Xenar f/2.8 38mm 4-element glass lens. There is also a nice little bit of 'swirl' in the corners that adds a little old school charm to the photo. I think I will be loading this camera more frequently and keeping it handy.

Dacomatic in the Instamatic

Tuesday, July 29, 2014

Pushing Through Addendum

When I wrote the last two Pushing Through articles, I used a couple of photos from one of my favorite cameras; my 1939 Voigtländer Bessa 6x9. I love using that camera and am always wonderfully surprised when I see the results. There is a lot of fuss made about lenses these days. How many elements in how many groups, what kind of coating, rotating or fixed front element, etc. Here's what I have to say about that. Photography is art (unless you are doing scientific or some other kind of strictly documentary photography). The artist needs to use the tools that will give him or her the results that are pleasing to them. If you like tack sharp perfection of contrast and color, then you should stick with modern lenses, preferably high-end ones. I have gone that route and even got caught up in 'pixel peeping' to make sure that my images were just as sharp as they possibly could be with the equipment I had. Then I rediscovered film via the Holga. This 'opened my eyes' to a world of color and shapes and blur and haze that I sort of knew existed, but never thought much about. That little plastic meniscus lens opened doors into creative spaces in my brain that I didn't know were there. Then I started buying old cameras and old film to see where that would lead and it took me deeper into those places. These days, I don't mind taking a shot or two with my DSLR or even on my phone (if required), but when I want to really be creative, I get out an old camera. Maybe it has a really nice lens (for its day), maybe it doesn't. In the case of these photos taken with my Bessa, the lens is a decent 'triplet' type without any coatings. The focus is done by estimation of the distance to the subject and exposure is measured either with a hand-held meter or by 'sunny sixteen'. These are not the sharpest, most contrasty, color accurate photos I could make, but I love the way this camera 'interprets' the light. It fits well with my artistic vision.

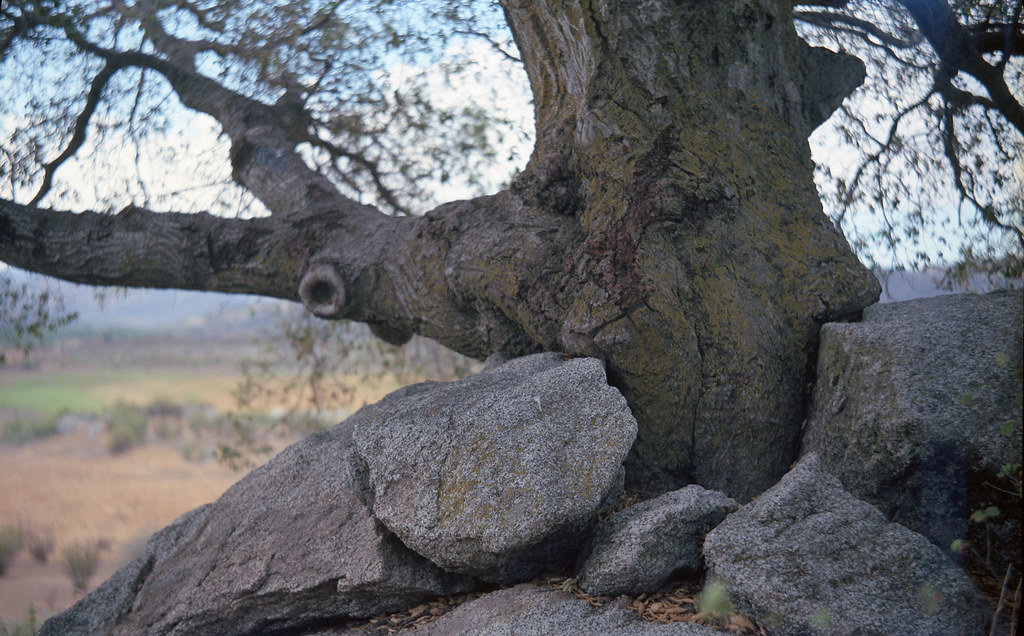
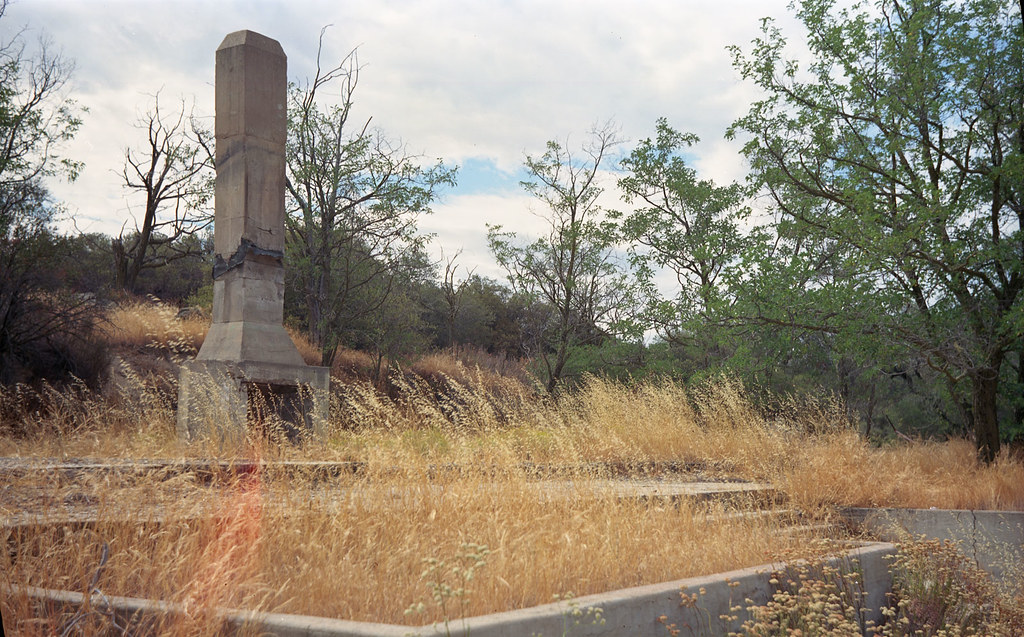
These were taken on Kodak Ektar 100 film. I don't shoot this film very often, but it does a very nice job rendering color in a vivid but accurate way. Compare these to the shots done with the same camera on expired Tri-X. Leave a comment if you have an opinion about which are better. Lake Morena Oak

Lake Morena Ruins

Tuesday, April 22, 2014

Springtime in San Diego

Here in San Diego, California we have two seasons. There is Warm Summer and Hot Summer. Right now we are still in Warm Summer as it is late April and Hot Summer doesn't really get here until late July. But I know that Hot Summer is coming because the Coral Trees are in bloom.

I took this photo with my Graflex Speed Graphic using the Optar 135, F/4.7 lens. I shot it on Kodak Clinic Select Green x-ray film and developed in 1:100 Adonal for 4.5 min standing. I hope you are enjoying the change of seasons where you are.

Sunday, April 20, 2014

Landscape Details

Here are a few photos I took just around my workplace. The camera was my Yashica Electro 35 loaded with some expired Kodak Ektachrome Slide Duplicating Film. For these I used an EI of 100. These are pretty much straight off of the scanner with a little bit of dust spotting. Enjoy.

Monday, October 21, 2013

Moving Pictures

I have always liked the look of film. Even when our first child was born in 1997, I didn't rush out and buy a 'video' camera. I did some research and bought a mid-70's model French made Super-8 movie camera. It is the Beaulieu 4008 ZM II.

Beaulieu Diptych I really disliked the aesthetic of the 'handicam' and don't get me started on the quality of the images and sound. The ultra sharp/contrasty quality along with the ghosting and interleaving effects common in consumer video recorders of that time just left me cold. I did eventually buy one at the urging of my wife who wanted sound and more immediate results, but I still love my Super-8 movies. Recently I had them telecined and burned to a dvd. The shop didn't do a very good job of it, but at least I can share them now without forcing people to sit in front of my movie screen in my living room. Besides, the belt in my projector broke :(

Here is a small sample of what you get with Super-8 film. This happens to be the venerated Kodachrome which is no longer produced or processed. The scene is at the La Brea Tar Pits near Los Angeles. Our (then) young son was about 5 and walking through a quiet museum for a number of hours was about all his energetic little body could take. Once we got outside, he found an open space and cut loose!

Monday, September 23, 2013

Pushing Through IX

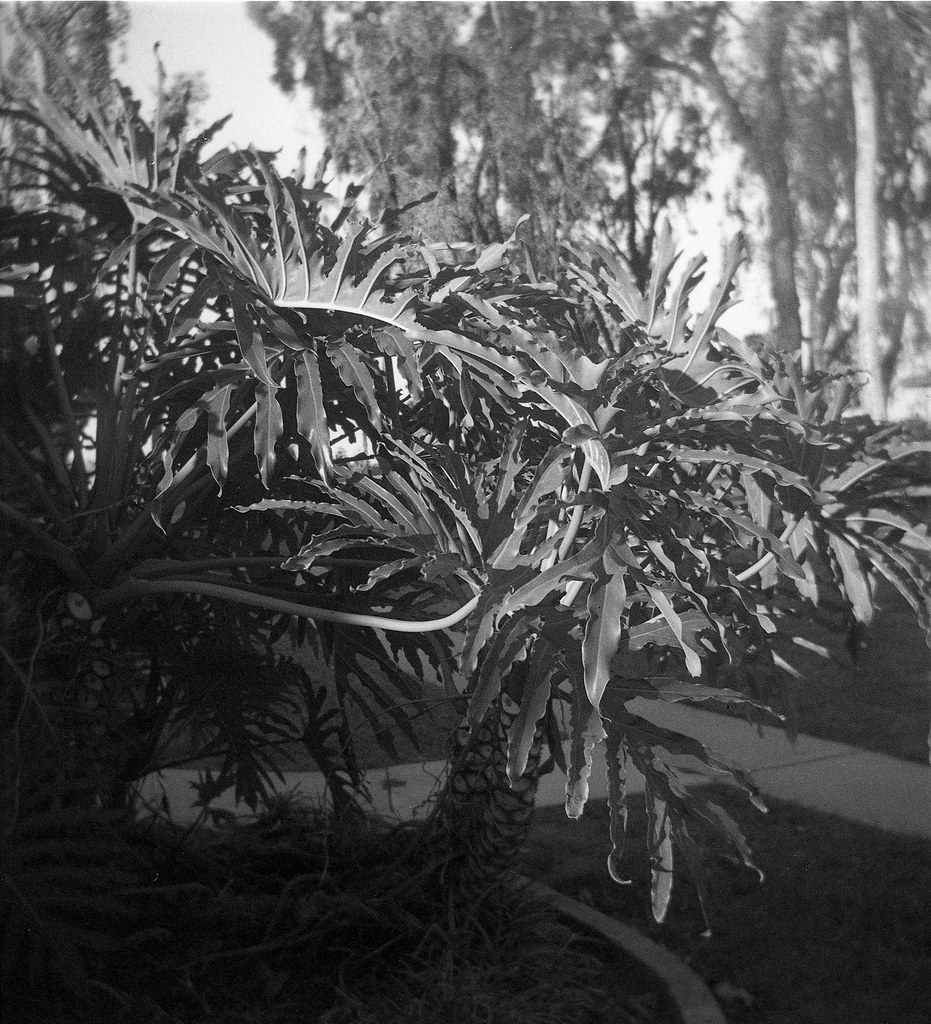
This is a little bit of a departure from the theme of the first 8 in this series, but I think that it is well within the overall theme of plants defying man's attempts to control them. In this case, the landscapers have pruned back a branch on a tree. The tree's response? Re-grow that branch of course (sprouting from the lower left of the scar). After all it was there for a reason.
I took this photo with my '39 Voigtländer Bessa 6x9. I had it loaded with one of my favorite films, Fuji Neopan Acros 100. I also was holding a deep yellow filter in front of the lens (there is no way to mount a filter on the front of this lens). I think the filter helped with contrast and with distinguishing the sky and clouds in the background.
See the rest of this series HERE. Pushing Through IX

Monday, August 12, 2013

Fern Leaves

I'm not really much of a 'closeup' or 'macro' photographer. So I don't really have many tips on doing it right, but I do know this. Your depth of field is WAY shallower than what you are used to or expecting. Now that can be good or bad depending on what kind of composition you have in mind. A small aperture (f/22 or higher) is still going to give a pretty deep focus. For this photo of a fern on my patio, I wanted a shallow DOF and some good contrast to accentuate the texture of the leaves. If the DOF were too deep, then the texture of the leaves would get lost in the overall jumble of leaves not just of the fern itself, but also those in the background. I shot this at f/5.6 on my large format Speed Graphic, so I got a very shallow DOF. I probably could have gone with f/8 and still had a pleasing composition, but I'm glad I didn't. For contrast, I added a green filter to the lens. This had the effect of brightening up the green of the leaves and darkening the reddish brown stems.

fern
Like I said, I shot this with my Graflex Speed Graphic. I set it up about 18 inches from the fern and extended the bellows about 3 inches past the infinity stops. I didn't measure the focal length I came up with. Focusing is always a bit of a challenge (my eyes are old), but my dark cloth and 10x loupe help a lot. This was shot on Kodak Tri-X 320 at iso 320. I exposed for 1/10th of a second as metered (no compensation for filter or bellows extension). I developed the film in Adox Adonal (Rodinal) diluted 1+50 for 15 minutes. I agitated the tank (Paterson tank with MOD54) initially for 30 sec and then 4 gentle inversions every minute. The grain came out quite fine given these conditions and that it was probably a few degrees warmer than the recommended temp of 20C. This is a credit to the latitude and tolerance of this film. I really love Tri-X. It is hard to mess it up.

Tuesday, August 6, 2013

Moving Water

There are two kinds of water in photography. There is still water and there is moving water. Both can be interesting and both can be very effective elements of composition.
Woody Reflection
Still water reflects. It adds a dimension to a photo. If it is not reflecting, then it is a dark mass that adds visual weight which can help to balance elements of composition. Still water can add a sense of serenity and peace to a photo. Think of an alpine lake reflecting a distant mountain. You can feel the stillness of the scene. The blue sky, the pine-filled air, the glassy surface of the water, but especially the water. It has a psychological effect on us. We have a feeling that if the water is still and the sun is shining on it, then it is safe and we are safe in its presence. Photographing still water takes patience. The light needs to be right and the more mirror-like the surface is, the better.
Fountain

Moving water is different. It brings action to the photo and a feeling of dynamism and energy. With moving water you have choices. In the photo of the fountain, I froze the water. It is still obvious that the water is moving, but with fast shutter speeds, the water is silenced. You get that same feeling as with a sports photo where the player is in mid air with some crazy look on his face. The action is there, but it is a moment frozen and taken out of time. It is unnatural. It creates tension because it is outside of our experience. We look at it and wait for the column to fall, the droplets to continue their arc downward.

In the photo of the McKenzie river below, I slowed down the shutter by closing the aperture a couple of stops and resting the camera on a rock to avoid any blur from shaky hands. This creates motion blur in the water while the trees and scenery on the shore are still in good focus. This tells our eyes that the water is moving, even though it is a still photo. That information relieves the tension in the photo and all is well with the world. We can view this photo as a 'normal' riverscape with the water rushing by us just like we have always experienced. You can almost hear the rush of the water over the rocks and feel the spray.


McKenzie River
Go out and find some water to shoot. Use it either as a main subject or as a compositional element. Just have fun and make some photos you like!

Thursday, August 1, 2013

Black Butte Ranch

Mt. Jefferson
We had a family reunion of sorts up in Oregon at a place called Black Butte Ranch. It is sort of a typical Northwest resort. It is up in the Cascade range and so there is plenty of mountain air and hiking and glacial run-off. This photo was taken with my '39 Voigtländer Bessa 6x9 folding camera. I thought the corral made a nice compositional element to frame the mountain. One principal of composition I try to keep in mind is framing and frames within frames. This one might have been better composed if I had taken a step to the right and filled the frame with the 'corral frame' a little more. I do like the photo though and the b/w film gives it a classic look.


Woody Reflection
This resort also happens to have a golf course. I don't golf, but this one offered some nice landscape photo ops, so I took advantage since I had my Speed Graphic with me. I splurged a little and used a sheet of my Portra 160 for this. I was pressing my luck a little with the chemicals I had. It was getting along in development cycles and there was some uneven development in some of the images, but this one came out pretty good. There isn't really anything exciting or earth-shattering in the composition, but it is a 'nice' pastoral kind of scene. It conveys the tranquility of the time we spent there (or at least the tranquility I wish we had experienced). Getting four families together under one roof for 'vacation' is a recipe for chaos, but there are still some quiet times and nice memories to be had and this photo hints at those.

Monday, July 15, 2013

Pushing Through

I have had this idea for a photo essay or series for a while. This photo is the first in the series. It is called Pushing Through I. The subjects of the series are plants that push through the holes and cracks in humanity's infrastructure. It is a metaphor for many things. A couple that come to my mind when I think about this photo are the persistence of life in general. There have been mass extinctions in the history of our planet, yet there is always some scrap of life that manages to survive. Recently, I saw a short film about the Nazi concentration camps and the genocide that happened there. Yet even in the face of that evil, horrific holocaust, there was a remnant of Jews who stayed alive, both in the camps and outside, hiding in attics and cellars. The life of an entire race squeezed through the cracks of hatred and violence. It is really about hope. I think I will work on this series with all of my cameras and see what sort of eclectic mix I can come up with. I hope you enjoy seeing it develop as much as I do.
Pushing Through I
Taken with Yashica Mat 124G on Lomography X-pro 200 film. Shot at 100 and developed in Unicolor C-41 chemistry using standard times and agitation.

Monday, June 10, 2013

"Exotic" films

Gasworks Forest

At first glance, you are thinking "James! Holy cow, take care of your freakin' white balance, will ya?" I thought that too, and I still do sometimes when I see a photo like this. But once you know what this is, you might gain an appreciation for it. This is "red scale" film and it is called that for obvious reasons. The colors are all 'shifted' toward the red end of the spectrum. So what is it and why use it?

Red scale film is simply regular color negative film that has been put on the spool with the emulsion side facing away from the lens. Ok, maybe I should back up a bit. Here is a diagram showing how modern color film is produced.
 Normally, layer 'a' would be facing the lens and light would pass through the layers in a-i order. The layers are made and balanced so that this produces an accurate rendition of the actual image in terms of human vision. However, if you put the film on the spool backward, the light passes through in i-a order. That means that it first passes through the antihalation layer, followed by the base, then the red layer. This completely turns the balance on end and strange things begin to happen. It isn't just taking a photo through a red filter. That would cause blues and greens to look very dark, but that isn't the look you get with red scale film. It is shifted in a strange sort of surreal way. It isn't just white balance either. Take a look at this image that was 'corrected' in PhotoShop for white balance.


Fixture

Now it is almost a sepia tone with the blue sky going grey and the whole thing giving a kind of monochrome (but not really) feel.

Next up is not really an exotic film as much as a misplaced one. What would happen if you took color transparency (slide) film and developed it in negative film chemistry? You would get what is called "cross-processed" images. The result depends on the film you start with and how you expose it, but in general, you are going to get increased contrast and potentially some color shifts. Some colors may saturate and others may wash out. You just have to experiment and see what happens.

Here is an image that I cross processed.

The bee and the coral tree

You can see that the sky has taken a very cyan color .The greens have saturated and the red of the coral tree flower has washed out to orange. To me it makes a kind of retro look as if the film or print has been left out in the sun. You can use regular Fuji Velvia (100 or 50) and either process it yourself or send it to a lab that offers cross processing (usually for a couple bucks more than regular E-6 slide processing). It is a lot of fun seeing what kind of results you get using unusual films or processes. Give it a try. Create something unique!!