Showing posts with label 126 film. Show all posts

Saturday, November 8, 2014

Perforating 126 Film II

I thought I would follow up with a little bit of what I've learned after using the perforating rig on two rolls and running them through the Kodak Instamatic 500.

First, there is a little bit of room in the rig, so the film can slip down maybe a mm or two and the holes end up being up on the edge of the film. That makes them too high for the shutter reset pin to engage. Here is a pic of the shutter reset pin in the camera.

And here is one of the film I perforated.

The two strips on the bottom are the first roll I did and after I only got 5 shots for 12 perforations, I was more careful about lining up the second roll with the top edge of the perforating jig. That one did much better and I got 10 shots on that one. The ones that missed were still up at the top edge. I attribute this to the 'wiggle room' I mentioned before and also to the fact that the holes are hard to find in the cardboard in the dark. Also the paper hole punch is a little difficult to manage in the dark because I have to get the cardboard and the film into the punch where it is designed for only a piece of paper to go.

The next steps are to cut a new jig out of 1/16 inch acrylic and possibly purchase a hollow leather hole punch to make the holes in the film. That would be simpler because I would just have to get the end of the punch into the existing hole in the jig and turn with a little pressure to punch out the film.

One last issue is frame spacing. I used an old roll of 126 film to position the holes in the jig, but the holes in the film are oblong, so I just aimed for the center. That made the images on the film come out right next to each other without any spacing between. I will adjust the distance between the holes and see if that problem doesn't go away. Stay tuned.

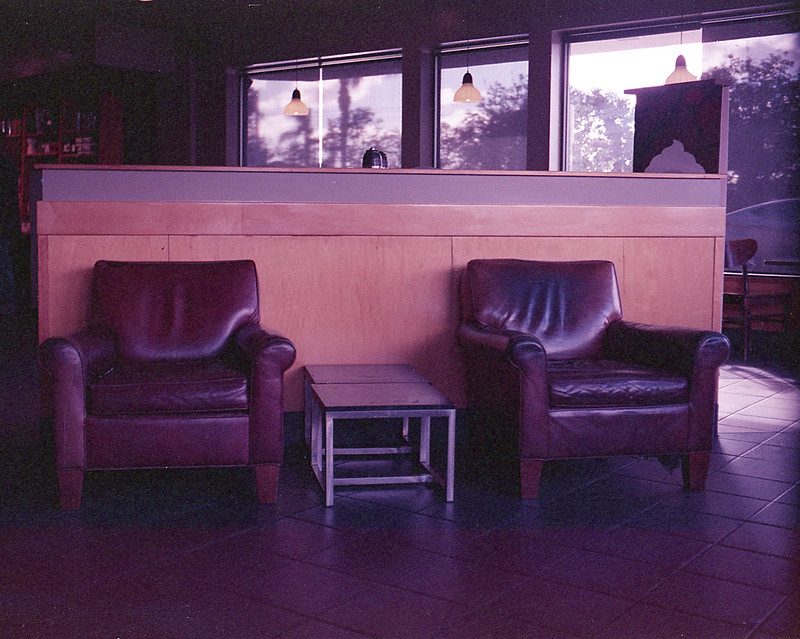
Here are a few shots I took with this film. It is Konica brand color negative film which I shot at its box speed of 160. It came out with a purple cast, which is not the end of the world, but I might lower the speed and see what it does. Also, my C-41 chemistry is WAAAY past the manufacturer's recommended roll count, so I will mix up a new batch.

instamatic-007
instamatic-006
instamatic-015

Friday, October 31, 2014

Perforating 126 Film

A while back, I got the idea that I wanted an Instamatic camera. Why would I want an archaic camera for which film is nigh impossible to find? In fact, the only place to find "new" 126 format film is at the Frugal Photographer with an anything but frugal price tag of $25/roll! That's over a dollar a shot for what is essentially 35mm film in a fancy cartridge. The fortunate part of this is that 126 film is, well... essentially 35mm film in a fancy cartridge. That means that (according to the Google) you should be able to manually load the 35mm film of your choice into an empty 126 cartridge and be on your way. Well, yes and no. Most of the instamatic format cameras were quite simple with fixed focus, single aperture, single shutter speed lenses. The winding mechanism worked on the principle that there was a single perforation along the top edge of each exposure, so as you wind the film, a pin in the camera pokes through that single perforation and stops the winding mechanism until the shutter is tripped. Well, 35mm film has 8 sprocket holes for each (24x36) exposure, so that pin no longer works for spacing. The 'work around' most instamatic cameras allow is that you fire the shutter for your picture, then you hold the shutter release button down again when you wind the film and instead of the camera telling you where to stop, you guess and by trial and error, you figure out how many actuations of the winding lever you need to make the right frame spacing. Unfortunately, the camera I have is a Kodak Instamatic 500. I say "unfortunately" not because I don't like the camera. Quite the opposite. This camera has full manual control of a good quality lens and shutter. However, it does not allow the "hold down the button" trick to work. Once the shutter is fired, the pin is up. If you have 35mm film in the cartridge, you have to try to power through the sprocket holes (note: forcing dials, knobs, and levers on a camera is never a good idea). So what to do with a perfectly working camera that is impractical to use with current film?? The only rational thing I could think to do is to make my own 126 film.

There are a couple of options here. First would be to use some sort of tape to cover the unwanted perforations in current 35mm stock. It would have to be done in the dark and working with sticky tape and film in the dark is just a recipe for disaster and frustration. The other option is to buy unperforated 35mm film and make the perforations myself. Again, it will have to be done in the dark, but a hole punch is a lot easier to deal with than sticky tape (I think). The trick then is figuring out where to punch the holes in a reasonably accurate way and then lining them up with corresponding holes in the backing paper (should you choose to use it). The answer is to use a 'jig' that will guide the hole punch to the right places. First, I made a prototype with cardboard. I used an existing authentic roll of old 126 film as a guide to put the holes in the right places.

The two pieces fold together to 'sandwich' the film, holding it steady with some bulldog clips. Here is a picture of the jig with film loaded.

The first time I tried punching the holes with my eyes closed, I accidentally punched an extra hole. When I make the real jig with acrylic sheet, that won't happen because the hand held hole punch won't be strong enough to punch new holes. It will just punch through the pre-drilled holes through the film. Otherwise, it worked perfectly and the film holes lined up with the paper holes.

Getting the film positioned correctly on the backing paper in the dark is a little tricky, but usually I will put a crease in the paper where the film end is to be taped down. Also, the holes in the backing paper are sort of oblong, so there is some tolerance for misalignment. The alternative is to tape the film to the paper first and then punch the holes through both at the same time. Then alignment is pretty much assured.

I have yet to test this in-camera, but I am hopeful that I will be able to use this unperforated film to get this camera running. I will update soon with results.

Update: Go see PART II.